
As I savored the sweet aroma wafting through my kitchen, a delightful thought struck me—what if I could combine two of my all-time favorites into one epic treat? Enter the Oreo Cinnamon Rolls with Vanilla Glaze, a luscious fusion that combines fluffy cinnamon dough with a rich, chocolatey Oreo filling. These rolls not only elevate your breakfast game but also double as a comforting dessert, making them perfect for any occasion. With a quick prep time and the promise of a gooey, melt-in-your-mouth experience, they’re bound to win over even the pickiest eaters. So, are you ready to satisfy those sweet cravings and bring some warmth into your home? Let’s bake these indulgent rolls together!
Why Are Oreo Cinnamon Rolls Irresistible?
Fluffy Texture: Each roll is soft and pillowy, making every bite a comforting experience.
Decadent Filling: Filled with crushed Oreos and chocolatey goodness, they offer a delightful twist on classic cinnamon rolls.
Quick Prep: You can whip these up in no time, perfect for weekend brunch or even a last-minute dessert.
Sweet Glaze: The vanilla glaze adds the perfect finishing touch, sending these rolls over the top.
Crowd-Pleasing: Watch your family and friends devour these tasty treats—they’re sure to become a beloved staple! If you’re looking for even more delicious options, consider trying my Basil Beef Rolls for a savory counterpart!
Oreo Cinnamon Rolls Ingredients
For the Dough
• All-Purpose Flour – Forms the dough structure; you can use up to 1/2 cup extra if needed for consistency.
• Instant Dry Yeast – Helps the dough rise quickly; if using active dry yeast, account for a longer rise time.
• Fine Salt – Balances sweetness and enhances flavor.
• Granulated Sugar – Sweetens the dough; coconut sugar is a great substitute for a less processed option.
• Whole Milk – Adds richness to the dough; any milk or dairy alternative works too.
• Unsalted Butter – Provides flavor and tenderness; make sure it’s at room temperature.
• Large Egg – Binds the dough and adds richness; swap with a flax egg or applesauce for an egg-free version.
For the Filling
• Light Brown Sugar – Adds sweetness and moisture; substitute with dark brown sugar for a deeper flavor.
• Black Cocoa Powder – Gives a rich chocolate flavor reminiscent of Oreos; can swap with dark cocoa or regular cocoa powder.
• Ground Cinnamon – Brings warmth and classic cinnamon roll flavor; no substitutes needed.
• Unsalted Butter (for filling) – Enhances the texture and flavor; make sure it’s softened for easy spreading.
• Crushed Oreos – Provides the signature Oreo flavor and texture; any dark chocolate cookie works as a replacement.
For the Glaze
• Powdered Sugar – Sweetens the glaze; adjust the amount to achieve your desired sweetness.
• Whole Milk (for glaze) – Thins the glaze to the right consistency; any non-dairy milk can substitute.
• Artificial Vanilla Extract – Adds flavor to the glaze; opt for pure vanilla for a more natural taste.
Get ready to embark on a delightful baking adventure with these Oreo Cinnamon Rolls! The fusion of chocolate and cinnamon will capture your heart and satisfy your sweet tooth.
Step‑by‑Step Instructions for Oreo Cinnamon Rolls
Step 1: Prepare Filling
In a mixing bowl, blend together the light brown sugar, black cocoa powder, and ground cinnamon until well combined. This mixture will create the decadent filling for your Oreo cinnamon rolls. Set the bowl aside as you move on to the next step, allowing these flavors to meld together beautifully.
Step 2: Make the Dough
In a large mixing bowl or stand mixer, combine 3.5 cups of all-purpose flour, instant dry yeast, and fine salt. In a saucepan, warm the whole milk with unsalted butter and granulated sugar over low heat until the butter melts. Gradually pour the warm mixture into the flour mixture, mixing until everything is well combined and a sticky dough forms.
Step 3: Combine Ingredients
Add the large egg to your dough mixture and stir until the dough becomes cohesive. If the dough is too sticky, gradually incorporate additional flour, ensuring it is tacky but not overly sticky. Once the perfect consistency is achieved, you’ll be on your way to the softest Oreo cinnamon rolls!
Step 4: Incorporate Oreos
Gently fold in the crushed Oreos into the dough, ensuring they are evenly distributed throughout. This will infuse each roll with that signature Oreo flavor, creating delightful pockets of rich chocolate in your cinnamon rolls. Take a moment to feel that sense of excitement as the deliciousness comes together.
Step 5: First Rise
Cover the bowl with a clean kitchen towel or plastic wrap, allowing the dough to rest for 10 minutes. During this time, the dough will rise slightly, becoming even fluffier and more pliable for shaping. It’s a perfect time to prepare your baking area for the next steps!
Step 6: Shape the Dough
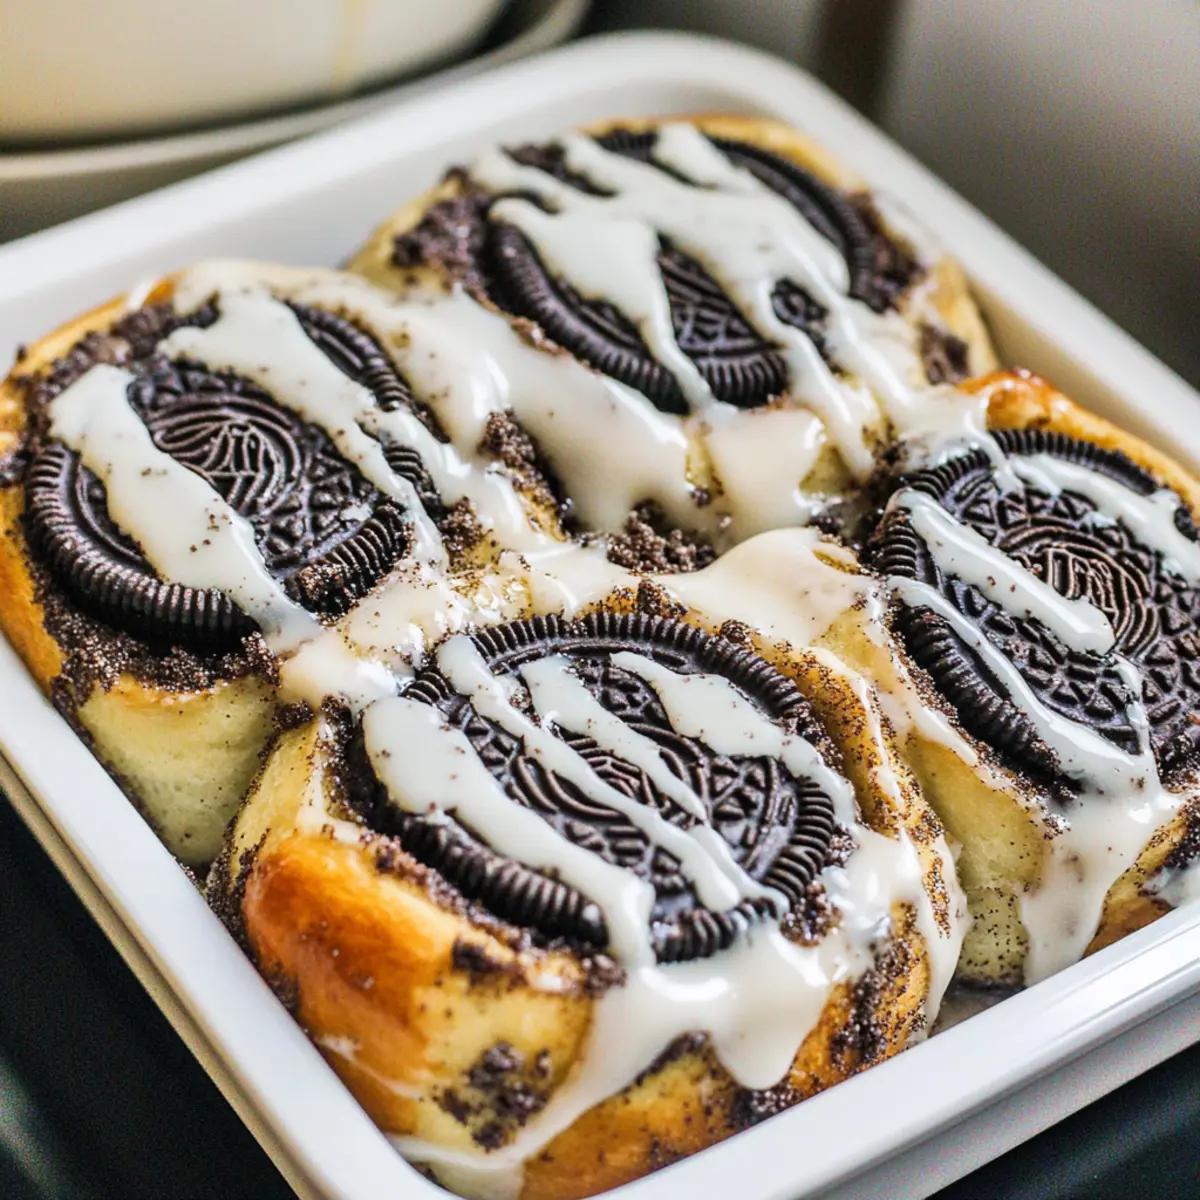
On a floured surface, roll out the dough into a 12×18-inch rectangle. Use a rolling pin to ensure an even thickness. Spread the softened unsalted butter generously over the surface, followed by the filling mixture and additional crushed Oreos. The sight of this delicious layering will surely get you excited!
Step 7: Roll & Cut
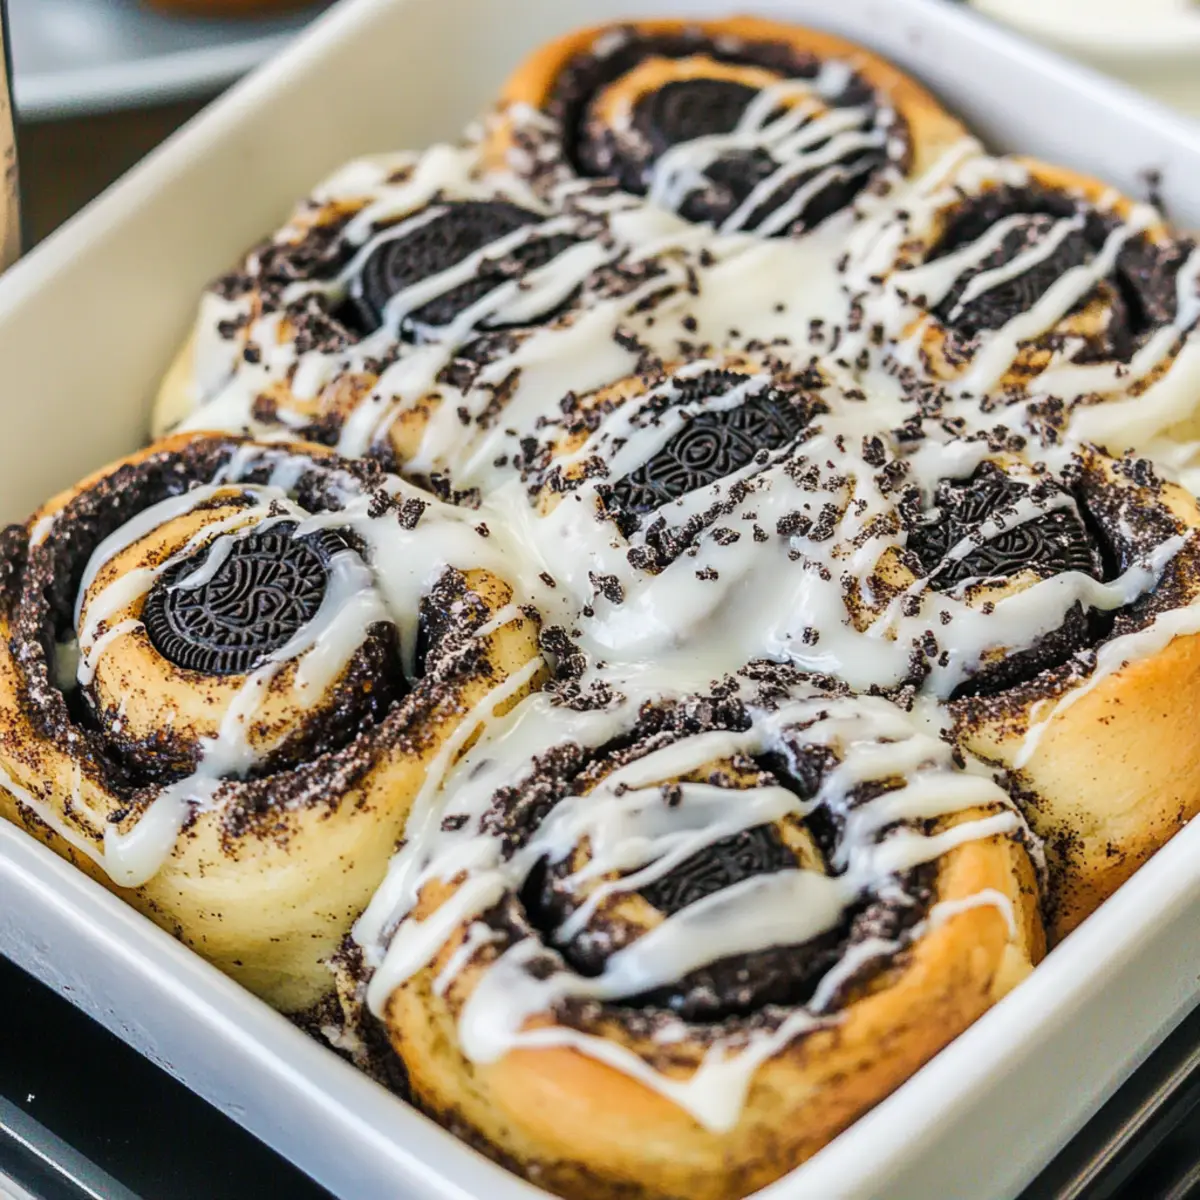
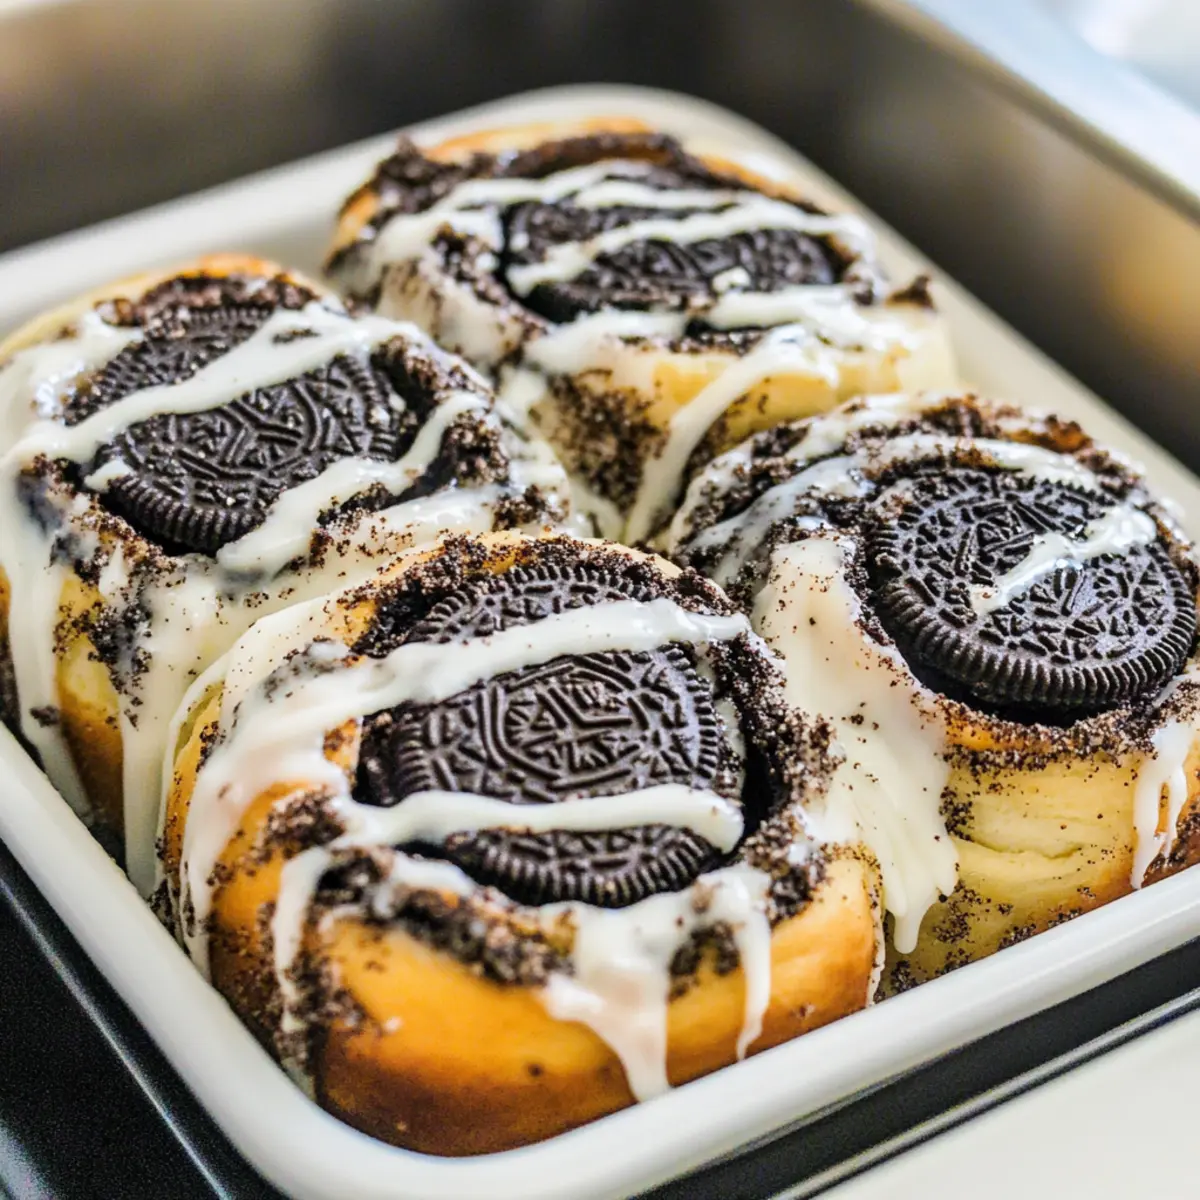
Begin rolling the dough tightly from one side to the other, creating a log shape. Once rolled, use a sharp knife or dental floss to cut the log into 9 equal pieces. Place these spiral beauties in a greased baking pan, allowing each roll to nestle snugly alongside its neighbors for the perfect rise.
Step 8: Proof
To encourage rising, preheat your oven to a low 200°F and turn it off. Place the covered pan of rolls in the warm oven for 30 minutes. This gentle warmth will help the rolls puff up beautifully, ready to achieve that golden brown perfection in the baking phase.
Step 9: Bake
Once the rolls have proofed, preheat your oven to 350°F. Bake the Oreo cinnamon rolls for 26-30 minutes or until they are golden brown and fluffy. Keep an eye on them in the last few minutes, as you want that perfect inviting color without overbaking.
Step 10: Make Glaze
While the rolls cool slightly, whisk together powdered sugar and whole milk in a small bowl until the glaze reaches a smooth and pourable consistency. Adjust the thickness to your liking by adding more milk if necessary. This sweet finishing touch will elevate your Oreo cinnamon rolls to heavenly heights.
Step 11: Serve
Once the rolls are slightly cooled, drizzle the luscious vanilla glaze generously over the top. Serve them warm, and watch as everyone enjoys these delightful Oreo cinnamon rolls that bring joy and sweetness to any breakfast or brunch gathering!
Expert Tips for Oreo Cinnamon Rolls
Dough Consistency: Ensure the dough is tacky but not sticky; add flour gradually to avoid overwhelming the texture.
Crushed Oreos: Crush the Oreos finely for even distribution in the filling; larger chunks can create uneven bites.
Rising Time: Let the dough rise in a warm environment to achieve the perfect fluffiness. Cold conditions can lead to dense rolls.
Using Active Dry Yeast: If you choose active dry yeast, proof it in warm water first and allow for a longer rising time for best results.
Glaze Adjustment: For a thicker glaze, reduce the milk; for a thinner drizzle, add a little more. Adjust to taste before serving.
Make-Ahead Tip: Assemble Oreo cinnamon rolls the night before, refrigerate, and let them rise at room temperature before baking to save time in the morning.
Make Ahead Options
These Oreo cinnamon rolls are ideal for meal prep, allowing you to savor homemade goodness without the rush! You can fully assemble the rolls up to 24 hours in advance—just follow all the steps up until the proofing stage, then cover the pan tightly and refrigerate. This helps maintain their fluffy texture and prevents browning. When you’re ready to bake, simply let the rolls sit at room temperature for about 1-2 hours to rise before popping them in the oven. Finish by drizzling the creamy vanilla glaze once they’re slightly cooled, and you’ll be rewarded with delicious, melt-in-your-mouth treats with minimal effort!
What to Serve with Oreo Cinnamon Rolls
As the joyful aroma fills your kitchen, find the perfect companions to elevate your breakfast or brunch experience even further.
-
Fresh Fruit Salad: Bursting with vibrant colors and flavors, a fruit salad adds a refreshing contrast to the rich rolls, balancing sweetness perfectly.
-
Crispy Bacon: The savory crunch of bacon brings a delightful textural contrast, making every bite an exciting blend of sweet and savory.
-
Vanilla Ice Cream: For a decadent dessert twist, serve the warm rolls with a scoop of creamy vanilla ice cream, melting into the chocolatey layers.
-
Coffee or Espresso: A rich, bold cup of coffee or a shot of espresso enhances the sweet flavors of the rolls, making each bite even more indulgent.
-
Cream Cheese Frosting: Swap the glaze for a tangy cream cheese frosting for an extra layer of flavor, adding smoothness to each soft roll.
-
Maple Syrup Drizzle: A warm drizzle of maple syrup can enhance the sweetness and provide a syrupy delight that pairs beautifully with the chocolate.
Indulging in these options will surely create a memorable meal that entices everyone to gather around the table. Enjoy every bite!
How to Store and Freeze Oreo Cinnamon Rolls
Room Temperature: Store leftover rolls at room temperature in an airtight container for up to 2 days to keep them soft and fresh.
Fridge: If you want to preserve them longer, keep the rolls in the fridge for up to 5 days. Make sure they are well wrapped to prevent them from drying out.
Freezer: For long-term storage, freeze the rolls individually wrapped in plastic wrap and then in a zip-top bag for up to 3 months. Thaw overnight in the fridge before reheating.
Reheating: Reheat the rolls in a microwave for about 20-30 seconds or in an oven at 350°F for 10-15 minutes to enjoy them warm and gooey again.
Oreo Cinnamon Rolls: Sweet Customization Awaits!
Feel free to get creative and add your personal touch to these delightful rolls—the flavor possibilities are endless!
- Different Cookies: Bold Cookie Swap: Use any dark chocolate sandwich cookie instead of Oreos for a unique twist. Experiment and find your favorite!
- Mocha Delight: Bold Espresso Infusion: Add 1-2 tsp of espresso powder to the filling for a rich mocha flavor that complements the chocolate.
- Cream Cheese Frosting: Bold Richer Topping: Swap the vanilla glaze for cream cheese frosting to add a tangy richness that balances the sweetness beautifully.
- Nutty Crunch: Bold Add Nuts: Chopped pecans or walnuts can be incorporated into the filling for an added crunch that enhances the texture and flavor.
- Cinnamon Roll Lovers: Bold Extra Spice: Boost the ground cinnamon in the filling for those who crave a more cinnamon-forward experience.
- Vegan Version: Bold Dairy-Free: Substitute all dairy ingredients with plant-based alternatives, including almond milk and vegan butter, for a vegan treat.
- Zesty Citrus: Bold Citrus Zing: Add a sprinkle of lemon or orange zest to the glaze for a bright citrus twist that brightens each bite.
- Chili Chocolate: Bold Spicy Kick: Incorporate a pinch of cayenne pepper into the filling for those adventurous taste buds seeking extra heat in their sweet.
Each time you make these rolls, you can infuse your personality and preferences into them, ensuring they are a family favorite! And if you’re looking for more savory dishes, don’t forget to check out my delicious Basil Beef Rolls for a perfect pairing.
Oreo Cinnamon Rolls Recipe FAQs
What type of Oreos should I use?
Absolutely! You can use regular Oreos for that classic taste. However, feel free to experiment with flavored Oreos or even gluten-free varieties to match your dietary needs or preferences.
How should I store leftover Oreo cinnamon rolls?
You can keep leftover rolls in an airtight container at room temperature for up to 2 days. If you want them to last longer, refrigerate them for up to 5 days, but wrap them well to avoid drying out!
Can I freeze Oreo cinnamon rolls?
Yes, indeed! To freeze them, wrap the cooled rolls tightly in plastic wrap and place them in a zip-top bag. They’ll remain delicious for up to 3 months. When you’re ready to enjoy, thaw them overnight in the fridge and warm them up for gooey goodness.
What should I do if my dough isn’t rising?
If your dough isn’t rising, it could be due to inactive yeast. Make sure your yeast is fresh and that the milk mixture isn’t too hot or too cold when mixed. If you’re using active dry yeast, remember to proof it in warm water first. If this happens, allow the dough to rise in a warmer environment, or as a backup, you can try placing it in an oven preheated to 200°F (then turned off) for optimal conditions.
Can I make these rolls ahead of time?
Very! You can prepare the rolls the night before. Assemble them up to the proofing step, then cover and refrigerate overnight. In the morning, let them sit at room temperature for about 1-2 hours to rise before baking. This way, you wake up to freshly baked Oreo cinnamon rolls with minimal effort!
Is there a dairy-free option for this recipe?
Yes, you can easily make these rolls dairy-free! Substitute the whole milk with any non-dairy milk, like almond or oat milk. Replace the unsalted butter with a dairy-free alternative, and you’re good to go! Enjoy these Oreo cinnamon rolls with great taste and a heavenly dairy-free twist.

Oreo Cinnamon Rolls: Soft, Gooey Treats for Breakfast Bliss
Ingredients
Equipment
Method
- In a mixing bowl, blend together the light brown sugar, black cocoa powder, and ground cinnamon until well combined. Set aside.
- Combine the flour, yeast, and salt in a large mixing bowl. Warm the milk, butter, and sugar in a saucepan until the butter melts. Gradually pour mixture into flour, mixing until a sticky dough forms.
- Add the egg to the dough mixture and stir until cohesive. Gradually incorporate additional flour if too sticky.
- Gently fold in the crushed Oreos into the dough for even distribution.
- Cover the bowl with a clean towel and let dough rest for 10 minutes.
- On a floured surface, roll out the dough into a 12x18-inch rectangle. Spread softened butter over the surface, followed by filling mixture and additional crushed Oreos.
- Roll the dough tightly from one side to the other and cut into 9 equal pieces. Place in a greased baking pan.
- Preheat your oven to 200°F and turn it off. Place the covered pan of rolls in the warm oven for 30 minutes.
- Preheat oven to 350°F. Bake the rolls for 26-30 minutes until golden brown.
- Whisk together powdered sugar and milk for the glaze in a small bowl until smooth. Adjust the thickness to your liking.
- Drizzle the glaze over the slightly cooled rolls and serve warm.
Leave a Reply