
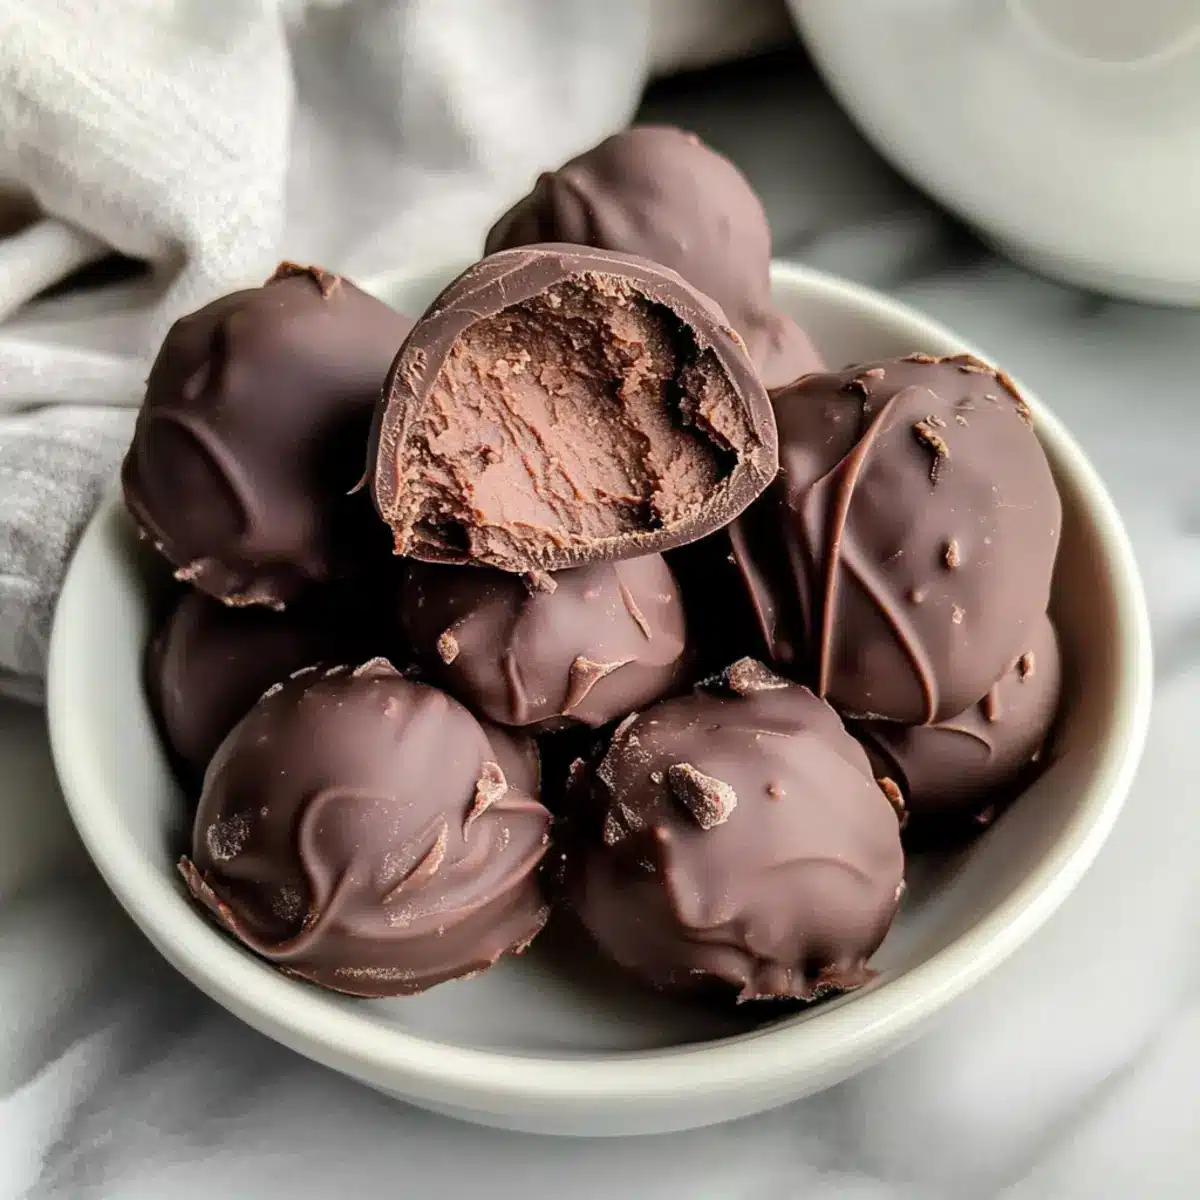
As I was savoring a soft chocolate truffle recently, I couldn’t help but think how delightful it would be to create something equally indulgent yet surprisingly wholesome. Enter my Chickpea Truffles, where three simple ingredients—chickpeas, almond butter, and dark chocolate—come together to form an irresistible dessert. Not only are these truffles easy to whip up, but they’re also vegan and gluten-free, making them a guilt-free way to satisfy your sweet cravings. Whether you’re hosting a gathering or just treating yourself, these no-bake wonders will surely impress! Curious about how to make this delicious treat in your own kitchen? Let’s dive in!
Why are Chickpea Truffles a must-try?
Easy to Make: You only need three simple ingredients, making this recipe a breeze for anyone, even if you’re a beginner!
Rich, Indulgent Flavor: The combination of chickpeas and dark chocolate creates a decadent experience that you won’t believe is vegan.
Guilt-Free Treat: These truffles are gluten-free and packed with plant-based protein, so you can enjoy them without the guilt.
No-Bake Convenience: Perfect for those hot days or last-minute gatherings, you won’t need to turn on the oven.
Crowd-Pleaser: Whether for friends, family, or yourself, these truffles are sure to impress. Looking for a more refreshing option? Check out my Chickpea Feta Avocado for another wholesome treat!
Chickpea Truffles Ingredients
• Dive into a world of flavors with these simple ingredients!
For the Truffles
- Chickpeas – The base ingredient that provides creamy texture and a surprising source of plant-based protein.
- Almond Butter – Adds richness and creaminess to the truffles; feel free to swap with your favorite nut or seed butter.
- Vegan Dark Chocolate Chips – The star of the show, providing a rich chocolate flavor; make sure to choose dairy-free options for a guilt-free treat.
For Coating
- Additional Vegan Dark Chocolate Chips – Use these to coat your truffles for a sumptuous chocolate shell.
- Coconut Oil – A little helps to melt the chocolate smoothly; you can skip this if you prefer.
Optional Toppings
- Cacao Nibs – Add a delightful crunch and a touch of bitterness to balance the sweetness.
- Shredded Coconut – For a tropical twist that also enhances the visual appeal of your truffles.
- Nuts/Seeds – Sprinkle on top for added texture and nutty flavor!
Step‑by‑Step Instructions for Chickpea Truffles
Step 1: Prepare Chickpeas
Start by draining and rinsing one can of chickpeas under cool water to eliminate excess sodium and improve flavor. Pat them gently with a clean kitchen towel to remove excess moisture. This step is crucial for ensuring your Chickpea Truffles have a smooth texture without unwanted grit from the chickpeas.
Step 2: Melt Chocolate
In a microwave-safe bowl, add your vegan dark chocolate chips and heat in 30-second intervals, stirring in between until melted and silky smooth. Alternatively, use a double boiler for better control. Keep an eye on it; chocolate can burn easily. This melted chocolate will be the star ingredient for your decadent Chickpea Truffles!
Step 3: Blend Base
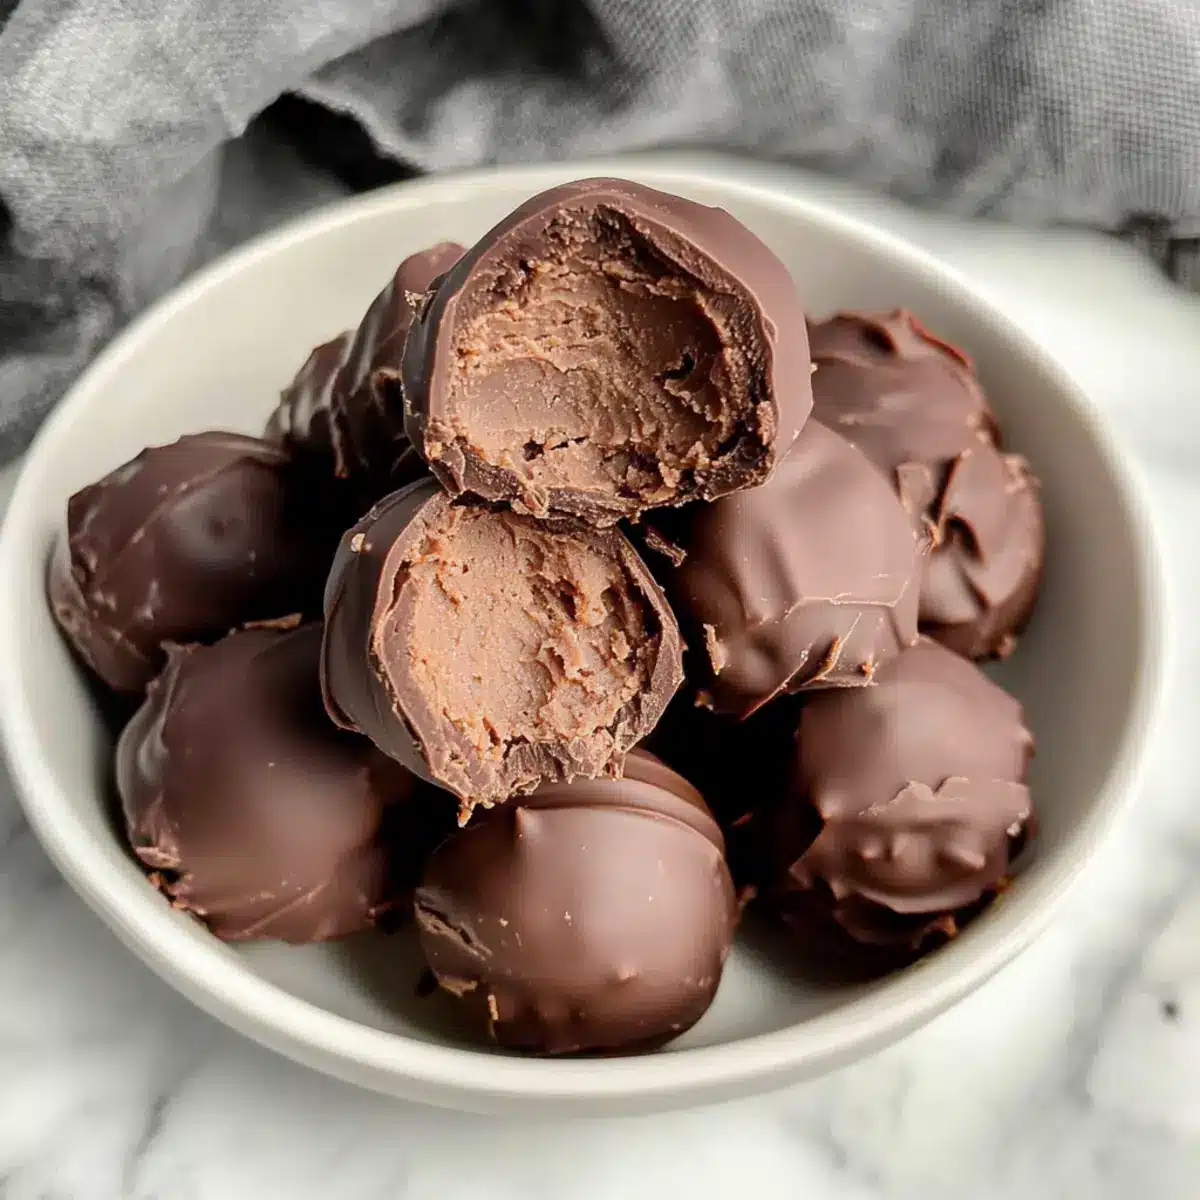
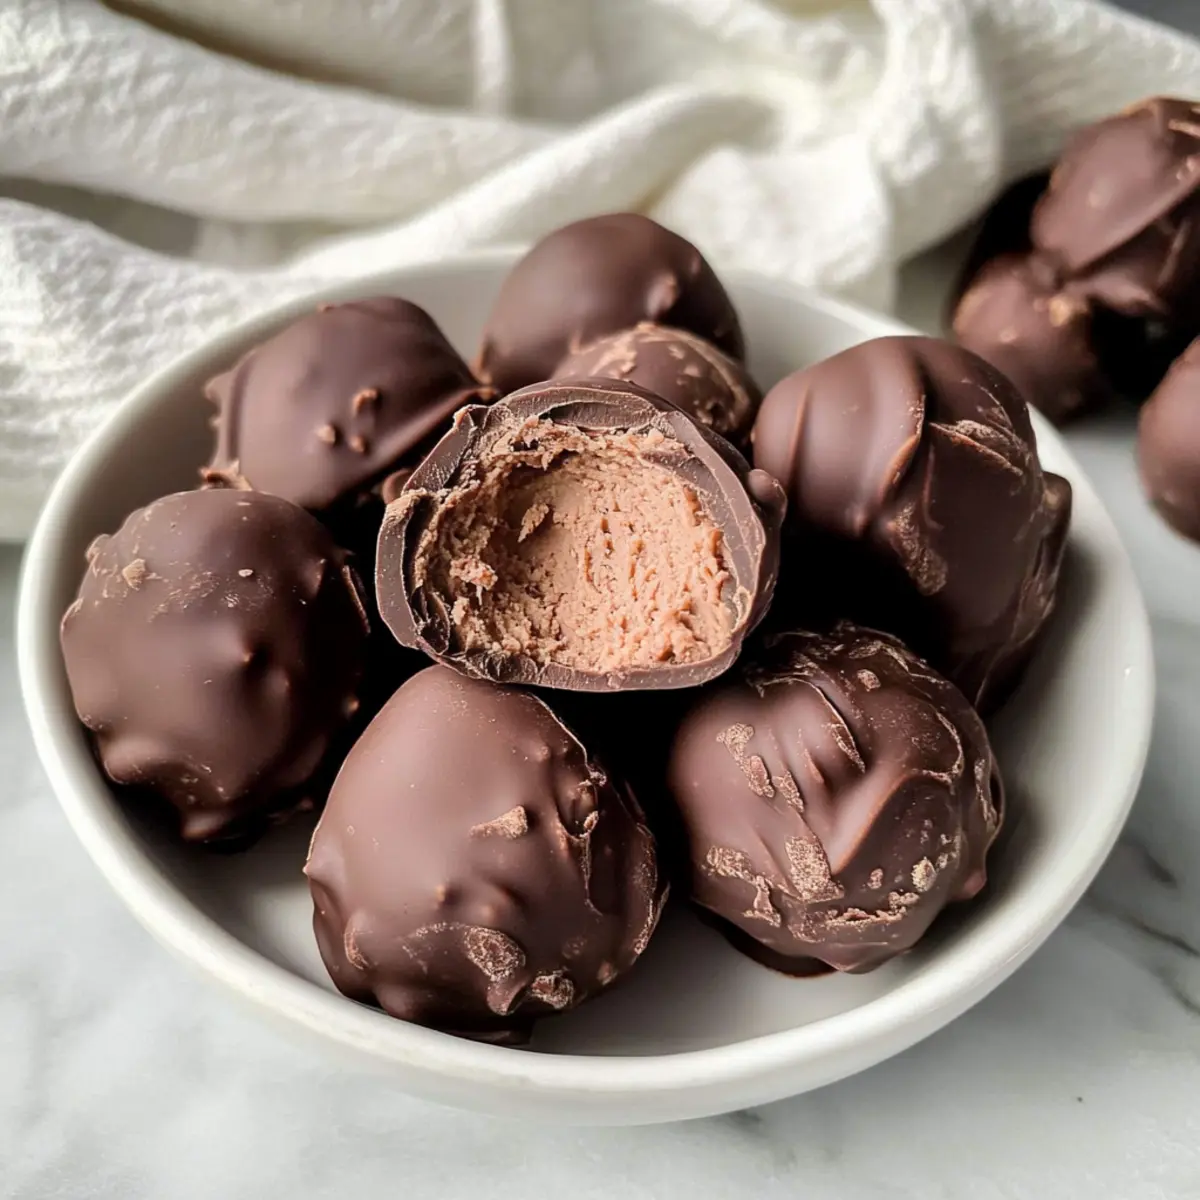
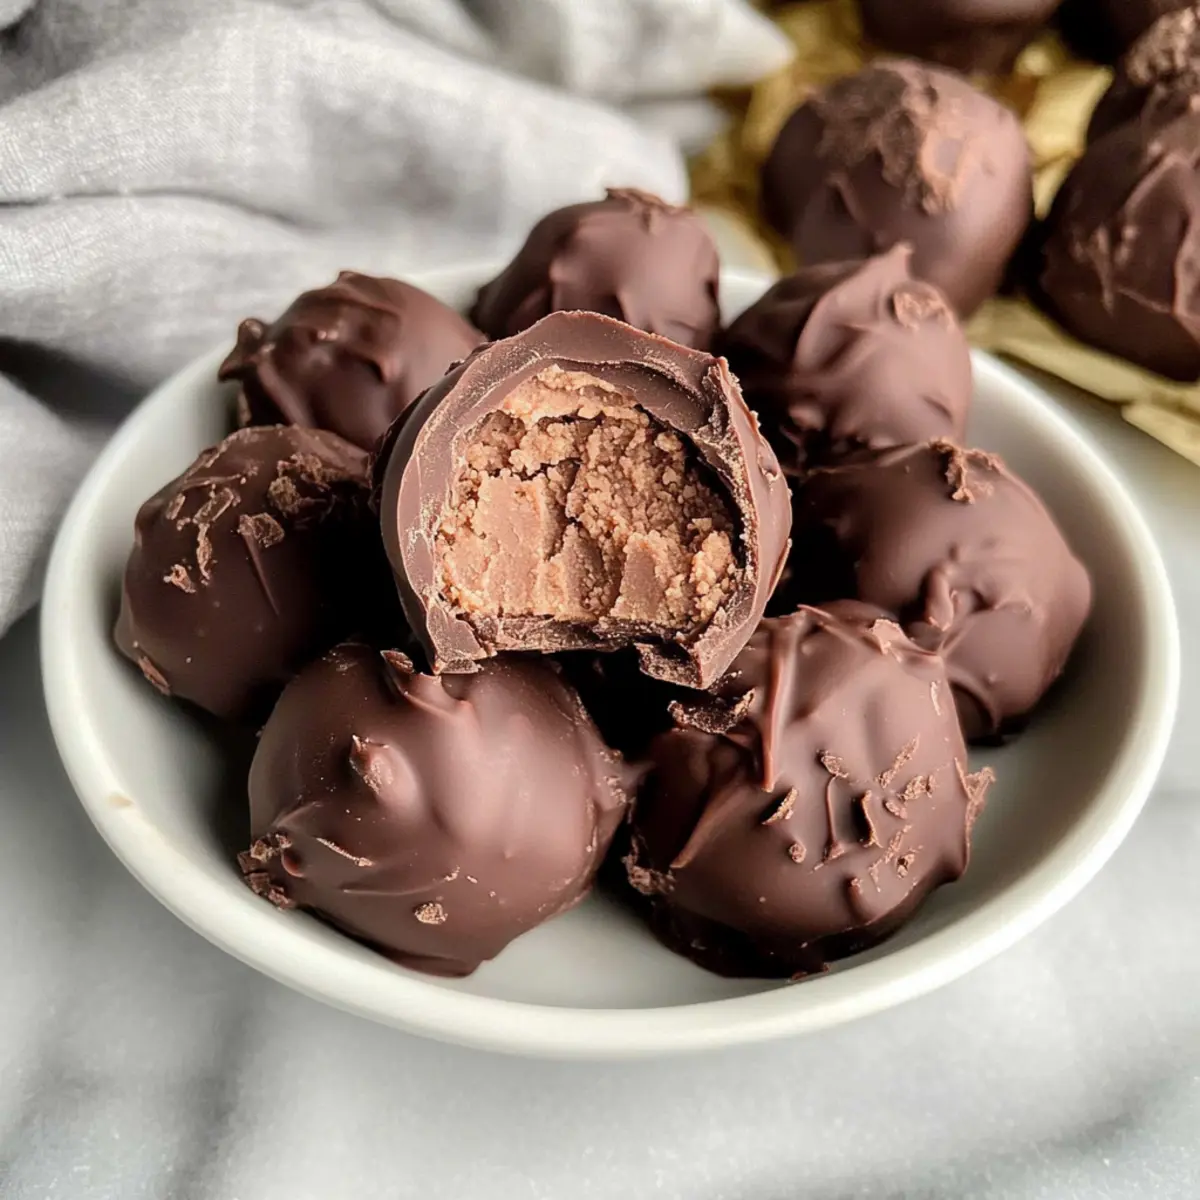
In a food processor, combine the prepared chickpeas, creamy almond butter, and melted dark chocolate. Blend on high speed for about 1-2 minutes until the mixture is completely smooth and uniform. Scrape down the sides as needed to ensure all ingredients are thoroughly incorporated. The rich and fudgy mixture is the perfect base for your Chickpea Truffles.
Step 4: Form Truffles
Using a cookie scoop or your hands, scoop out the mixture and place round portions onto a parchment-lined baking sheet. Aim for uniform sizes for even cooking and presentation. Once all the mixture is scooped, place the baking sheet in the freezer for about 15-20 minutes to firm up, making it easier to shape into smooth balls.
Step 5: Coat with Chocolate
After chilling, remove the truffles from the freezer and reshape them into smooth balls if necessary. Melt additional vegan dark chocolate as before, then dip each truffle into the chocolate, making sure they’re thoroughly coated. Place them back on the parchment-lined sheet, ensuring they’re not touching. Freeze again until the chocolate hardens, about 20 minutes for your Chickpea Truffles to achieve a delightful shell.
Step 6: Add Toppings
If desired, sprinkle your chosen toppings like cacao nibs, shredded coconut, or nuts on top of the truffles before the chocolate coating fully hardens. This adds flavor, texture, and visual appeal to your Chickpea Truffles. Feel free to get creative with your favorite toppings!
Step 7: Serve & Store
Once the chocolate has hardened completely, remove your Chickpea Truffles from the freezer. You can enjoy them right away or store them in an airtight container. Keep them in the fridge for up to 7-10 days or in the freezer for 30-60 days. These delightful treats are perfect for satisfying your sweet cravings anytime!
What to Serve with Chickpea Truffles
Enhance your dessert experience with delightful pairings that complement the rich, fudgy flavor of these Chickpea Truffles.
- Fresh Berries: Serve ripe strawberries or blueberries for a refreshing contrast that brightens the palate.
- Coconut Whipped Cream: A light and fluffy topping that adds a tropical twist and creamy texture to each bite.
- Vegan Vanilla Ice Cream: Scoop this alongside your truffles for a classic dessert duo that’s indulgent yet guilt-free.
- Nutty Granola: Sprinkle crunchy granola for an added texture that perfectly complements the softness of the truffles.
- Dark Chocolate Dip: Create a luscious extra layer by serving an extra melted dark chocolate dip for those who crave more richness.
- Chai Tea: A warm, spiced beverage that enhances the chocolate flavors and provides comfort, perfect for cozy evenings.
- Mint Tea: This refreshing herbal tea cleanses the palate, making it a lovely companion for the decadent sweetness of the truffles.
- Coffee: A bold cup of coffee pairs beautifully, bringing out the rich chocolate notes and balancing sweetness.
Expert Tips for Chickpea Truffles
- Use Fresh Chickpeas: Ensure the chickpeas are fresh and well-drained for a smooth and creamy texture in your truffles.
- Chocolate Melting Technique: Melt chocolate slowly in short bursts, stirring frequently to prevent burning, ensuring a smooth coating for your Chickpea Truffles.
- Uniform Size: Use a cookie scoop to maintain consistent sizes, making it easier to control portioning and cooking time.
- Experiment with Flavors: Don’t hesitate to add spices like cinnamon or vanilla extract—these enhance the flavor profile of your Chickpea Truffles!
- Storage Matters: Keep your truffles in an airtight container to maintain freshness; they can last up to 10 days in the fridge or 60 days in the freezer.
How to Store and Freeze Chickpea Truffles
Fridge: Keep your Chickpea Truffles in an airtight container in the fridge for up to 7-10 days to maintain freshness and flavor.
Freezer: For longer storage, freeze the truffles in a single layer on a baking sheet before transferring them to an airtight container. They can last for 30-60 days.
Thawing: When ready to enjoy, simply take out the desired number of truffles and let them thaw in the fridge for a few hours, or at room temperature for about 30 minutes before serving.
Reheating: These treats are best enjoyed cold, but if you prefer a soft texture, microwave for a few seconds—just be cautious not to melt the chocolate coating!
Chickpea Truffles Variations & Substitutions
Feel free to explore different twists and turns to make these truffles your very own delight!
- Nut-Free: Substitute almond butter with tahini for a nut-free version that still delivers on creaminess.
- Sweetness Boost: Add a tablespoon of maple syrup or agave nectar for an extra touch of sweetness if you have a sweet tooth.
- Flavor Infusion: Stir in a teaspoon of vanilla extract or a pinch of sea salt to enhance the chocolate flavor in every bite.
- Spiced Up: Add a sprinkle of cinnamon or a dash of espresso powder to give the truffles a warm, comforting twist. The spices complement the chocolate beautifully!
- Crunch Factor: Roll the truffles in crushed nuts, seeds, or even crushed freeze-dried berries for added texture and visual flair. They become a feast for both the eyes and taste buds!
- Double Chocolate: For an ultra-indulgent treat, mix in some mini vegan chocolate chips into the truffle base before forming them. This elevates the chocolatey experience!
- Toppings Galaxy: Instead of just cacao nibs or coconut, consider adding matcha powder or crushed pretzels to the coating for an exciting flavor contrast.
- Different Beans: Experiment with different beans like black beans or white beans if you’re feeling adventurous; this not only changes the taste but can also add unique textures to the truffles.
And while you’re here, if you’re in the mood for something refreshing, don’t miss my deliciously zesty Chickpea Feta Avocado salad, or perhaps a delightful variation like the Chickpea Feta Avocado to impress your guests!
Make Ahead Options
These Chickpea Truffles are a fantastic option for meal prep, saving you time on busy days! You can prepare the truffle mixture and shape it into balls up to 24 hours in advance. Simply scoop the mixture onto a parchment-lined baking sheet and refrigerate it, covered, to maintain quality. When you’re ready to enjoy, melt the additional chocolate and coat the truffles as instructed. For long-term storage, freeze the uncoated truffles for up to 60 days; just thaw them in the refrigerator overnight before finishing with the chocolate coating. This way, you’ll have a delicious, healthy treat at your fingertips whenever cravings hit!
Chickpea Truffles Recipe FAQs
How do I choose ripe chickpeas for this recipe?
Absolutely! When selecting canned chickpeas, look for ones that are firm, not mushy or overly soft. Check the expiration date on the can and avoid any that have dark spots or an off smell. For a fresher option, you can also cook dried chickpeas; just soak them overnight and boil until tender.
How should I store the leftover Chickpea Truffles?
Very! Store your Chickpea Truffles in an airtight container in the fridge for up to 7-10 days. If you want to keep them for longer, freezing is a great option! Just line them on a baking sheet to freeze individually and then transfer to a sealed freezer bag—they can stash away for about 30-60 days.
Can I freeze Chickpea Truffles? If so, how?
Absolutely! To freeze your Chickpea Truffles, first, place them on a baking sheet lined with parchment paper in a single layer to prevent sticking. Freeze for about 1-2 hours until hard, then transfer them to an airtight container or freezer bag. Be sure to label it with the date. This way, you can enjoy a tasty vegan treat whenever you need a sweet fix!
What if my truffle mixture is too dry or crumbly?
If your mixture ends up a bit dry or crumbly, don’t worry! You can add a teaspoon of almond butter or a splash of plant-based milk to help bind it together. Blend it again until you reach a smooth consistency. If you find it being too soft, pop the mixture back in the freezer for a short time to firm up before forming the truffles.
Are Chickpea Truffles safe for my allergies?
Great question! These truffles are naturally vegan and gluten-free. However, make sure to check the labels of any nut butters or chocolate you use, as they may be processed in facilities that handle allergens. If making for pets, it’s best to avoid giving these truffles, especially chocolate, which is harmful to dogs.
What toppings can I use for Chickpea Truffles?
The more the merrier! Get creative with your toppings! You can use cacao nibs, crushed nuts, shredded coconut, or even sprinkles for a fun twist. If you’re looking for extra flavor, consider adding spices like cinnamon or a sprinkle of sea salt for a gourmet touch.
Indulge in Guilt-Free Chickpea Truffles – Vegan Delight!
Ingredients
Equipment
Method
- Prepare Chickpeas: Drain and rinse chickpeas under cool water, then pat dry to remove moisture.
- Melt Chocolate: In a microwave-safe bowl, melt dark chocolate chips in 30-second intervals, stirring until smooth.
- Blend Base: In a food processor, combine prepared chickpeas, almond butter, and melted chocolate and blend until smooth.
- Form Truffles: Scoop out portions of the mixture onto a parchment-lined baking sheet and freeze for 15-20 minutes.
- Coat with Chocolate: Melt additional chocolate, dip each truffle until coated, and freeze again for about 20 minutes.
- Add Toppings: Sprinkle any desired toppings on the truffles before the chocolate fully hardens.
- Serve & Store: Once hardened, enjoy immediately or store in an airtight container.
Leave a Reply