
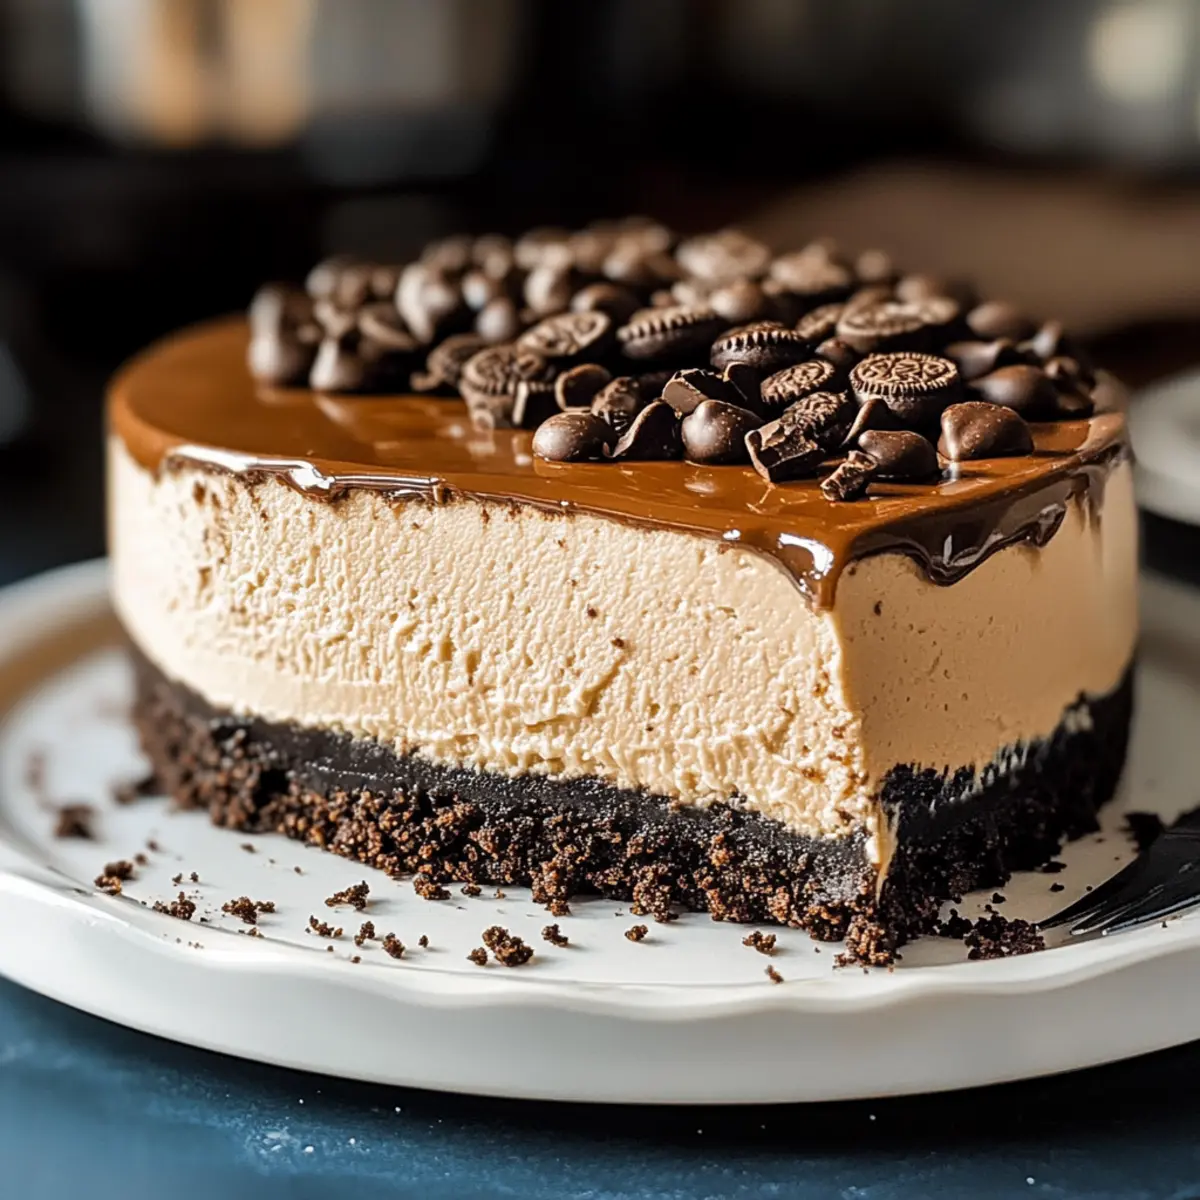
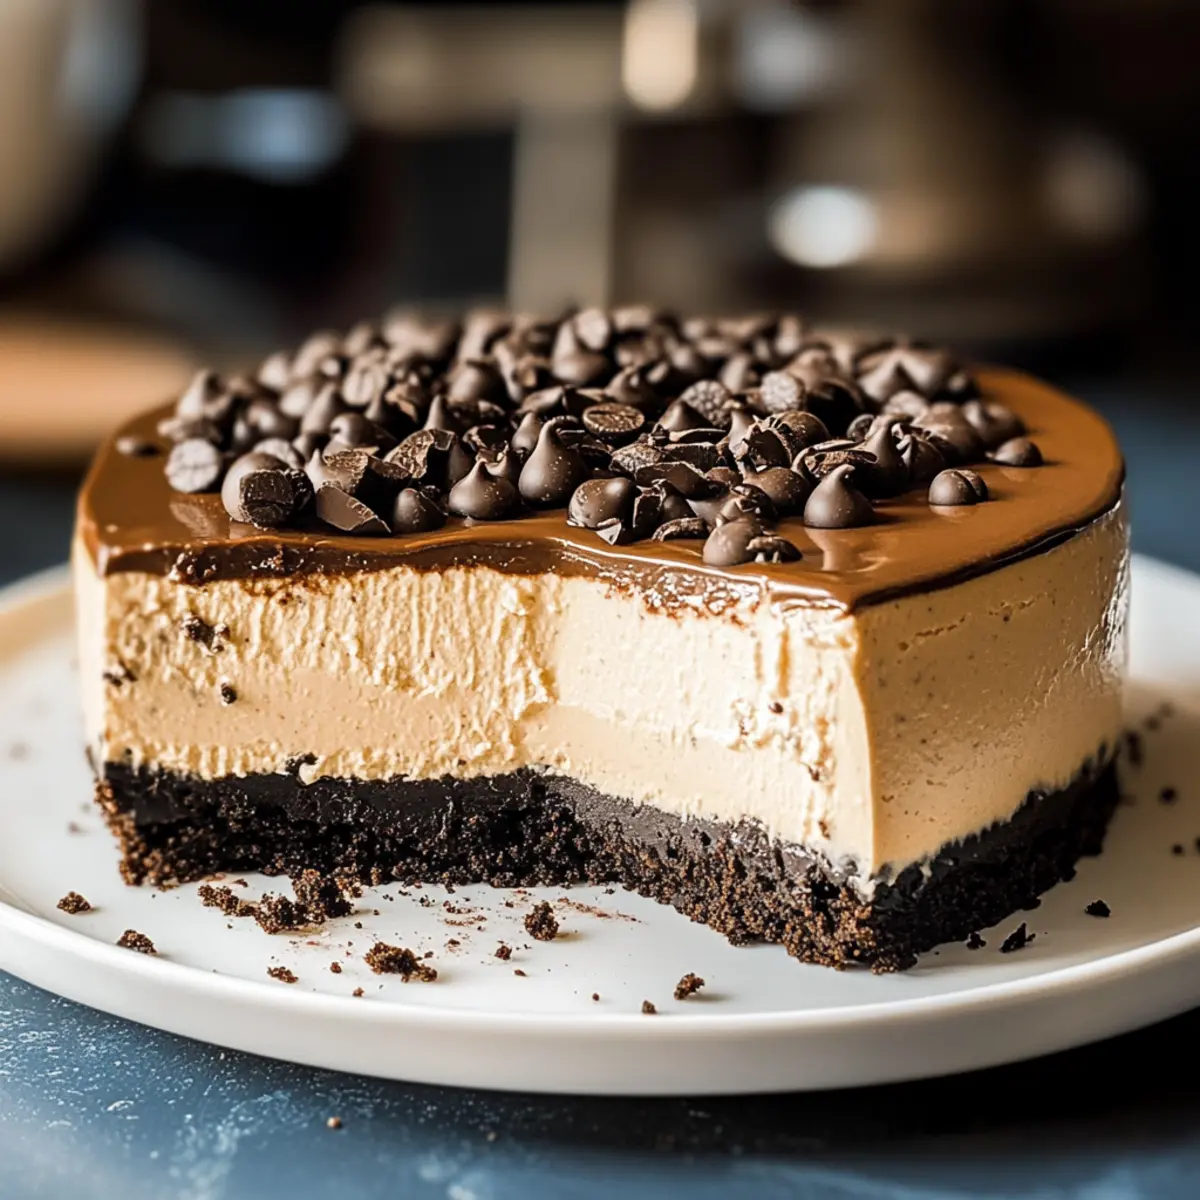
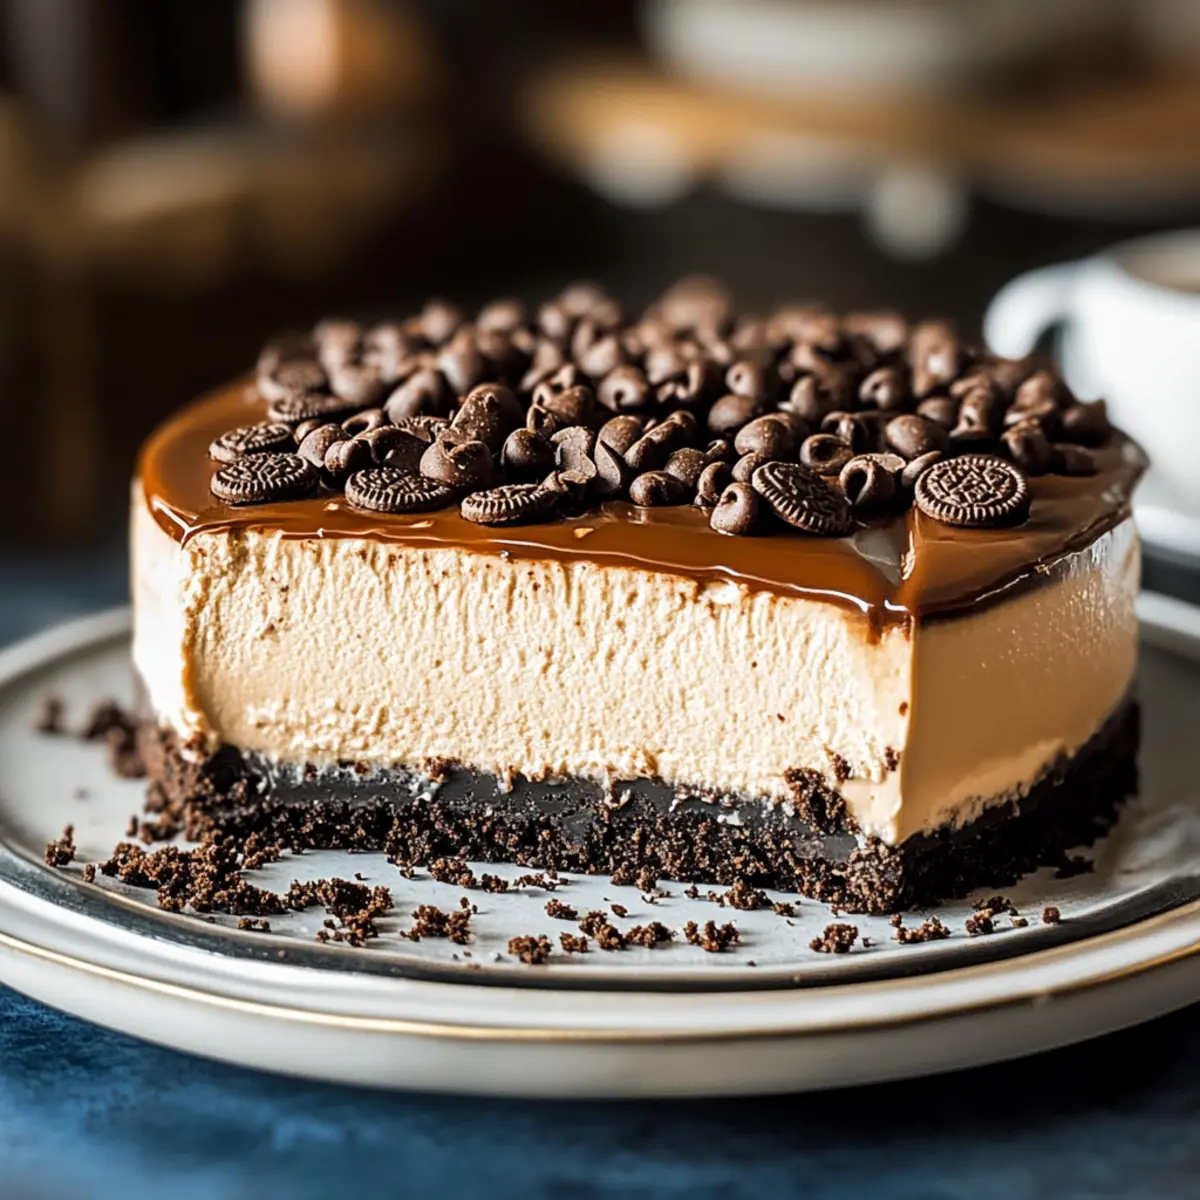
As I stood in the kitchen, the unmistakable aroma of coffee wafted through the air, whisking me away to my favorite café. This was the moment I decided to craft a Delicious Espresso Cheesecake that perfectly marries that beloved coffee essence with creamy chocolate decadence. What truly sets this recipe apart is that it’s a no-bake delight, making it a breeze to whip up even on the hottest days when the oven feels like a formidable foe. With a graham cracker crust under a silky filling and a glossy ganache topping, this cheesecake becomes a show-stopping dessert that offers both indulgence and ease. Plus, it shines as a crowd-pleaser, ready to impress guests at any gathering. Are you ready to transform your dessert game with this delightful twist on a classic favorite? Let’s dive in!
Why is this cheesecake a must-try?
Unforgettable Flavor: The bold espresso combined with rich chocolate creates a dessert that coffee lovers will adore.
Effortless Preparation: With a no-bake method, you can enjoy this treat without turning on the oven, ensuring a stress-free experience.
Versatile Options: Feel free to experiment with gluten-free ingredients or mix up your toppings for a personalized twist!
Impressive Presentation: The glossy ganache not only tastes great but also adds a stunning touch perfect for parties.
Crowd Pleaser: This cheesecake is sure to be a hit, satisfying both chocolate and coffee enthusiasts alike. If you love unique desserts, check out my Apple Crumble Cheesecake for another stellar recipe!
Delicious Espresso Cheesecake Ingredients
For the Crust
• Oreo Cookies – Adds a rich flavor; use gluten-free Oreos for a gluten-free version.
• Butter – Binds the crust together; coconut oil can be a great dairy-free alternative.
For the Filling
• Cream Cheese – Provides creamy texture; make sure it’s at room temperature for easy mixing.
• Sugar – Balances the bitterness of espresso; substitute with honey for a natural sweetness.
• Espresso Powder – Infuses the cheesecake with deep coffee flavor; instant coffee can work in a pinch, though flavor may vary.
• Heavy Cream – Adds lightness; for a non-dairy option, try coconut cream, but the texture will change.
For the Ganache
• Chocolate Chips – Use dark chocolate for a richer flavor; it makes the ganache deeply indulgent indeed.
• Splash of Cream – Helps achieve the perfect pourable consistency; use a non-dairy cream for vegan options.
This Delicious Espresso Cheesecake is all set to elevate your dessert experience!
Step‑by‑Step Instructions for Delicious Espresso Cheesecake
Step 1: Prepare the Crust
Begin by crushing the Oreo cookies into fine crumbs using a food processor or by placing them in a zip-top bag and smashing them with a rolling pin. Melt the butter and mix it with the crumbs until fully combined. Press this mixture firmly into the bottom of a 9-inch springform pan, creating an even base. Chill the crust in the refrigerator for about 30 minutes to set.
Step 2: Make the Filling
In a large mixing bowl, beat the room temperature cream cheese and sugar together until the mixture is smooth and creamy, approximately 3-4 minutes. Gradually add the espresso powder, ensuring it dissolves completely, followed by the heavy cream. Continue to mix on medium speed until the filling is fluffy and lightened in color, about 2-3 minutes, achieving that perfect texture for your delicious espresso cheesecake.
Step 3: Assemble the Cheesecake
Remove the crust from the refrigerator. Pour the creamy espresso filling over the chilled crust, using a spatula to spread it evenly. Smooth the top to ensure an attractive finish. Tap the pan lightly on the counter to eliminate any air bubbles, ensuring your cheesecake has a lovely, smooth surface for the next layer.
Step 4: Prepare the Ganache
In a microwave-safe bowl, combine chocolate chips and a splash of cream. Microwave in 30-second intervals, stirring until the chocolate is completely melted and smooth. Allow the ganache to cool slightly, about 10 minutes, before pouring it over the cheesecake. Spread it gently to cover the entire surface, adding a delicious finish to your decadent espresso chocolate cheesecake.
Step 5: Chill
Carefully place the assembled cheesecake back into the refrigerator and allow it to chill for at least 5 hours, or preferably overnight, to ensure that it sets properly. The longer it chills, the firmer it will become, allowing flavors to meld beautifully in this irresistible dessert. Avoid the temptation to slice too early!
Step 6: Serve
Once chilled and set, run a knife around the edge of the springform pan before carefully removing the sides. For an elegant touch, garnish with whipped cream and sprinkle crushed espresso beans on top. Slice into pieces and serve alongside a fresh cup of coffee. This luscious and creamy delicious espresso cheesecake is sure to impress!
What to Serve with Decadent Espresso Chocolate Cheesecake
Indulge your senses with a delightful symphony of flavors, perfectly complementing your creamy dessert.
-
Fresh Brewed Espresso: The bold coffee flavor pairs beautifully with the cheesecake, enhancing its rich espresso notes for a luxurious experience.
-
Whipped Cream Topping: A light and airy dollop of whipped cream adds a delightful contrast, balancing the rich chocolate and coffee flavors for a smooth finish.
-
Chocolate-covered Strawberries: The sweetness of strawberries dipped in chocolate adds a refreshing fruitiness, cutting through the richness of the cheesecake.
-
Crushed Nuts: Chopped walnuts or hazelnuts sprinkled on top provide a satisfying crunch, along with an earthy flavor that elevates the dessert.
-
Dark Chocolate Shavings: A sprinkle of chocolate shavings enhances the decadent feel, adding both elegance and an intensified chocolate experience.
-
Ice Cream Scoop: Serve with a scoop of coffee or vanilla ice cream to create a delightful interplay of creamy textures and flavors, ensuring each bite is heavenly.
-
Chilled Dessert Wine: A glass of dessert wine like a Moscato complements the cheesecake’s sweetness, inviting a touch of sophistication to your meal.
-
Cocoa-dusted Edible Flowers: For a whimsical presentation, dust with cocoa and garnish with edible flowers; they create a stunning visual and a light floral note.
-
Mini Fruit Tart: Pairing dessert with a mini fruit tart adds tartness and pastry crunch that contrasts nicely with the creamy cheesecake.
Elevate your dessert spread with these perfect companions for a sensational end to any meal!
Make Ahead Options
These Delicious Espresso Cheesecake slices are perfect for meal prep, allowing you to enjoy a homemade dessert without the rush! You can prepare the crust and filling up to 24 hours in advance, storing the crust in the refrigerator and covering the filling in an airtight container. When ready to serve, simply pour the filling over the crust and prepare the ganache. To maintain quality, it’s best to chill the cheesecake overnight, allowing the flavors to meld beautifully. For the ganache, prepare it just before serving to ensure it’s fresh and glossy. This approach not only saves time but guarantees that your cheesecake is just as delicious and impressive when it’s time to enjoy!
Delicious Espresso Cheesecake Variations
Feel free to explore and personalize your cheesecake with these delightful twists and substitutions!
-
Gluten-Free: Substitute the Oreo crust with gluten-free graham crackers or gluten-free Oreos to enjoy every bite without worry.
-
No-Bake Option: For a quicker dessert, prepare the filling and layer it in dessert cups, topping with chocolate ganache and chilling for a few hours. This creates beautiful individual servings!
-
Dairy-Free: Swap cream cheese and heavy cream with vegan cream cheese and coconut cream to make this indulgent treat suitable for dairy-free guests.
-
Flavored Ganache: Add a splash of flavored liqueurs, such as coffee or orange liqueur, to the ganache for a sophisticated twist that elevates the cheesecake’s flavor profile. It’s a delicious way to surprise your taste buds!
-
Nutty Crunch: Incorporate finely chopped nuts into the crust for added texture. Walnuts or pecans work wonderfully and enhance the depth of flavor.
-
Fruit Topping: Top the cheesecake with fresh berries or a berry compote to add a refreshing contrast to the rich chocolate flavors. It’s a delightful way to brighten up each slice.
-
Choco-Peanut Butter Delight: Mix in a bit of creamy peanut butter into the filling for a decadent chocolate-peanut butter flair. It’s an irresistible combo that fans of both flavors will love!
-
Energizing Spice: Add a pinch of cinnamon or nutmeg to the filling for a warm, aromatic touch that complements the espresso beautifully. It adds a cozy note perfect for fall gatherings.
For further inspiration in creating scrumptious desserts, don’t forget to check out my Apple Crumble Cheesecake or another delicious variation of the apple cheesecake by visiting Apple Crumble Cheesecake 2. Enjoy your baking adventures!
How to Store and Freeze Delicious Espresso Cheesecake
Fridge: Store in an airtight container in the refrigerator for up to 5 days. This keeps your delicious espresso cheesecake fresh and creamy, ready to enjoy when cravings strike.
Freezer: For longer storage, freeze leftovers in a well-wrapped form for up to 3 months. Ensure it’s tightly sealed to prevent freezer burn, allowing you to savor this treat later.
Thawing: To enjoy frozen cheesecake, simply transfer it to the fridge to thaw overnight before serving. This keeps the texture delightful and creamy!
Reheating: This cheesecake is meant to be served cold, so no reheating is necessary. Just slice, garnish, and indulge in the sweet, coffee-infused goodness!
Expert Tips for Delicious Espresso Cheesecake
-
Room Temperature Cream Cheese: Always start with cream cheese at room temperature to ensure smooth blending, avoiding lumps that can ruin the filling’s texture.
-
Proper Cooling: Allow the cheesecake to chill for a minimum of 5 hours. Rushing this step can result in a runny filling, impacting the overall experience of your delicious espresso cheesecake.
-
Chill Time is Key: The longer you chill, the firmer and more flavorful your cheesecake will be. Aim for overnight chilling when possible!
-
Watch the Ganache: Allow the ganache to cool slightly before pouring it on to prevent it from melting the cheesecake filling underneath.
-
Avoid Overmixing: When incorporating the heavy cream, mix just until fluffy. Overbeating can introduce air, leading to cracks in your delicious espresso cheesecake.
-
Creative Toppings: Feel free to customize your toppings! Consider adding caramel drizzle or fresh berries for added flavor and a beautiful presentation.

Delicious Espresso Cheesecake Recipe FAQs
What type of espresso powder works best for this recipe?
For the best flavor, I recommend using a high-quality espresso powder, as it provides a deep coffee taste that elevates the cheesecake. Instant coffee can be used in a pinch, but it may not deliver the same rich espresso experience.
How should I store the leftover cheesecake?
Store your delicious espresso cheesecake in an airtight container in the refrigerator for up to 5 days. This keeps it fresh and ready for you to enjoy whenever a sweet craving strikes!
Can I freeze the cheesecake, and if so, how?
Absolutely! You can freeze your cheesecake for up to 3 months. To do this, slice the cheesecake first and wrap each slice tightly in plastic wrap, then place them in a freezer-safe container or bag. This makes it easy to enjoy a piece whenever you like.
What if my cheesecake filling isn’t thickening properly?
If your filling isn’t thickening as expected, check to make sure the cream cheese is at room temperature—this is essential for smooth mixing. Also, ensure that you’re whipping the heavy cream until it forms soft peaks before mixed with the other ingredients. If it’s still too soft, chill the cheesecake longer to help it set properly.
Can I make any substitutes for the ingredients if I have allergies?
Certainly! If you have dairy allergies, substitute cream cheese with a non-dairy cream cheese and use coconut cream instead of heavy cream. Be sure to use gluten-free Oreo cookies or a gluten-free crust to keep this dessert accommodating for those with gluten sensitivities. Always check the labels to ensure they meet your dietary needs!
How can I add more flavor to the ganache?
For a more indulgent touch, consider adding flavored liqueurs such as coffee or hazelnut liqueur to the ganache before pouring it onto the cheesecake. Just add a tablespoon or so to the melted chocolate and cream mixture before it cools. This will give your delicious espresso cheesecake an extra layer of flavor!
Irresistibly Delicious Espresso Cheesecake That's No-Bake!
Ingredients
Equipment
Method
- Begin by crushing the Oreo cookies into fine crumbs using a food processor or by placing them in a zip-top bag and smashing them with a rolling pin. Melt the butter and mix it with the crumbs until fully combined. Press this mixture firmly into the bottom of a 9-inch springform pan, creating an even base. Chill the crust in the refrigerator for about 30 minutes to set.
- In a large mixing bowl, beat the room temperature cream cheese and sugar together until the mixture is smooth and creamy, approximately 3-4 minutes. Gradually add the espresso powder, ensuring it dissolves completely, followed by the heavy cream. Continue to mix on medium speed until the filling is fluffy and lightened in color, about 2-3 minutes.
- Remove the crust from the refrigerator. Pour the creamy espresso filling over the chilled crust, using a spatula to spread it evenly. Tap the pan lightly on the counter to eliminate any air bubbles.
- In a microwave-safe bowl, combine chocolate chips and a splash of cream. Microwave in 30-second intervals, stirring until the chocolate is completely melted and smooth. Allow the ganache to cool slightly before pouring it over the cheesecake.
- Carefully place the assembled cheesecake back into the refrigerator and allow it to chill for at least 5 hours, or preferably overnight, to ensure that it sets properly.
- Once chilled and set, run a knife around the edge of the springform pan before carefully removing the sides. Garnish with whipped cream and sprinkle crushed espresso beans on top before slicing and serving.
Leave a Reply