
As I wandered through the bustling streets of Athens, the sweet, buttery aroma of traditional Greek Koulourakia lured me into a cozy café. These delightful Easter biscuits, often braided and glazed to golden perfection, are not just a treat; they’re a symbol of celebration and togetherness. In this Koulourakia recipe, you’ll discover how to create these mouthwatering snacks that are perfect for dipping in your morning coffee or sharing with loved ones. With just a few simple ingredients and quick prep, you can bring the warmth of Greek culture into your kitchen. As the biscuits bake, they fill your home with nostalgia and joy, making them irresistible for any gathering. Are you ready to make a batch and share a taste of tradition?

Why You’ll Adore This Koulourakia Recipe
Irresistible Aroma: As you mix the ingredients, the combination of orange zest and vanilla will fill your kitchen with a delightful scent that feels like a warm hug.
Cultural Tradition: Koulourakia are not just cookies; they embody the joy of Greek Easter celebrations and family togetherness, making them a meaningful addition to any festive table.
Customizable Fun: Feel free to get creative! Add spices like cinnamon or experiment with different citrus flavors to make this recipe your own.
Quick Prep Time: With just a few simple steps and minimal hands-on time, you can whip up a batch of these delightful biscuits, turning your kitchen into a Greek café in no time!
Perfect Pairing: Enjoy them alongside a cup of Greek coffee or even with a slice of French Butter Cake for a delightful afternoon treat that friends and family will adore.
Versatile Storage: Not only do they taste amazing fresh out of the oven, but they also store well. Keep them in an airtight container and enjoy their scrumptiousness for weeks!
Koulourakia Recipe Ingredients
For the Dough
- Unsalted Butter (250 grams, melted) – Provides a rich, moist texture; swap with coconut oil for a dairy-free version.
- Eggs (4) – Acts as a binder and contributes to the richness; consider flaxseed eggs for a vegan option.
- Orange Zest (1 orange) – Brightens the flavor profile with citrus notes; lemon zest can work well as a substitute.
- Orange Juice (¼ cup) – Adds moisture and enhances citrus flavor; milk can be used for a less pronounced taste.
- Vanilla Essence (½ tablespoon) – Infuses a sweet aroma; almond extract can offer a unique twist.
- Brandy (½ tablespoon) – Boosts the flavor and aroma; can be omitted or replaced with apple juice for a non-alcoholic alternative.
- Granulated Sugar (1 cup) – Sweetens the dough and aids in browning; brown sugar deepens the flavor if preferred.
- Self-Raising Flour (4.5 cups) – Provides the structural base; replace with all-purpose flour plus baking powder if necessary.
- Baking Powder (½ tablespoon) – Ensures the biscuits rise; always check freshness for the best results.
- Egg (for brushing) – Gives a glossy finish to the biscuits; a milk wash can be used for a simpler glaze.
Optional Toppings
- Sesame Seeds (to sprinkle) – Adds a crunchy texture and visual appeal; consider using poppy seeds for a different flavor.
This Koulourakia recipe is your gateway to crafting delightful, traditional treats that capture the essence of Greek celebrations!
Step‑by‑Step Instructions for Koulourakia Recipe
Step 1: Combine Wet Ingredients
In a large mixing bowl, blend 250 grams of melted unsalted butter with 4 whole eggs, the zest of one orange, ¼ cup of orange juice, ½ tablespoon of vanilla essence, and ½ tablespoon of brandy. Mix these ingredients thoroughly until well combined, creating a smooth, creamy texture that invites you to indulge in this Koulourakia recipe.
Step 2: Incorporate Dry Ingredients
Add ½ tablespoon of baking powder to your wet mixture and stir well until evenly distributed. Gradually sift in 4.5 cups of self-raising flour while mixing with a wooden spoon or spatula, until the dough becomes soft and moist but no longer sticky. If the dough feels too wet, sprinkle in more flour, ensuring you achieve the perfect consistency for shaping.
Step 3: Knead and Rest the Dough
Once your dough is formed, lightly knead it on a floured surface for about 1-2 minutes to bring it together. Wrap the dough in plastic wrap and let it rest for 15 minutes at room temperature. This resting period allows the flavors to meld beautifully and makes it easier to shape your Koulourakia later.
Step 4: Shape the Biscuits
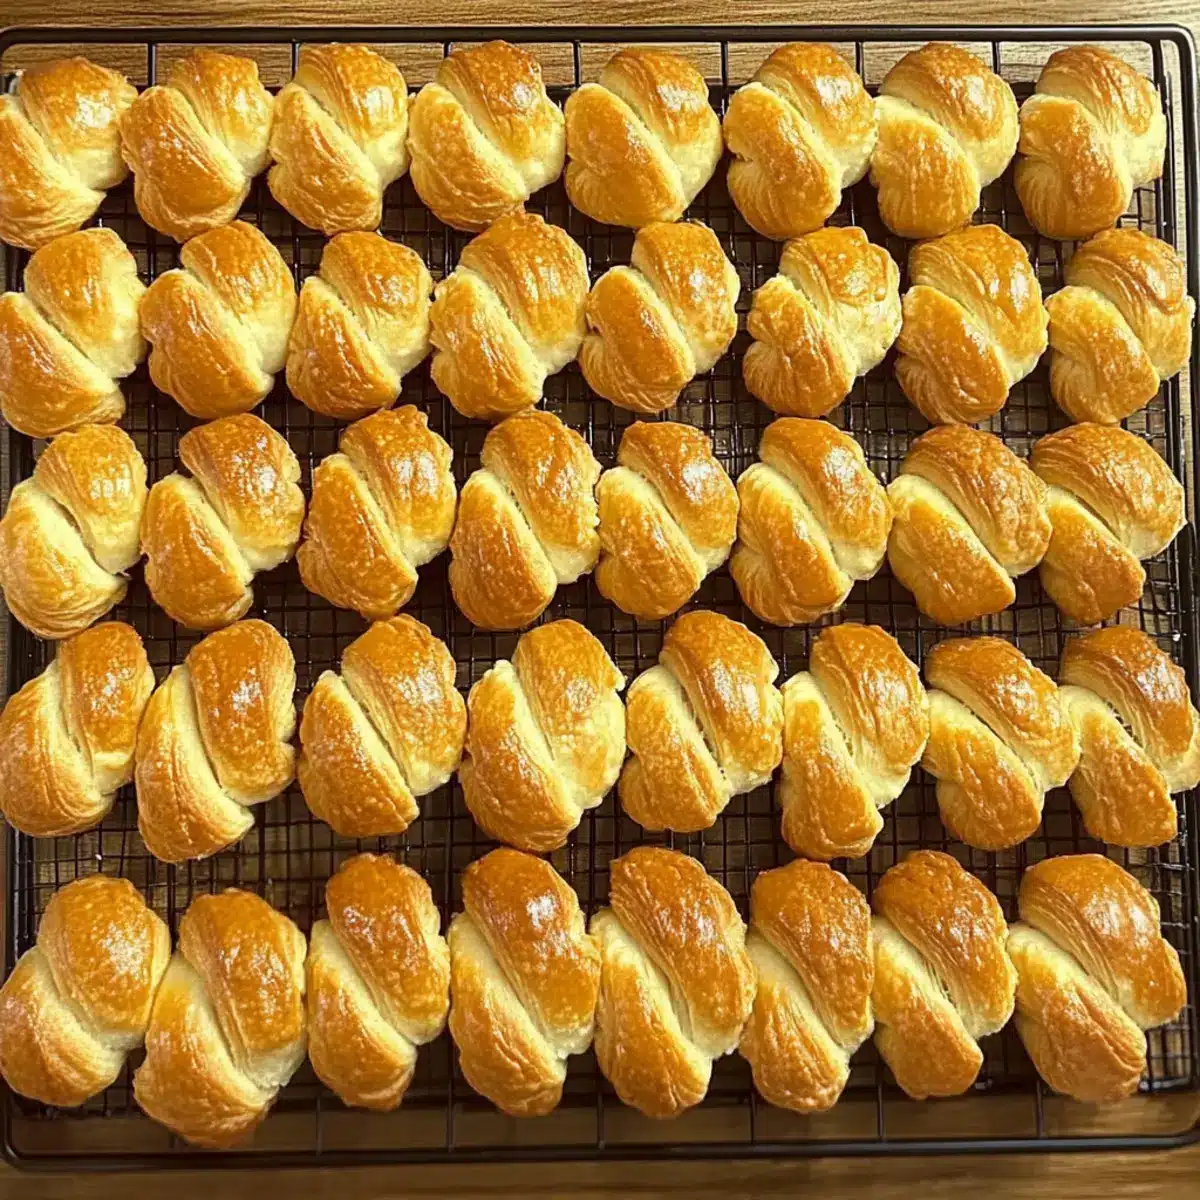
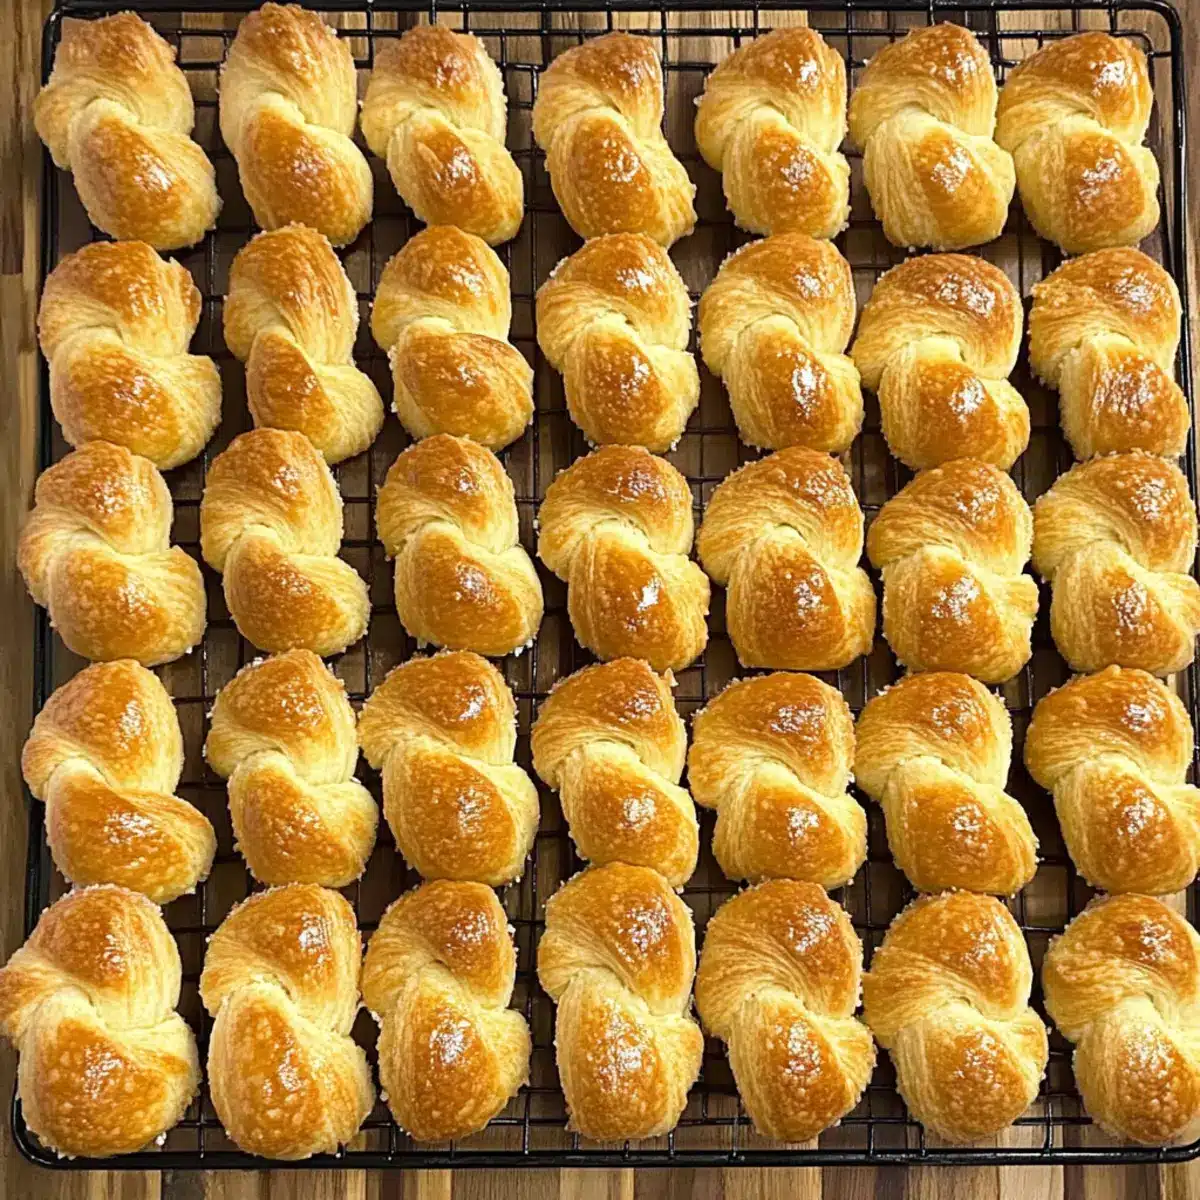
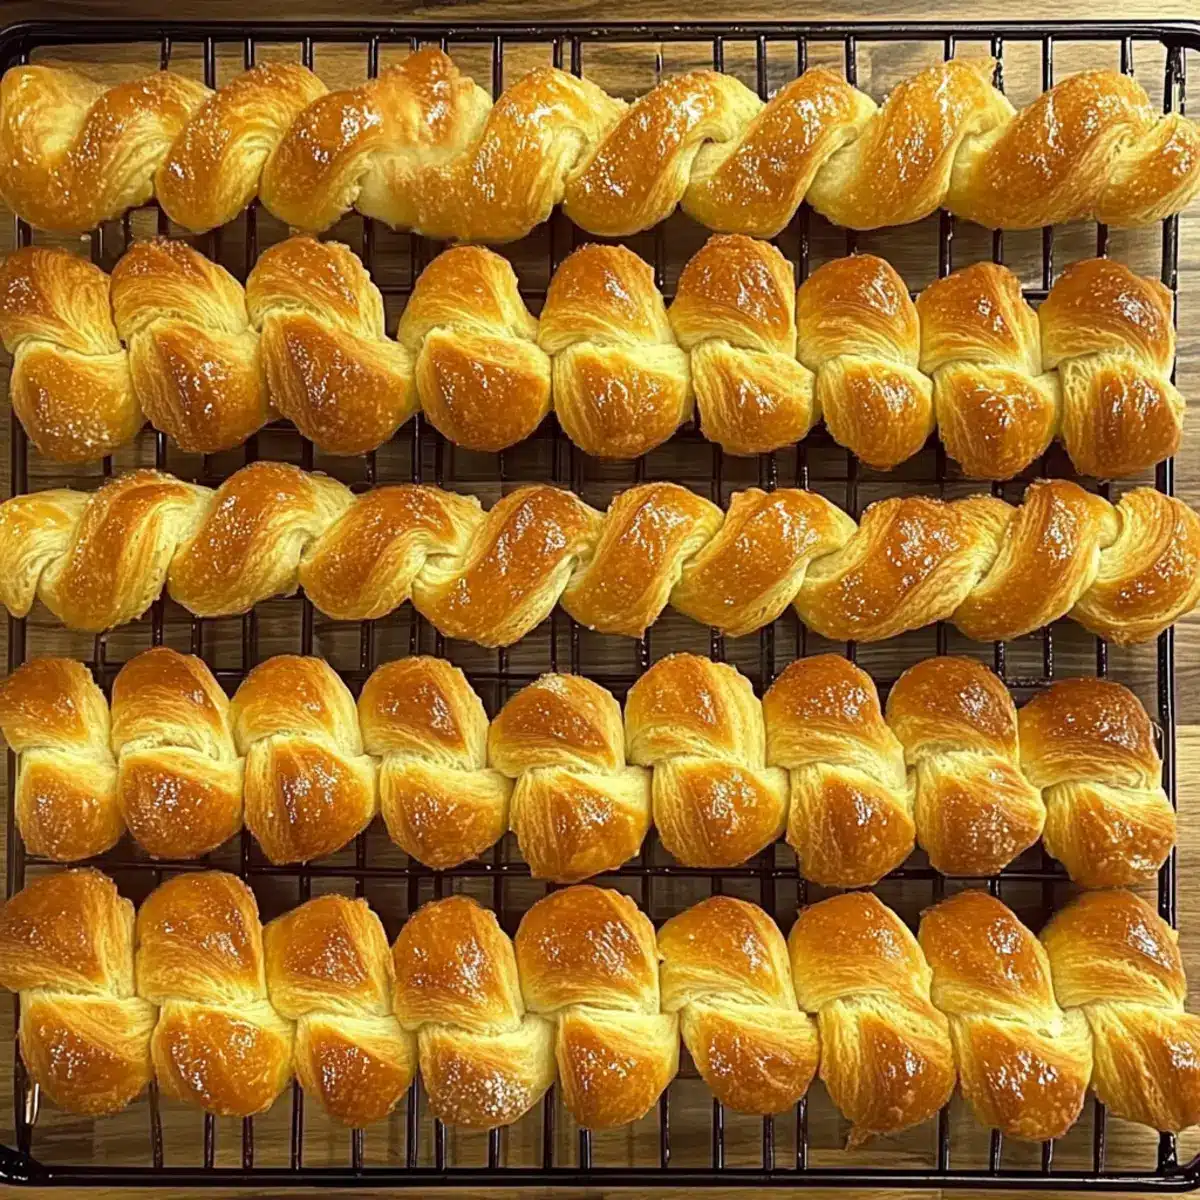
After resting, divide the dough into 30-gram portions using a kitchen scale for accuracy. Roll each piece into long strips, then create your desired shapes such as braids or twists. Keep your hands lightly floured to prevent sticking. Feel free to get creative as you shape the biscuits, adding personal flair to your Koulourakia.
Step 5: Prepare for Baking
Preheat your oven to 180°C (350°F) while you arrange the shaped Koulourakia on a lined baking tray, leaving enough space between each biscuit for expansion. In a small bowl, whisk an egg to brush over the tops of the biscuits, giving them a shiny, appealing finish that enhances their golden-brown appearance as they bake.
Step 6: Bake to Perfection
Place the baking tray in the preheated oven and bake for about 20 minutes, or until the Koulourakia are golden brown and slightly firm to the touch. Keep an eye on them in the final minutes to avoid over-browning. The enticing aroma will fill your kitchen, signaling that your delicious Koulourakia are almost ready!
Step 7: Cool and Serve
Once baked, remove the Koulourakia from the oven and allow them to cool on a wire rack for a few minutes. This cooling time helps them set properly, ensuring a delightful texture. Serve these traditional biscuits with a cup of coffee or tea, sharing the warmth of Greek tradition with family and friends.
Koulourakia Recipe Variations
Feel free to explore the delightful possibilities to customize this recipe to fit your taste and dietary needs.
- Dairy-Free: Substitute melted butter with coconut oil for a rich, creamy texture without dairy.
- Vegan: Replace eggs with flaxseed eggs (1 tablespoon ground flaxseed and 2.5 tablespoons water per egg) to maintain the biscuit’s structure.
- Citrus Swap: Use lemon or grapefruit zest instead of orange for a slightly different, refreshing flavor profile that adds zing!
- Nutty Crunch: Incorporate finely chopped walnuts or almonds into the dough for an added texture contrast and nuttier taste.
- Spice It Up: Add a teaspoon of cinnamon or nutmeg for a warm, aromatic twist that enhances the traditional flavor.
Feeling adventurous? Try experimenting with toppings! A sprinkle of sesame seeds or poppy seeds will add a lovely crunch. Also, if you have a soft spot for warm flavors, consider drizzling with a touch of honey after baking for an extra layer of sweetness that pairs delightfully with the buttery biscuits.
If you’re looking to broaden your culinary journey further, dive into wonderful dishes like Korean Beef Bulgogi or try a fresh and vibrant Ina Garten Cape Cod Salad alongside these delectable Koulourakia. Enjoy the creative cooking process!
Make Ahead Options
These Koulourakia are perfect for busy home cooks looking to save time during festive preparations! You can prepare the dough up to 24 hours in advance by wrapping it tightly in plastic wrap and storing it in the refrigerator, preventing the dough from drying out. Additionally, you can shape the biscuits and place them on a baking tray, then cover and refrigerate for up to 3 days. When you’re ready to bake, just brush them with egg and pop them directly into a preheated oven without the need to bring them to room temperature first. This way, you can enjoy fresh, golden Koulourakia with minimal effort, making celebrations more joyful and relaxed!
Storage Tips for Koulourakia
Room Temperature: Store Koulourakia in an airtight container at room temperature for up to 2 weeks. This keeps them fresh while retaining their delightful texture.
Freezer: For longer storage, freeze the biscuits in an airtight container or freezer bag for up to 3 months. Thaw at room temperature and enjoy them later without losing the delicious flavors of this Koulourakia recipe.
Reheating: If you prefer them warm, reheat the biscuits in a preheated oven at 150°C (300°F) for about 5-7 minutes. This will refresh their crunchiness and bring back that lovely aroma.
Avoid Dampness: Ensure the container is completely dry before storing to prevent sogginess. This helps your Koulourakia stay crisp and enjoyable over time.
Expert Tips for Koulourakia Recipe
-
Butter Temperature: Always let melted butter cool slightly before mixing it with eggs to prevent any cooking. This ensures a smooth dough without scrambled bits!
-
Dough Consistency: Aim for a soft, slightly sticky dough; overworking it can lead to tough biscuits. If it’s too wet, add flour gradually until just right.
-
Creative Shapes: Enjoy the process of shaping your Koulourakia! From braids to knots, get creative and express your style—each shape can give a unique flair to your festive spread.
-
Egg Wash Trick: For a lovely golden finish, brush the biscuits with whisked egg before baking. If you prefer a simpler approach, milk works well too!
-
Storage Strategy: Keep leftover biscuits in an airtight container at room temperature for up to two weeks. You can also freeze them for later enjoyment without losing that lovely texture!
-
Flavor Boost: Experiment with the Koulourakia recipe by incorporating spices like cinnamon or nutmeg, or try topping with sesame seeds for an extra crunch.
What to Serve with Traditional Greek Koulourakia
Indulging in Koulourakia is just the beginning; let’s explore delightful accompaniments to create a truly memorable experience.
-
Greek Coffee: The rich, robust flavor of traditional Greek coffee perfectly complements the buttery sweetness of Koulourakia, creating an authentic taste of Greece in every sip.
-
Herbal Tea: A soothing cup of herbal tea balances the rich flavors of the biscuits, making it soothing for afternoon tea or a cozy evening treat with loved ones.
-
Fresh Fruit Salad: Bright, refreshing fruits like citrus and berries add a zingy contrast to the sweet and buttery Koulourakia, providing a refreshing palate cleanser.
-
Mild Cheese Platter: A selection of mild cheeses will bring a savory touch to your sweet biscuits, creating a balance that’s perfect for enjoying during a festive gathering.
-
Sesame Cookies: Serve alongside simple sesame cookies for a delightful textural juxtaposition. The crunchiness of sesame enhances the softness of Koulourakia beautifully.
-
Honey Drizzle: A light drizzle of honey atop Koulourakia adds a luxurious sweetness reminiscent of traditional Greek desserts, making every bite feel like a special occasion.
-
Vanilla Ice Cream: For a modern twist, pair these biscuits with vanilla ice cream. The creamy chill provides a delightful contrast to the warm, crumbly texture of freshly baked Koulourakia.
-
Baklava Bites: Introduce an array of traditional sweets by serving baklava bites, where the nuts and honey intertwine spectacularly with the flavors of your biscuits for an unforgettable dessert spread.
Koulourakia Recipe FAQs
How do I select the best oranges for orange zest in my Koulourakia?
Absolutely! Look for oranges that are bright and firm, with a smooth skin free from dark spots or blemishes. The zest from fresh oranges will provide a vibrant flavor, whereas older or softer oranges may have a less appealing taste. If fresh oranges aren’t available, consider using organic orange peel, as it typically has more intense flavor.
What’s the best way to store leftover Koulourakia?
Very! Once your Koulourakia have cooled completely, store them in an airtight container at room temperature for up to 2 weeks. You’ll want to ensure that the container is completely dry before adding the biscuits to avoid any moisture, which can make them soft. If you need to keep them longer, freezing is a great option!
Can I freeze Koulourakia and how should I do it?
Absolutely! For freezing, place the cooled Koulourakia in a single layer on a baking sheet and freeze until solid for about 2 hours. Then transfer them to an airtight freezer bag, removing as much air as possible to prevent freezer burn. They can be stored this way for up to 3 months. When you’re ready to enjoy them, simply thaw at room temperature. If you prefer warm biscuits, pop them in a preheated oven at 150°C (300°F) for about 5-7 minutes.
What should I do if my dough is too sticky?
No worries! If your dough feels too sticky after combining all the ingredients, gradually sprinkle in more self-raising flour, about a tablespoon at a time, mixing until you reach a soft and manageable texture. Be cautious not to add too much flour; the dough should remain slightly sticky for the best results. Kneading it lightly for a minute or two can also help enhance the texture.
Are there any dietary considerations for making Koulourakia?
Absolutely! For those wanting a dairy-free option, substitute unsalted butter with coconut oil. You can also swap traditional eggs with flaxseed eggs by mixing 1 tablespoon of ground flaxseed with 2.5 tablespoons of water—let it set for a few minutes to thicken before use. Always check for allergies related to nuts and gluten as well. This way, everyone can enjoy this festive Koulourakia recipe!
Delicious Koulourakia Recipe for a Sweet Greek Celebration
Ingredients
Equipment
Method
- In a large mixing bowl, blend melted unsalted butter with whole eggs, orange zest, orange juice, vanilla essence, and brandy until well combined.
- Add baking powder to the wet mixture and stir. Gradually sift in self-raising flour while mixing until the dough is soft and moist.
- Lightly knead the dough for about 1-2 minutes on a floured surface, wrap in plastic wrap, and let rest for 15 minutes.
- Divide the dough into 30-gram portions, roll into strips, and shape as desired.
- Preheat oven to 180°C (350°F) while arranging the shaped Koulourakia on a lined baking tray. Brush with whisked egg for a shiny finish.
- Bake for about 20 minutes or until golden brown. Watch closely to prevent over-browning.
- Remove from the oven and cool on a wire rack before serving with coffee or tea.
Leave a Reply