
The scent of freshly baked cheesecakes wafting through the air transports me back to family gatherings, where the dessert table was always the main attraction. If you’re looking for a delightful treat that captures that nostalgic joy without the hassle, then these Mini Cheesecake Cups are just the ticket! Ready in a swift 42 minutes, they offer a creamy and rich flavor reminiscent of a classic bakery cheesecake, all while being customizable to suit any palate. Best of all, you won’t need a water bath to achieve that perfect silky texture. Whether you’re celebrating a special occasion or simply craving a sweet indulgence, this easy recipe will not only impress your guests but also make your loved ones feel cherished. Are you ready to make some mini magic in your kitchen?
Why Make Mini Cheesecake Cups?
Quick and Easy: These mini cheesecake cups come together in just 42 minutes, making them a perfect option for busy bakers.
Customizable Flavors: From caramel to fresh fruit, the topping options are endless, so you can please any crowd with your unique twists.
No Water Bath Needed: Say goodbye to the fuss of traditional cheesecakes! This recipe ensures a smooth texture without complicated steps.
Crowd-Pleaser: Perfect for gatherings, these mini delights are sure to be a hit at any event, reminiscent of Apple Crumble Cheesecake.
Guilt-Free Indulgence: With around 107 calories each, they satisfy your sweet tooth without the guilt, making them a great dessert option for any occasion!
Mini Cheesecake Cups Ingredients
For the Crust
- Graham Cracker Crumbs – Provides structure and a delightful crunch; for a twist, try using chocolate wafers or ginger snaps instead.
- Unsalted Butter (melted) – Binds the crust beautifully; be sure it’s completely melted for the best texture.
For the Filling
- Full Fat Cream Cheese – The heart of your cheesecake for that creamy filling; ensure it’s softened at room temperature to mix smoothly.
- Granulated Sugar – Sweetens the filling perfectly; feel free to swap with brown sugar for a richer flavor.
- Vanilla Extract – Enhances the overall deliciousness of the cheesecake; almond extract can be swapped for a different flavor note.
- Large Eggs – Essential for structure and setting; give them a light whisk before adding to avoid overmixing.
Toppings Ideas
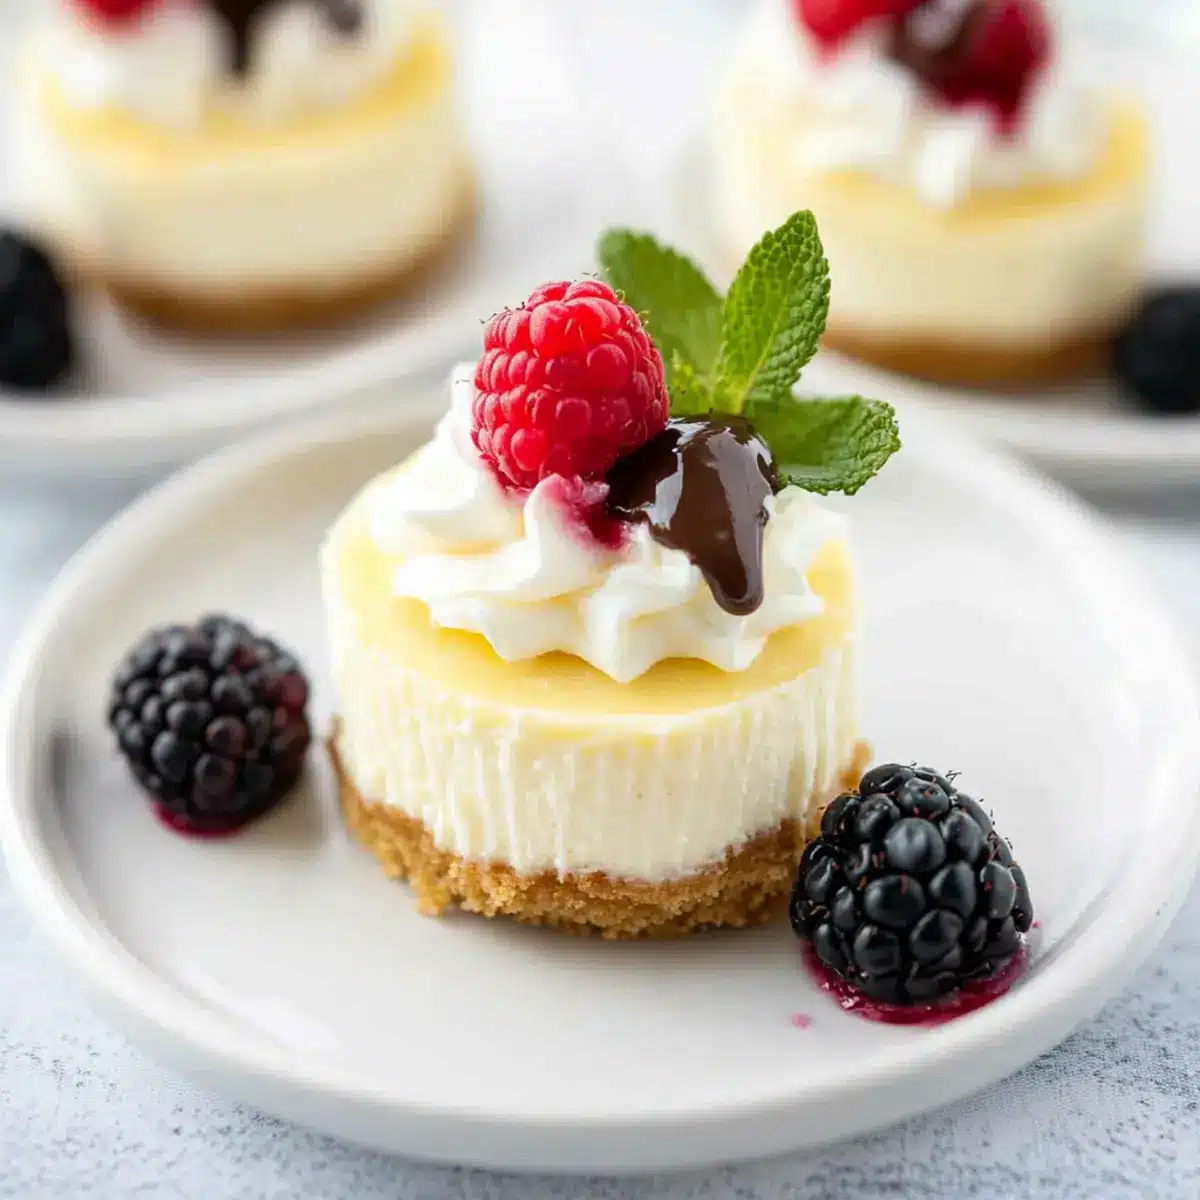
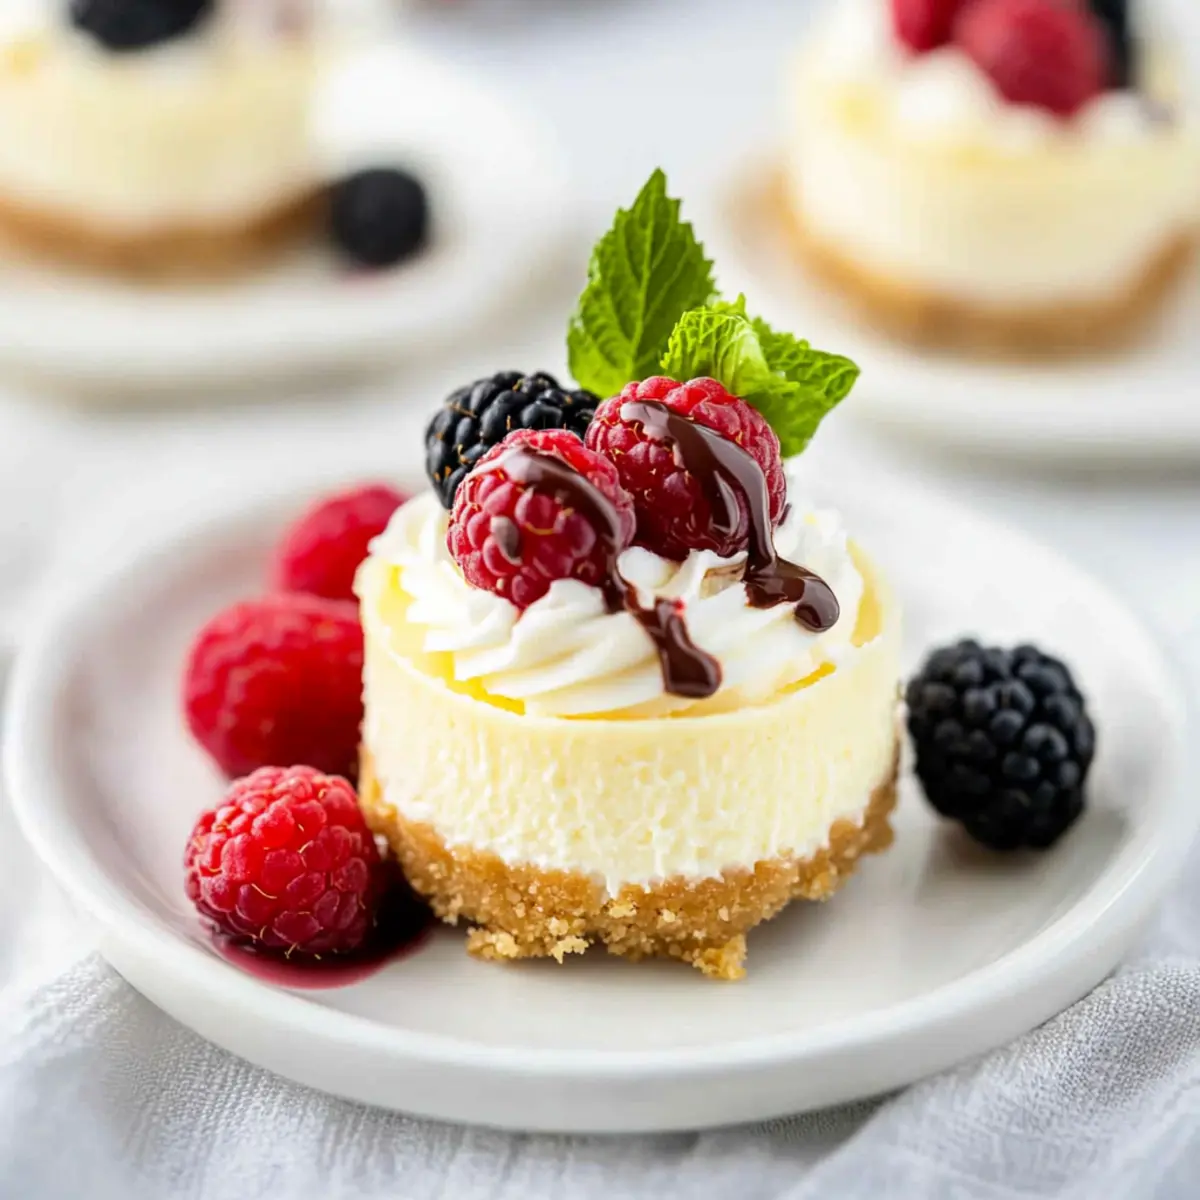
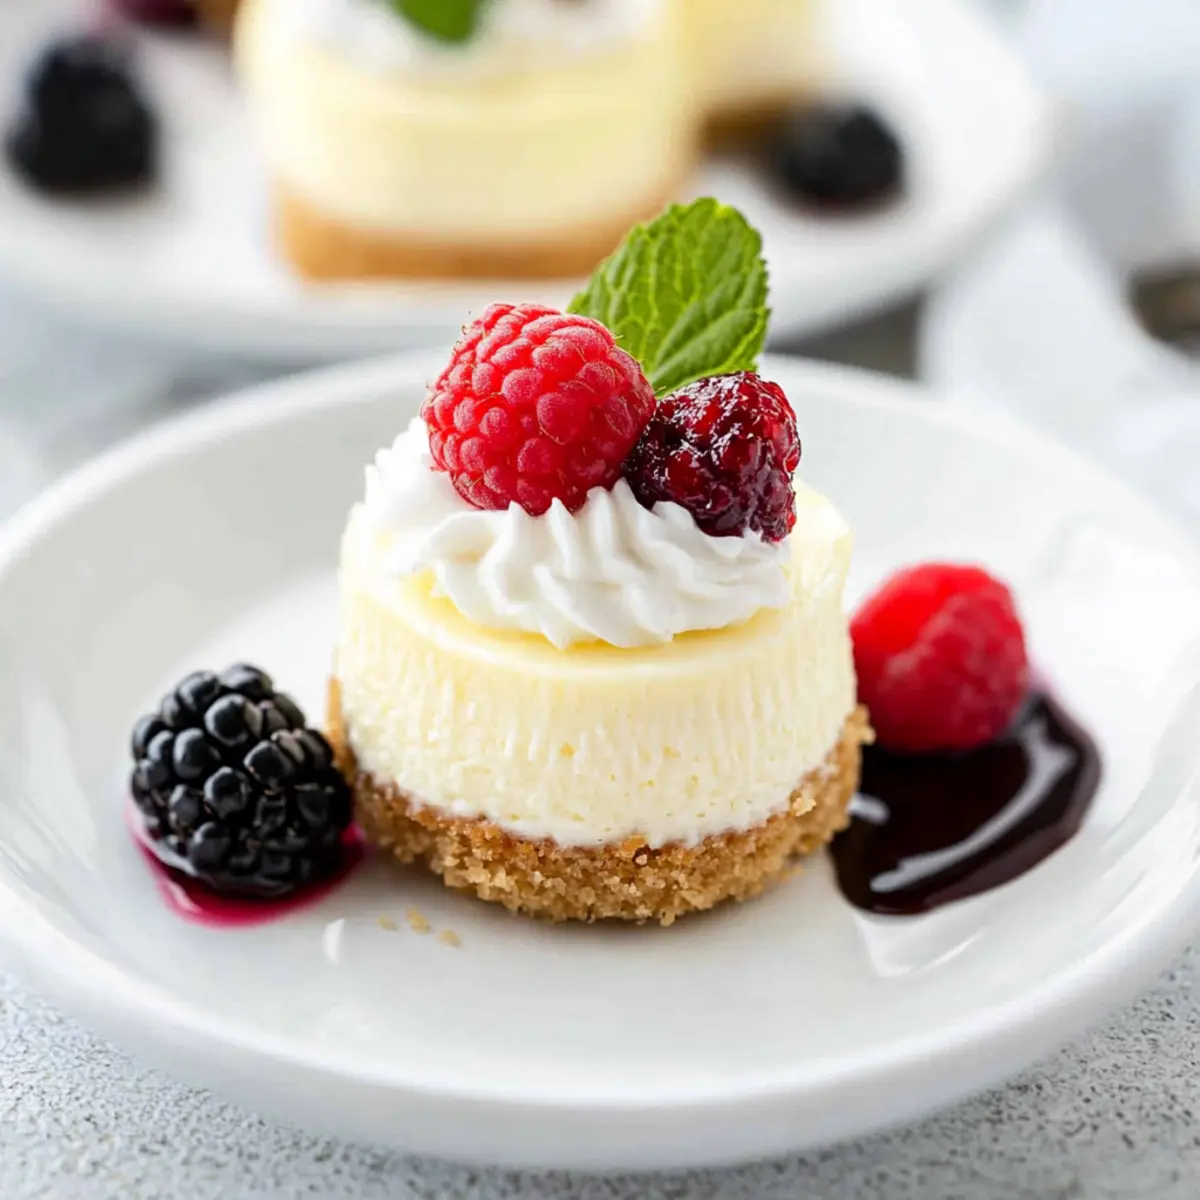
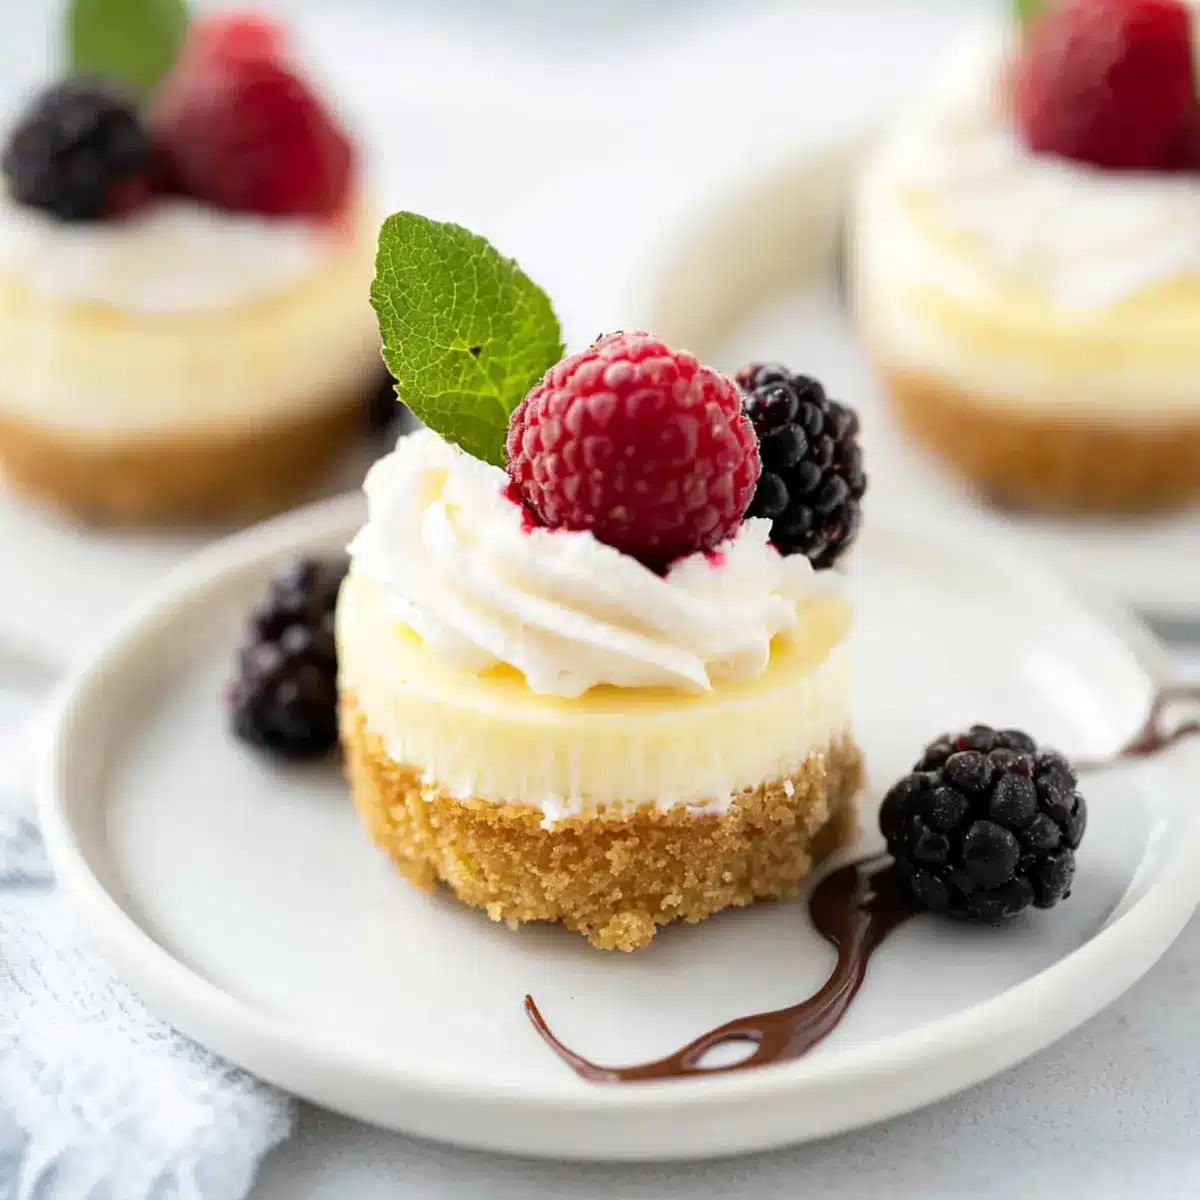
- Fresh Fruit – Berries, mango, or kiwi add a vibrant touch and fresh flavor.
- Whipped Cream – A dollop creates a luscious finish that both kids and adults will adore.
- Chocolate Ganache or Caramel Sauce – Drizzle on top for that extra indulgence that elevates these Mini Cheesecake Cups into something truly special.
Feel free to get creative with your Mini Cheesecake Cups; customize them to fit your taste and occasion!
Step‑by‑Step Instructions for Mini Cheesecake Cups
Step 1: Prepare Crust
In a mixing bowl, combine graham cracker crumbs and melted unsalted butter until completely mixed. Line a muffin pan with paper or silicone liners, then press the crumb mixture firmly into the bottom of each liner, forming a solid crust. Bake in a preheated oven at 350°F (175°C) for about 8 minutes, until slightly golden and set.
Step 2: Make Filling
In a large mixing bowl, beat softened full-fat cream cheese using an electric mixer until smooth and creamy. Gradually add granulated sugar and vanilla extract, continuing to mix until fully combined. Lightly whisk the large eggs in a separate bowl, then slowly add them, mixing gently to avoid overmixing; this will ensure your Mini Cheesecake Cups have a lovely texture.
Step 3: Bake
Carefully spoon the cream cheese filling over the pre-baked crusts in the muffin pan, filling each liner about three-quarters full. Place the muffin pan back in the oven and bake at 350°F (175°C) for approximately 22 minutes. You’ll know they’re done when the centers are set but still slightly jiggly, resembling a gentle wave when shaken.
Step 4: Cool Down
Once baked, turn off the oven and crack the oven door open slightly. Let the mini cheesecakes rest in the warm oven for 15-20 minutes to allow them to cool gradually. This will help prevent cracking. After, transfer the pan to the counter and cool completely to room temperature.
Step 5: Chill
After cooling, transfer the Mini Cheesecake Cups to an airtight container and refrigerate for at least 2 hours. Chilling not only enhances their flavor but also helps firm up the texture. Patience pays off, turning these delightful treats into a creamy indulgence that’s ready for serving.
Step 6: Serve and Enjoy
Once chilled, your irresistible Mini Cheesecake Cups are ready! Top each cheesecake with fresh fruit, a dollop of whipped cream, or a drizzle of chocolate ganache for an extra special touch. These versatile treats are bound to impress and become a cherished addition to any gathering.
How to Store and Freeze Mini Cheesecake Cups
Fridge: Store your mini cheesecake cups in an airtight container for up to one week. This helps maintain their creamy texture and flavor.
Freezer: For longer storage, freeze the mini cheesecake cups for up to three months. Wrap each cup in plastic wrap and place them in a freezer-safe container or bag.
Thawing: When ready to enjoy, thaw the mini cheesecakes overnight in the refrigerator. Avoid microwaving them, as this can alter their texture.
Reheating: If desired, serve them chilled or let them sit at room temperature for about 15 minutes before serving for the best flavor experience.
Helpful Tricks for Mini Cheesecake Cups
-
Perfect Crust: Press the graham cracker mixture firmly into the liners for a sturdy base, ensuring it doesn’t crumble after baking.
-
Creamy Texture: Always use fully softened cream cheese to achieve a smooth, creamy filling without lumps. Low-fat types can lead to a grainy texture.
-
Gentle Mixing: To avoid overmixing, incorporate eggs slowly and just until the mixture is homogenous. This will help prevent sinking centers in your Mini Cheesecake Cups.
-
Cooling Gradually: Let the cheesecakes cool in the oven with the door ajar for 15-20 minutes to reduce the risk of cracking, ensuring a beautiful presentation.
-
Chill Time: Don’t skip the refrigeration step! Chilling the cheesecakes for at least 2 hours will enhance their flavor and texture, making them irresistibly creamy.
What to Serve with Mini Cheesecake Cups?
Indulging in these creamy delights opens up a world of flavor pairings that will elevate your dessert experience.
-
Fresh Berries: Juicy strawberries, blueberries, or raspberries add a burst of color and natural sweetness, balancing the rich cheesecake flavor. They’re not only beautiful but also a refreshing touch to each bite.
-
Whipped Cream: A fluffy dollop creates a delightful contrast to the creamy texture of the mini cheesecakes, making each mouthful feel indulgent and festive.
-
Chocolate Ganache: Rich, velvety chocolate ganache drizzled on top transforms your mini cheesecakes into a decadent treat, perfect for chocolate lovers.
-
Caramel Sauce: Drizzling warm caramel over the cheesecake cups adds a touch of sweetness and a sticky, luxurious feel that pairs perfectly with the creamy filling.
-
Coffee or Espresso: A cup of freshly brewed coffee brings out the flavors of the cheesecake, providing a rich and warm counterpoint that will keep everyone coming back for more.
-
Ice Cream: Serve your mini cheesecake cups alongside a scoop of vanilla or caramel ice cream for a delightful contrast in temperature and texture, making each bite even more memorable.
-
Chocolate-Covered Almonds: The crunch of these treats complements the softness of the mini cheesecakes, creating an interesting texture play that’ll impress your guests.
Mini Cheesecake Cups Variations & Substitutions
Feel free to get creative and elevate your Mini Cheesecake Cups with these delightful twists that will tantalize your taste buds!
- Chocolate Crust: Swap graham cracker crumbs for crushed Oreos for a rich, chocolatey base. Perfect for chocolate lovers!
- Fruit-Infused Filling: Mix in puree from strawberries or raspberries to the cream cheese for a fruity zing. This adds a burst of color and flavor to your mini treats.
- Sugar-Free: Use a sugar substitute like erythritol or monk fruit to keep the sweetness without the calories. Your health-conscious friends will thank you!
- Nutty Twist: Incorporate almond flour instead of graham crackers for a gluten-free crust. This nutty flavor adds depth and a delightful crunch.
- Spiced Pumpkin: For a seasonal twist, add pumpkin puree and spices to the filling for a mini pumpkin cheesecake. Cozy flavors perfect for fall gatherings!
- Caramel Swirl: Drizzle caramel sauce into the filling before baking for a sweet surprise in each bite. This enhances the creaminess and adds warmth!
- Zesty Lemon: Add lemon zest and a squeeze of fresh lemon juice to the filling for a refreshing twist. It pairs beautifully with fresh berries on top.
No matter how you choose to customize your Mini Cheesecake Cups, they will be a delightful treat that reminds you of home. For more delectable variations, check out our delicious Apple Crumble Cheesecake or try another spin with this version of the classic cheesecake! Enjoy your baking adventure!
Make Ahead Options
These Mini Cheesecake Cups are perfect for meal prep, allowing you to enjoy a sweet treat with minimal last-minute effort! You can prepare the crust up to 24 hours in advance; simply mix the graham cracker crumbs with melted butter, press it into liners, and refrigerate. The cheesecake filling can be made and stored in the fridge for up to 3 days before baking—just ensure it’s in an airtight container to maintain its creamy texture. When you’re ready to serve, spoon the filling into the crusts and bake them fresh. This way, you’ll achieve just as delicious results without the stress of last-minute baking!
Mini Cheesecake Cups Recipe FAQs
How do I select ripe ingredients for my Mini Cheesecake Cups?
Absolutely! For your cheesecakes, ensure your full-fat cream cheese is at room temperature to avoid lumps in the filling. When choosing eggs, look for large eggs with clean shells—these should be stored in the refrigerator until use to maintain freshness. If you’re adding fresh fruit as toppings, opt for ripe, vibrant berries or fruit with no dark spots.
What’s the best way to store Mini Cheesecake Cups?
You can store your mini cheesecake cups in an airtight container in the refrigerator for up to one week. This keeps their creamy texture intact and ensures they remain delicious. If you’re making them in advance, I suggest placing parchment paper between layers to prevent sticking.
Can I freeze my Mini Cheesecake Cups?
Absolutely! Freezing is a great option for these treats. Simply wrap each Mini Cheesecake Cup tightly in plastic wrap, then place them in a freezer-safe container or bag. They can be frozen for up to three months. When you’re ready to enjoy them, thaw them overnight in the refrigerator for the best texture.
What should I do if my Mini Cheesecake Cups crack during baking?
Very! To prevent cracks, be sure to cool your cheesecakes gradually in the oven with the door slightly open, allowing them to adjust to the temperature change slowly. Additionally, avoid overmixing after adding the eggs; this can lead to bubbles that cause cracking. Remember, even if they do crack, they will still taste fantastic!
Are there any dietary considerations for pets or allergies with Mini Cheesecake Cups?
Definitely! This recipe contains dairy and eggs, which are not suitable for pets. Always keep your Mini Cheesecake Cups out of reach of furry friends. If anyone in your household has allergies, consider using alternatives, such as dairy-free cream cheese and egg substitutes, to make these delectable treats more inclusive.
Can I customize the toppings for my Mini Cheesecake Cups?
Very much so! The more the merrier when it comes to toppings! You can add a variety of flavors—think fresh fruits, whipped cream, chocolate ganache, or even flavored syrups. Just ensure that any fresh fruit you add is washed and cut into manageable pieces for easy serving. Enjoy experimenting!
Irresistible Mini Cheesecake Cups: Quick, Creamy Delights
Ingredients
Equipment
Method
- In a mixing bowl, combine graham cracker crumbs and melted unsalted butter until completely mixed. Line a muffin pan with paper or silicone liners, then press the crumb mixture firmly into the bottom of each liner, forming a solid crust. Bake in a preheated oven at 350°F (175°C) for about 8 minutes, until slightly golden and set.
- In a large mixing bowl, beat softened full-fat cream cheese using an electric mixer until smooth and creamy. Gradually add granulated sugar and vanilla extract, continuing to mix until fully combined. Lightly whisk the large eggs in a separate bowl, then slowly add them, mixing gently to avoid overmixing.
- Carefully spoon the cream cheese filling over the pre-baked crusts in the muffin pan, filling each liner about three-quarters full. Bake at 350°F (175°C) for approximately 22 minutes, until the centers are set but still slightly jiggly.
- Once baked, turn off the oven and crack the oven door open slightly. Let the mini cheesecakes rest in the warm oven for 15-20 minutes to cool gradually.
- After cooling, transfer the Mini Cheesecake Cups to an airtight container and refrigerate for at least 2 hours.
- Once chilled, top each cheesecake with fresh fruit, a dollop of whipped cream, or a drizzle of chocolate ganache.
Leave a Reply