
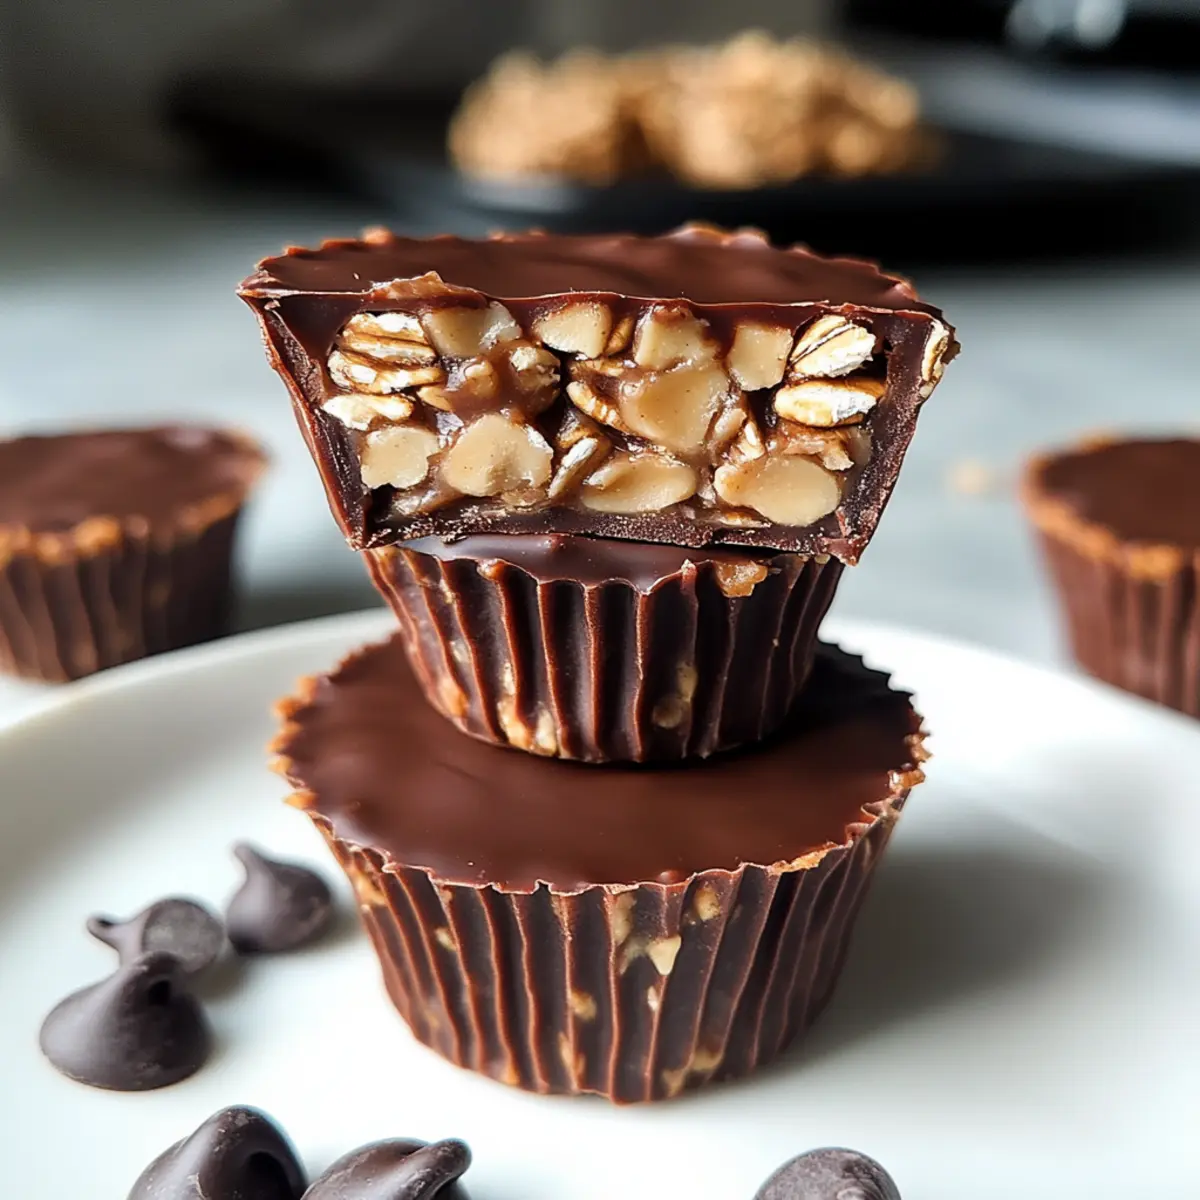
As the midday slump hits and my mind whirls with thoughts of what to snack on, a delightful solution suddenly strikes—No-Bake Peanut Butter Oat Cups! These sweet little delights manage to blend wholesome rolled oats and creamy peanut butter without ever turning on the oven. They’re a blissful balance of healthy indulgence that fits perfectly into our busy lifestyles. Not only do they come together in a flash, but they’re also gluten-free if you use certified oats, making them suitable for everyone. Their chewy texture paired with the rich flavor of peanut butter and a hint of chocolate? Irresistible! Whether you’re packing them for the kids’ lunch or craving a late-night treat, you’ll want to keep scrolling to discover how to whip up these enticing oat cups effortlessly!
Why Will You Love These Oat Cups?
Simplicity at Its Best: You only need a handful of ingredients for a delicious treat.
Chewy Delight: Each bite offers a satisfying texture that combines creaminess and crunch, perfect for snacking.
Versatile Creation: Customize with your favorite nut butter or add-ins like dried fruit for even more taste.
Healthy Energy Boost: With protein and healthy fats, these cups are great for refueling after a workout—think of them as a quicker alternative to my Chocolate Peanut Butter treats!
No Oven Needed: Enjoy the freedom of a no-bake recipe that saves time while still yielding scrumptious results.
Dive into these oat cups for a recipe that not only satisfies your cravings but also nourishes your body!
No-Bake Peanut Butter Oat Cups Ingredients
For the Cups
- Rolled Oats – Provide the base structure and comforting texture; opt for gluten-free oats if needed.
- Natural Peanut Butter – Adds creaminess with a rich flavor; choose a natural variety without added sugars for the healthiest option.
- Honey or Maple Syrup – Serves as a natural sweetener to bind the ingredients; substitute with maple syrup for a vegan option.
- Dark Chocolate Chips (optional) – Adds a sweet, indulgent touch; feel free to leave them out for a lower-calorie treat.
- Vanilla Extract (optional) – Enhances flavor with a warm depth; go for pure vanilla extract for the best results.
- Pinch of Salt – Balances the sweetness; this is essential especially if you’re using unsalted peanut butter.
These delicious No-Bake Peanut Butter Oat Cups come together quickly, satisfying those sweet cravings while keeping it nutritious!
Step‑by‑Step Instructions for No-Bake Peanut Butter Oat Cups
Step 1: Mix the Base Ingredients
In a large mixing bowl, combine 2 cups of rolled oats, 1 cup of natural peanut butter, and 1/2 cup of honey (or maple syrup). Use a sturdy spatula or wooden spoon to mix the ingredients until they are well incorporated. The mixture should look cohesive and slightly sticky. It typically takes about 2-3 minutes of mixing to achieve the perfect consistency.
Step 2: Add Flavor Enhancements
Next, stir in 1 teaspoon of vanilla extract and a pinch of salt to enhance the flavor of your No-Bake Peanut Butter Oat Cups. Continue mixing until the vanilla and salt are evenly distributed throughout the mixture, ensuring a burst of flavor in every bite. This additional step should take roughly 1-2 minutes.
Step 3: Incorporate Chocolate Chips
If you’re using dark chocolate chips for an extra touch of sweetness, gently fold in 1/2 cup at this stage. Use a spatula to evenly distribute the chocolate chips within the mixture without over-mixing, which may break them apart. Aim for a lovely mix where you can spot the chocolate chips peeking through, taking about 1-2 minutes to get it right.
Step 4: Press into a Dish
Line an 8×8 inch baking dish with parchment paper for easy removal. Spoon the oat mixture into the dish and press it down firmly using your hands or the back of a spatula to create an even layer. Make sure the mixture is well compacted, as this will help the cups hold their shape. This process should take around 3-4 minutes.
Step 5: Chill to Set
Place the pressed mixture in the refrigerator and allow it to chill for at least 30 minutes. This setting time is crucial for the No-Bake Peanut Butter Oat Cups to firm up properly. After chilling, you should be able to see and feel that the mixture has become firmer, making it easier to cut.
Step 6: Slice and Serve
Once set, remove the baking dish from the refrigerator. Lift out the parchment paper for easy access, and cut into squares or bars, depending on your preference. Serve them immediately or store them in an airtight container in the fridge for up to a week. Enjoy your healthy, delicious No-Bake Peanut Butter Oat Cups!
Expert Tips for No-Bake Peanut Butter Oat Cups
-
Mix Just Right: Ensure all ingredients are combined without overmixing to achieve that perfect chewy texture in your No-Bake Peanut Butter Oat Cups.
-
Chill Long Enough: Allow the cups to set for at least 30 minutes in the refrigerator to ensure they hold their shape and are easy to cut.
-
Parchment Perk: Line your dish with parchment paper before pressing in the mixture. This makes for hassle-free removal and cleanup.
-
Customize Wisely: Feel free to swap peanut butter for almond or sunflower butter, but remember that the texture will change slightly.
-
Measure Accurately: Use a proper measuring cup for sticky ingredients like peanut butter and honey to avoid mess and ensure consistent results.
These tips will help you whip up the best No-Bake Peanut Butter Oat Cups for your snacking pleasure!
How to Store and Freeze No-Bake Peanut Butter Oat Cups
Fridge: Store the No-Bake Peanut Butter Oat Cups in an airtight container in the refrigerator for up to 1 week. This keeps them fresh and delightful for snacking!
Freezer: For longer storage, freeze the oat cups in a single layer on a baking sheet until firm, then transfer them to a freezer bag for up to 3 months. Thaw in the fridge before enjoying.
Reheating: If you prefer a warm treat, microwave individual cups for about 10-15 seconds. This will slightly soften them while retaining that delicious chewiness.
Enjoy Freshness: Best consumed cold or at room temperature, these cups make a great go-to snack anytime!
What to Serve with No-Bake Peanut Butter Oat Cups
Elevate your snacking experience with delightful accompaniments that balance flavors and textures perfectly.
-
Fresh Fruit Salad: A colorful medley of seasonal fruits adds refreshing juiciness that cuts through the richness of the oat cups.
-
Greek Yogurt Parfait: Layer creamy Greek yogurt with berries and a drizzle of honey for a protein-packed treat that complements the chewiness of the cups.
-
Nutty Trail Mix: A crunchy blend of nuts and seeds provides a satisfying contrast, making it a perfect snack alongside your peanut butter delights.
-
Milk or Non-Dairy Alternative: Pair with a glass of cold milk for a classic combo that enhances the creamy texture of the oat cups while providing a little indulgence.
-
Chocolate Dipped Strawberries: Indulge your sweet tooth with fresh strawberries dipped in chocolate; the fruity freshness harmonizes beautifully with the peanut butter flavor.
-
Coffee or Tea: A warm beverage like herbal tea or a rich cup of coffee can provide a cozy complement to your sweet snack, creating a comforting afternoon ritual.
With these pairing options, your No-Bake Peanut Butter Oat Cups will shine even brighter, transforming a simple treat into a satisfying experience!
Make Ahead Options
These No-Bake Peanut Butter Oat Cups are perfect for meal prep, allowing you to whip up a batch ahead of time for quick snacks throughout the week. You can prepare the mixture up to 24 hours in advance and refrigerate it before pressing it into your dish. Simply combine the rolled oats, peanut butter, honey (or maple syrup), and any optional add-ins, then refrigerate the mixture to let the flavors meld. When you’re ready to serve, press it into the lined baking dish and chill it for at least 30 minutes to set. To maintain quality, store the cut squares in an airtight container in the fridge, and they’ll stay delicious for up to a week! This makes them an excellent choice for busy weeknights or planned snacks.
No-Bake Peanut Butter Oat Cups Variations
Feel free to explore new flavors and textures as you customize your No-Bake Peanut Butter Oat Cups!
- Nut Butter Twist: Substitute almond butter or cashew butter for a unique taste that brings warmth and creaminess.
- Fruit Fusion: Add dried fruits like apricots or raisins to introduce natural sweetness and delightful chewiness, enhancing the overall experience.
- Nutty Crunch: Incorporate chopped nuts like walnuts or pecans for an additional crunchy texture that complements the soft oats beautifully.
- Coconut Lover: Mix in shredded coconut for a tropical twist that pairs perfectly with peanut butter, creating a delightful combination.
- Chocolate Delight: Amp up the chocolaty goodness by adding cocoa powder to the mixture or using chocolate protein powder for a fabulous protein boost.
- Spice It Up: Sprinkle in a dash of cinnamon or nutmeg for a warm spice that brings cozy vibes to your healthy treat.
- Seed Power: Add chia seeds or flaxseeds for an extra nutritional punch, giving your cups even more health benefits.
- Heat It Up: For a spicy kick, mix in a pinch of cayenne pepper or a sprinkle of chili powder—a daring but delicious twist!
By incorporating these delightful variations, you can create a personalized snack that keeps your taste buds excited. Pair them with a side of fresh fruit or enjoy them with a slice of my delicious French Butter Cake for a balanced treat!
No-Bake Peanut Butter Oat Cups Recipe FAQs
What kind of oats should I use for No-Bake Peanut Butter Oat Cups?
I recommend using rolled oats for the best texture and flavor. If you’re avoiding gluten, opt for certified gluten-free oats to ensure they’re safe for your diet.
How should I store my No-Bake Peanut Butter Oat Cups?
To keep your oat cups fresh, store them in an airtight container in the refrigerator for up to 1 week. They stay tasty and chewy this way, making them a convenient snack!
Can I freeze No-Bake Peanut Butter Oat Cups? How?
Absolutely! For longer storage, freeze the cups by laying them in a single layer on a baking sheet until firm. After they’ve hardened, transfer them to a freezer bag. They can be stored in the freezer for up to 3 months! Just remember to thaw them in the fridge before enjoying them.
What should I do if the mixture is too dry?
If you find that the mixture seems too dry when you’re mixing, try adding a tablespoon of warm water or a bit more peanut butter. This will help bind the ingredients together better, ensuring a chewy texture.
Can I make these oat cups nut-free?
Yes! You can substitute peanut butter with sunflower seed butter or tahini to make them nut-free. Just keep in mind that it may slightly alter the flavor, but they’ll still be delicious!
Is it safe for pets to consume any part of No-Bake Peanut Butter Oat Cups?
It’s best to avoid giving these oat cups to pets since peanut butter can contain xylitol, which is harmful to dogs. Always check the labels, and consult your veterinarian for pet-safe treats.
Delicious No-Bake Peanut Butter Oat Cups for Quick Energy
Ingredients
Equipment
Method
- In a large mixing bowl, combine rolled oats, natural peanut butter, and honey (or maple syrup). Mix until cohesive and slightly sticky, about 2-3 minutes.
- Stir in vanilla extract and a pinch of salt, ensuring even distribution of flavor, about 1-2 minutes.
- Gently fold in dark chocolate chips if using, aiming for an even distribution, about 1-2 minutes.
- Line an 8x8 inch baking dish with parchment paper. Spoon the mixture into the dish and press down firmly to create an even layer, about 3-4 minutes.
- Place the dish in the refrigerator and allow to chill for at least 30 minutes.
- Once set, lift the parchment paper out and cut into squares or bars. Serve immediately or store in an airtight container in the fridge for up to a week.
Leave a Reply