
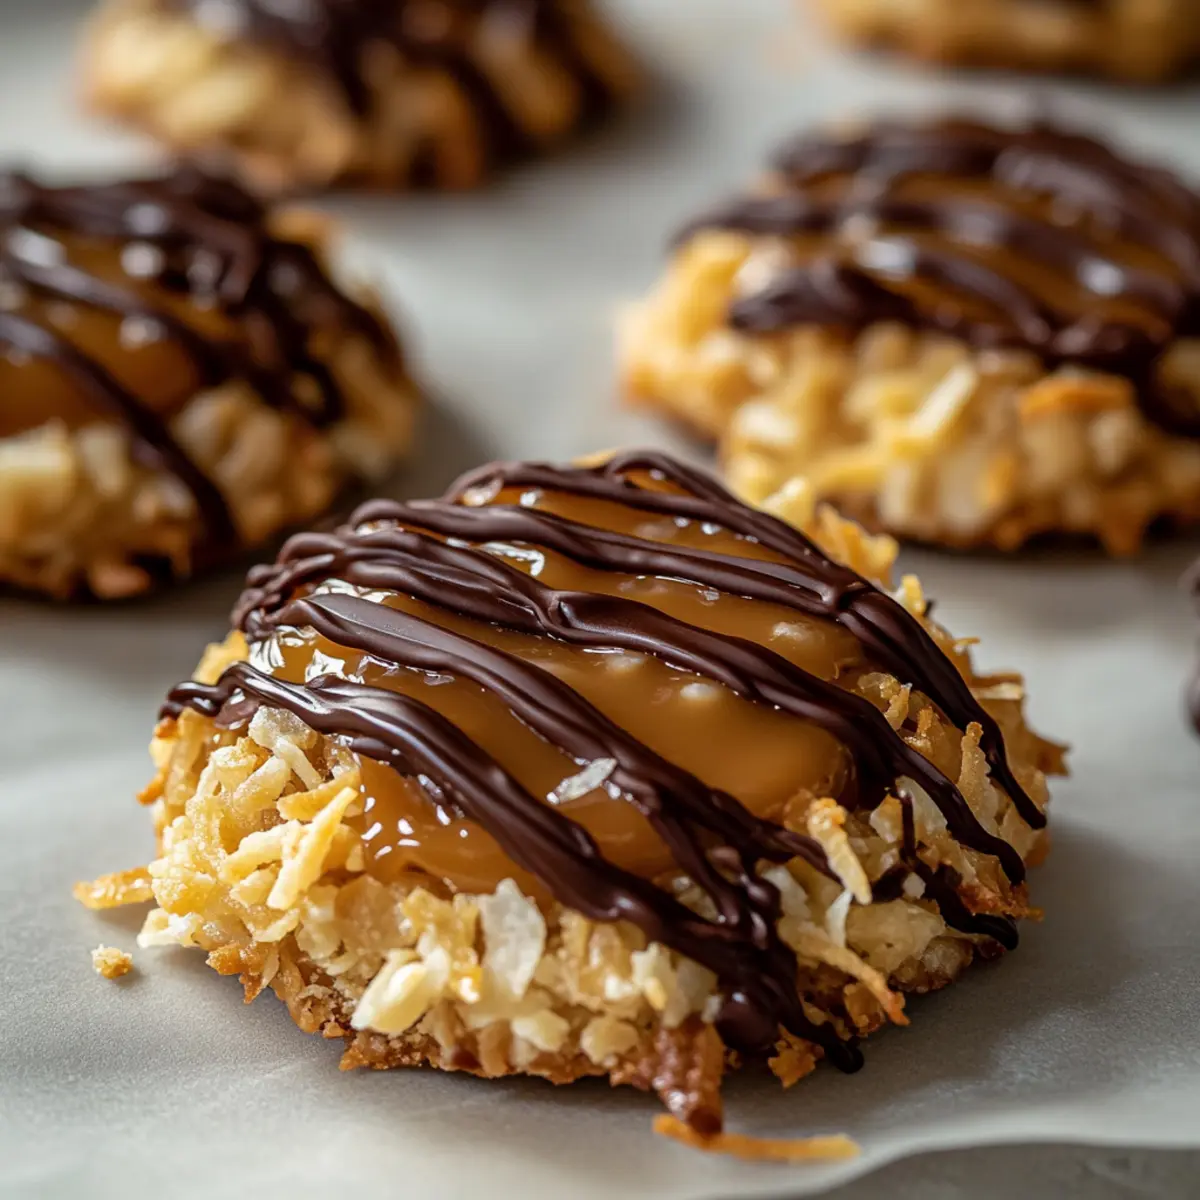
As I sat with a cup of coffee, the unmistakable scent of caramel wafted through the kitchen, transporting me back to my childhood and those beloved Girl Scout Samoa cookies. These No-Bake Samoa Cookies capture that nostalgic goodness without the fuss of an oven, making them an effortless way to indulge. Imagine a chewy, caramel-laced cookie studded with toasted coconut and coated in rich chocolate—pure bliss! With their quick preparation and gluten-free twist, they’re perfect for impressing guests at parties or simply satisfying a late-night craving. Ready to recreate this delightful treat that brings smiles to faces and warms the heart? Let’s dive into the delicious world of No-Bake Samoa Cookies!
Why are No-Bake Samoa Cookies a hit?
Effortless Preparation: No baking means minimal cleanup, letting you enjoy more time with loved ones and less time in the kitchen.
Packed with Flavor: Each bite bursts with sweet caramel, toasted coconut, and rich chocolate—a divine trifecta that satisfies your sweet tooth!
Versatile Options: Customize these cookies with nutty additions or a salted caramel twist, ensuring there’s something for everyone.
Perfect for Parties: These cookies are not just treats but conversation starters; they’ll undoubtedly steal the show at any gathering.
Gluten-Free Delight: With simple substitutions, such as using gluten-free chocolate, everyone can enjoy these decadent bites.
Get ready to share smiles and happiness with each delicious mokey!
No-Bake Samoa Cookies Ingredients
For the Cookies
• Unsweetened Shredded Coconut – Provides the signature coconut flavor; you can substitute with sweetened coconut for a sweeter taste.
• Soft Caramel Candies – Adds delightful sweetness; try brands like Werther’s or Kraft for the best results.
• Milk or Heavy Cream – Aids in achieving a creamy caramel texture; use cream for richness or milk for a lighter option.
• Semi-Sweet Chocolate Chips – Coats the cookies and balances the sweetness of the caramel; consider dark chocolate for a less sweet bite.
• Coconut Oil or Butter – Helps melt the chocolate smoothly; choose based on what you have on hand.
• Vanilla Extract – Boosts the overall flavor; it’s a must for enhancing the caramel.
• Salt – Just a pinch to bring out the sweetness and flavors beautifully.
Get ready to indulge in these No-Bake Samoa Cookies that will surely delight your taste buds!
Step‑by‑Step Instructions for No-Bake Samoa Cookies
Step 1: Toast Coconut
Start by heating a skillet over medium heat. Add the unsweetened shredded coconut and toast it for about 3–5 minutes, stirring frequently, until it turns golden brown and fragrant. Keep an eye on it to prevent burning. Once toasted, transfer it to a plate and let it cool completely.
Step 2: Melt Caramel
In a medium saucepan, combine the soft caramel candies and milk or heavy cream. Place the saucepan over low heat, stirring consistently for about 5 minutes until the mixture is smooth and fully melted. Once melted, stir in the vanilla extract and a pinch of salt to enhance the flavors of your no-bake Samoa cookies.
Step 3: Combine Coconut & Caramel
Remove the saucepan from heat and fold the cooled, toasted coconut into the smooth caramel mixture. Mix thoroughly until the coconut is evenly coated with caramel. This combination creates the chewy, sweet filling that defines your no-bake Samoa cookies, so ensure it is well-mixed and invitingly sticky.
Step 4: Shape Cookies
Prepare a baking sheet by lining it with parchment paper for easy removal. Using a spoon, drop generous spoonfuls of the caramel-coconut mixture onto the lined sheet, gently pressing them flat to form cookie shapes. Optionally, create a small hole in the center of each cookie just like traditional Samoas.
Step 5: Melt Chocolate
In a microwave-safe bowl, combine the semi-sweet chocolate chips and coconut oil or butter. Heat in the microwave in 20-second intervals, stirring after each interval until the chocolate appears smooth and melted. This melted chocolate will provide a delightful coating for your no-bake Samoa cookies.
Step 6: Dip and Drizzle
Take each cookie and dip the bottom into the melted chocolate, ensuring it is fully coated. Place the dipped cookies back on the parchment-lined baking sheet. Once dipped, use a spoon to drizzle any remaining melted chocolate over the tops of the cookies for an extra layer of indulgence.
Step 7: Set and Serve
Transfer the baking sheet to the refrigerator and allow the cookies to chill for about 15–20 minutes, or until the chocolate has firmly set. Once set, your no-bake Samoa cookies are ready to be served! You can store any leftovers in an airtight container or indulge right away.
How to Store and Freeze No-Bake Samoa Cookies
Room Temperature: Store your cookies in an airtight container at room temperature for up to 3 days. This keeps them fresh while maintaining their chewy texture.
Fridge: For longer freshness, place the cookies in the refrigerator, where they’ll stay delicious for up to one week.
Freezer: If you wish to preserve them even longer, you can freeze the cookies for up to two months. Just ensure they’re in a sealed container or freezer bag to prevent freezer burn.
Reheating: While they are best enjoyed straight from the fridge or at room temperature, if you prefer a softer texture, let them sit out for a few minutes before indulging in these delightful No-Bake Samoa Cookies.
Make Ahead Options
These No-Bake Samoa Cookies are ideal for busy home cooks looking to save time during hectic weeks! You can prepare the caramel-coconut mixture and shape the cookies up to 24 hours in advance; simply store them in an airtight container in the refrigerator to maintain their delicious flavor and texture. When you’re ready to enjoy, melt the chocolate, dip the bottoms of each cookie, and drizzle the tops as directed. For best results, refrigerate them again for about 15–20 minutes after dipping to ensure the chocolate sets perfectly. By prepping ahead, you’ll have delightful treats waiting to impress your guests or satisfy your sweet tooth—deliciousness awaits!
Expert Tips for No-Bake Samoa Cookies
-
Quality Counts: Choose high-quality chocolate to prevent unwanted blooming—those white streaks that can ruin cookie aesthetics.
-
Watch the Toasting: Stir the shredded coconut frequently while toasting to ensure it turns golden brown, not burnt, for that perfect flavor.
-
Stickiness Control: If the caramel-coconut mixture is too sticky to handle, wet your hands with a little water while shaping the cookies to ease the process.
-
Make Ahead: These No-Bake Samoa Cookies can easily be made in advance and stored for several days, perfect for stress-free entertaining.
-
Gluten-Free Assurance: When creating your no-bake Samoa cookies, ensure that both the caramel and chocolate are certified gluten-free for everyone to enjoy!
No-Bake Samoa Cookies Variations
Feel free to explore these delightful variations that will add even more excitement to your No-Bake Samoa Cookies!
-
Salted Caramel Twist: Sprinkle flaky sea salt on top before the chocolate sets for an added savoriness that enhances sweetness. This simple touch takes the flavor profile up a notch!
-
White Chocolate Swap: Replace dark chocolate with white chocolate for a creamier, sweeter treat that kids and adults alike will adore. It’s a perfect option for those with a sweet tooth!
-
Nutty Addition: Add chopped pecans or almonds to the caramel-coconut mixture for some delightful crunch. The nuts will bring a lovely texture and additional flavor to each bite.
-
Sugar-Free Version: Use sugar-free alternatives for chocolate and caramel to suit dietary needs. You can still enjoy a sweet treat without the guilt—just make sure to choose high-quality substitutes!
-
Extra Thick Base: Double the chocolate layer for a more indulgent cookie experience that will leave everyone wanting more. This extra richness will transform your cookies into a decadent delight.
-
Spicy Kick: Want to heat things up? Add a pinch of cayenne pepper to the melted chocolate for a surprising yet delicious spicy twist!
-
Flavor Infusion: Experiment with flavored extracts like almond or hazelnut for a unique twist on the traditional vanilla. Just a drop can elevate the flavor to new heights!
-
Coconut Chocolate Drizzle: For a tropical touch, top with a mix of melted white chocolate and coconut flakes for an elegant finish. This will not only enhance flavor but also boost aesthetics!
Whichever variation you choose, these No-Bake Samoa Cookies will remain an indulgent delight. For more inspiration or classic versions, check out my other beloved recipes like Chocolate Chip Cookies. Happy baking!
What to Serve with No-Bake Samoa Cookies
As you gather around to share the excitement of these delicious treats, think about what could make your indulgence even sweeter.
-
Rich Coffee: The bold flavors of coffee balance the sweetness of the cookies, enhancing that delightful caramel taste.
-
Vanilla Ice Cream: A scoop of smooth vanilla ice cream pairs wonderfully, providing a creamy contrast to the chewy texture of the cookies.
-
Fresh Berries: The tartness of strawberries or raspberries cuts through the richness, adding a refreshing and vibrant touch to your dessert spread.
-
Chocolate Milkshake: Indulge in a chocolate milkshake for a decadent pairing that echoes the cookies’ flavor and elevates dessert time to a treat.
-
Chilled Milk: A classic pairing that never goes wrong—dipping these cookies into a glass of cold milk will remind you of childhood simple pleasures.
-
Coconut-Pineapple Smoothie: Blend coconut and pineapple for a tropical twist; it complements the coconut in the cookies and adds a fruity flair to the experience.
-
Perfectly Brewed Herbal Tea: For a sophisticated touch, serve with chamomile or peppermint tea, creating a soothing undertone against the delightful texture of the cookies.
Imagine these pairings inviting smiles and joyous moments, turning a simple treat into a delightful occasion shared with loved ones.
No-Bake Samoa Cookies Recipe FAQs
How do I choose the right shredded coconut?
Absolutely! For the best flavor in your No-Bake Samoa Cookies, I recommend using unsweetened shredded coconut. It provides a rich texture without adding excess sweetness. If you prefer a sweeter cookie, you can opt for sweetened coconut, just keep in mind it may affect the overall sugar content.
How should I store my No-Bake Samoa Cookies?
Store your cookies in an airtight container at room temperature for up to 3 days to keep them chewy and delicious. For longer storage, pop them in the fridge, where they’ll stay fresh for up to one week. Wrapping them well or using a sealed container helps maintain that delightful texture.
Can I freeze No-Bake Samoa Cookies?
Certainly! To freeze your No-Bake Samoa Cookies, first allow them to set completely in the fridge. Then, place them in a single layer in an airtight container, with parchment paper between layers to prevent sticking. These delightful treats can be frozen for up to two months. Just thaw them in the fridge whenever you’re ready to enjoy!
What should I do if my caramel mixture is too sticky?
If you find that your caramel mixture is overly sticky, don’t panic! Simply wet your hands lightly with water when shaping the cookies. This will help prevent the mixture from sticking to your hands and make the shaping process a breeze.
Are there any allergens to consider when making these cookies?
Very much! When preparing your No-Bake Samoa Cookies, be mindful of any allergies. Ensure that the caramel and chocolate you use are certified gluten-free if you’re making these for anyone sensitive to gluten. If you want a dairy-free version, look for dairy-free chocolate and coconut cream, and carefully check the labels of all ingredients to avoid any unwanted allergens.
Can I modify this recipe for dietary preferences?
Yes, indeed! You can make the No-Bake Samoa Cookies sugar-free by substituting with sugar-free chocolate and caramel alternatives. Additionally, consider adding chopped nuts for an extra crunch or using white chocolate instead of dark for a sweeter option. The beauty of this recipe is its versatility, so don’t hesitate to make it your own!
No-Bake Samoa Cookies: Irresistibly Chewy & Chocolatey Delights
Ingredients
Equipment
Method
- Start by heating a skillet over medium heat. Add the unsweetened shredded coconut and toast it for about 3–5 minutes, stirring frequently, until it turns golden brown and fragrant. Once toasted, transfer it to a plate and let it cool completely.
- In a medium saucepan, combine the soft caramel candies and milk or heavy cream. Place the saucepan over low heat, stirring consistently for about 5 minutes until the mixture is smooth and fully melted. Stir in the vanilla extract and a pinch of salt.
- Remove the saucepan from heat and fold the cooled, toasted coconut into the caramel mixture. Mix thoroughly until the coconut is evenly coated.
- Prepare a baking sheet by lining it with parchment paper. Using a spoon, drop spoonfuls of the caramel-coconut mixture onto the lined sheet, pressing them flat to form cookie shapes.
- In a microwave-safe bowl, combine the semi-sweet chocolate chips and coconut oil or butter. Heat in the microwave in 20-second intervals, stirring after each until smooth and melted.
- Dip the bottom of each cookie into the melted chocolate, ensuring it is fully coated. Place dipped cookies back on the baking sheet, and drizzle remaining chocolate over the tops.
- Transfer the baking sheet to the refrigerator and chill for 15–20 minutes, or until the chocolate has firmly set.
Leave a Reply