
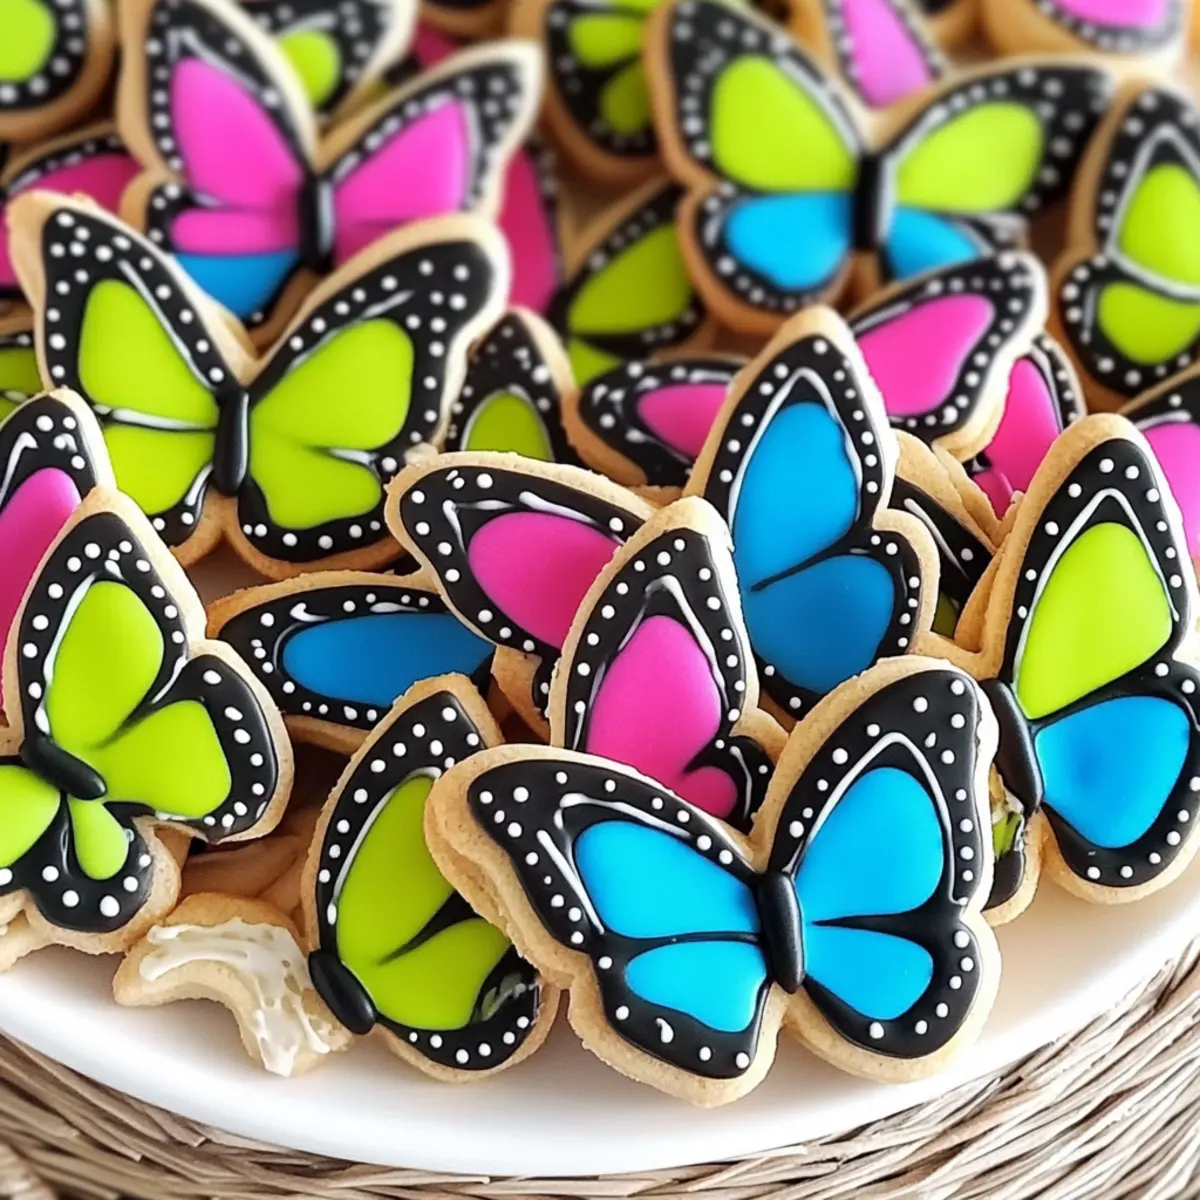
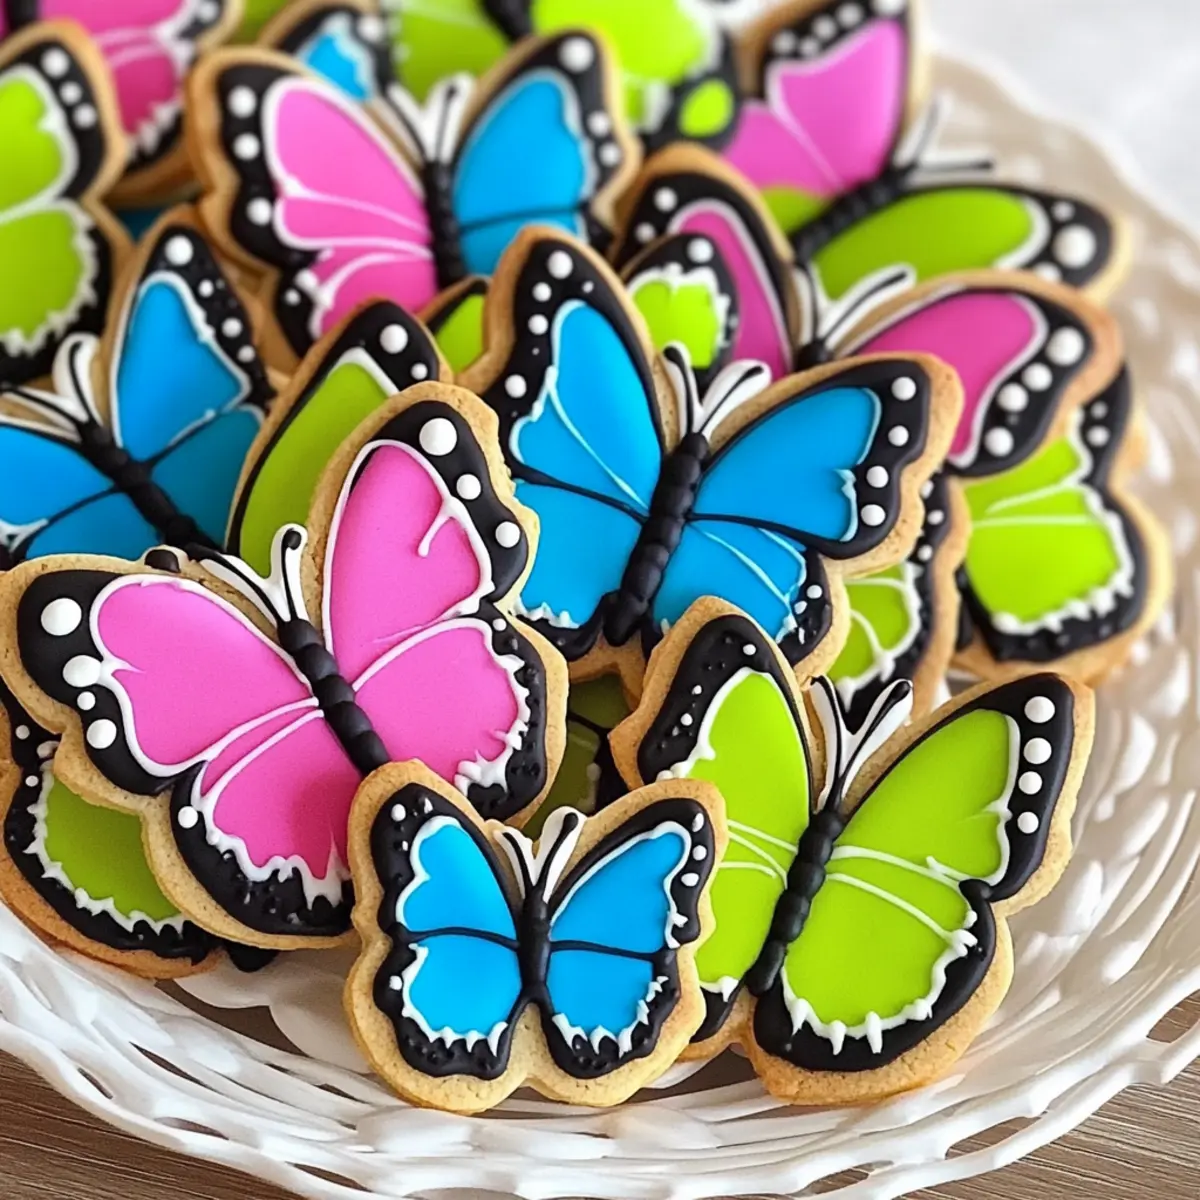
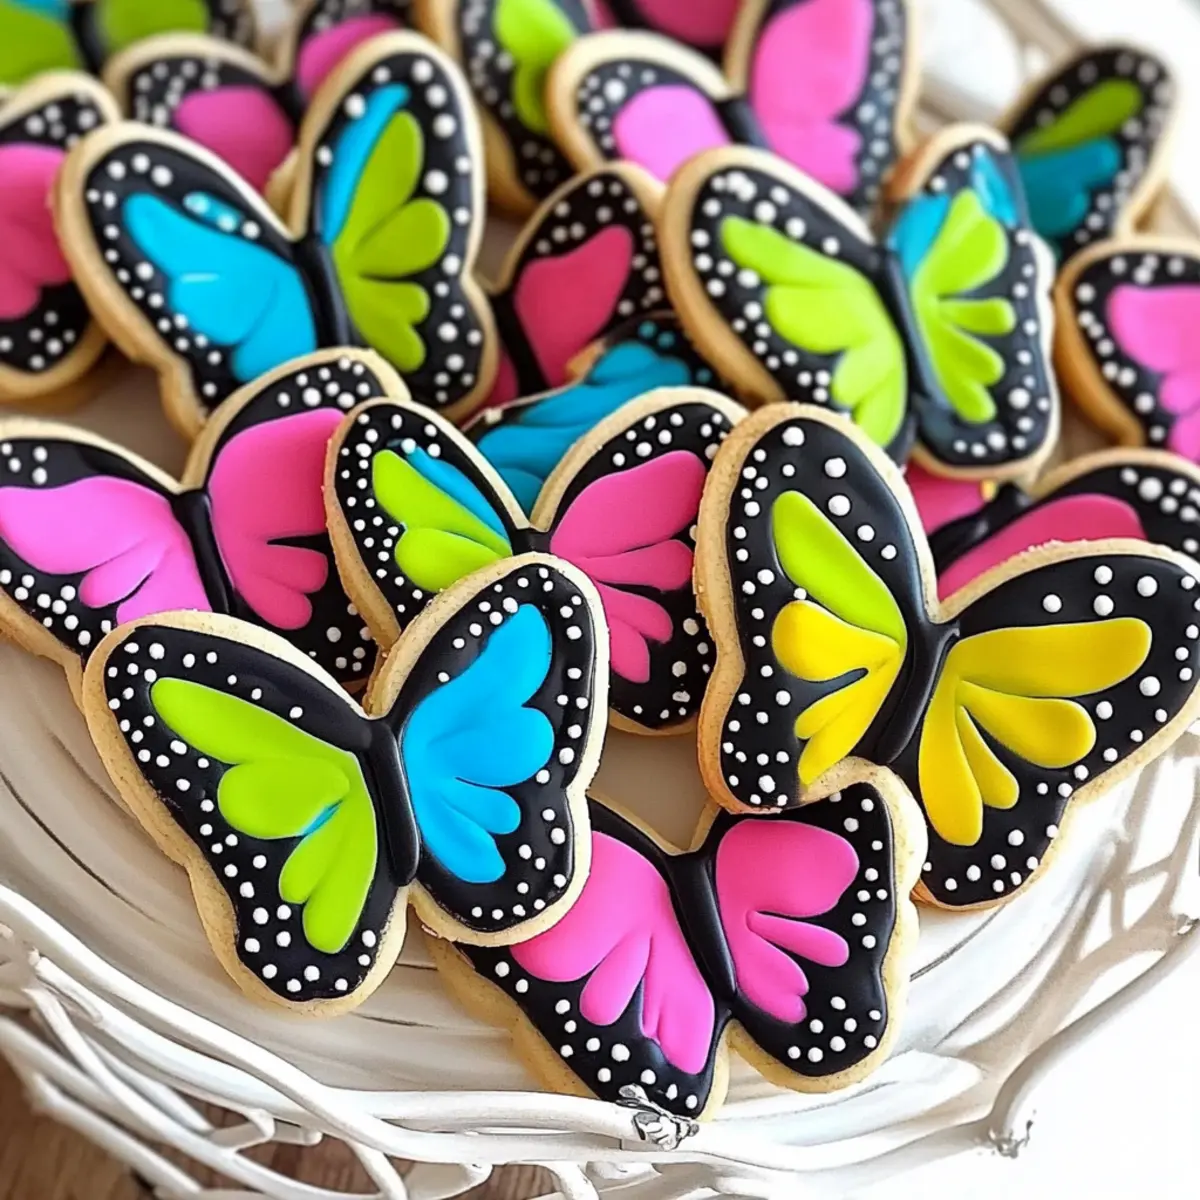
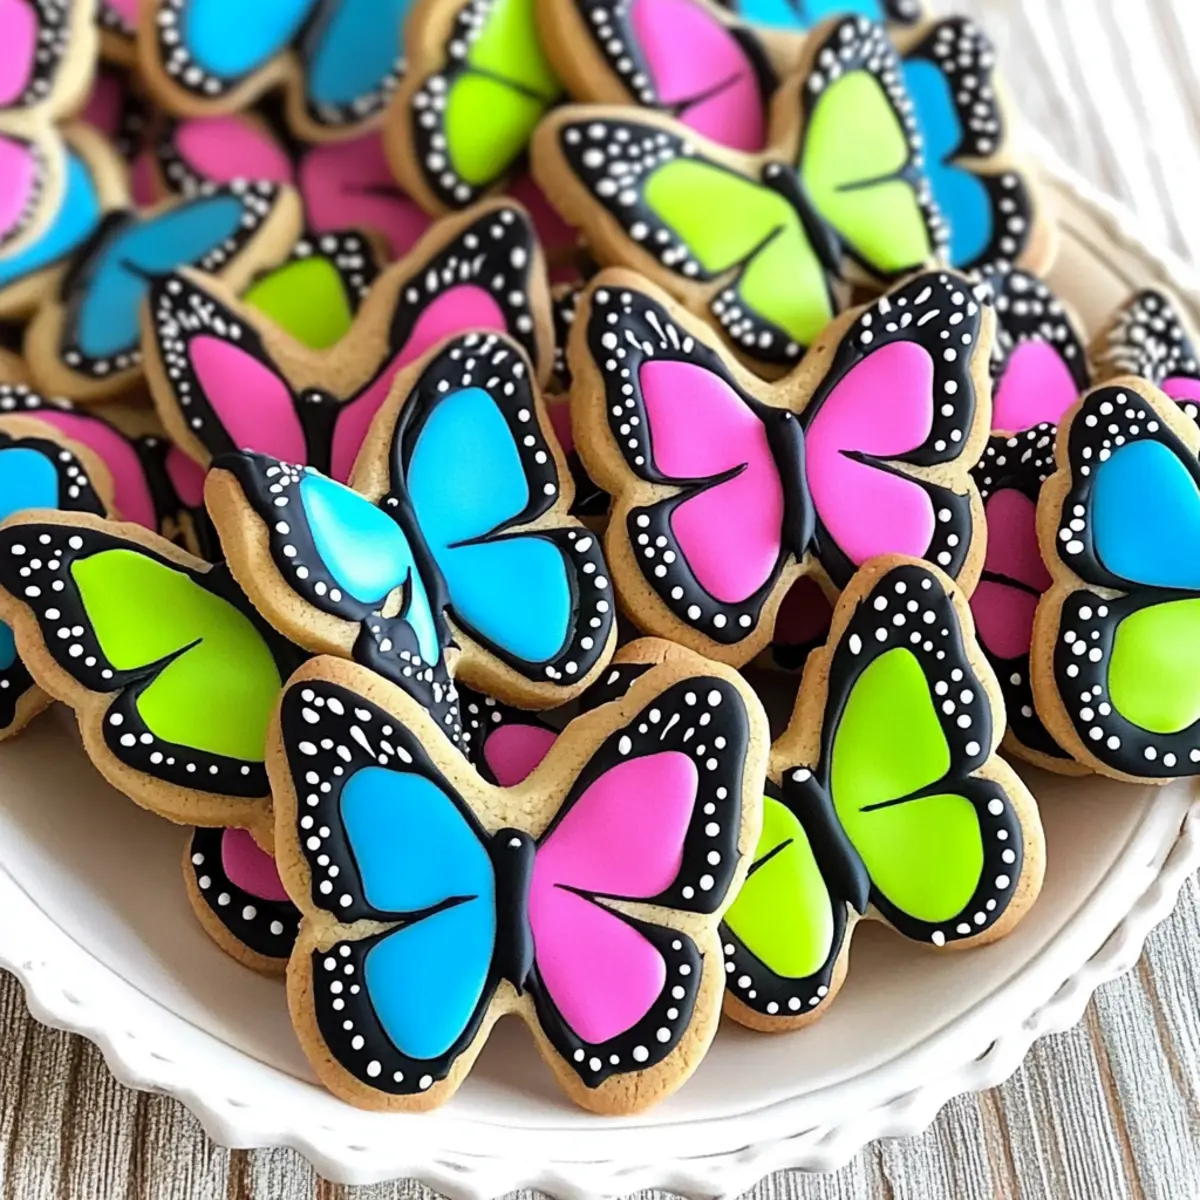
As I stood in my kitchen, the vibrant colors of sprinkles and icing danced around me like a painter’s palette, ready to transform plain cookies into delightful works of art. Today, I’m excited to share my recipe for Simple Butterfly Cookies—charming little treats that are perfect for any occasion or just a fun afternoon of baking. Not only do these cookies bring a splash of color to your dessert table, but they’re also easy to whip up, making them a stress-free way to impress guests or enjoy with the family. With their buttery vanilla flavor and whimsical designs achieved through a simple royal icing technique, these cookies are sure to spark joy. Who needs to settle for store-bought when a bite of homemade can brighten your day? Ready to flutter into the world of cookie decorating? Let’s get started!
Why Are These Cookies So Fun to Make?
Visual Appeal: The bright colors and intricate butterfly designs will enchant everyone, making them an eye-catching centerpiece for any gathering.
Easy Technique: With a simple royal icing method, you’ll find decorating enjoyable rather than daunting, perfect for bakers of all skill levels.
Customization Galore: Feel free to get creative! Experiment with different colors or flavor variations, like lemon or almond, to match your theme or mood.
Wholesome Treats: Made with simple ingredients, these cookies are a delightful twist on everyday sweets, ensuring your snacks are made from scratch.
Stress-Free Baking: Quick and effortless, you’ll have these delicious treats ready to dazzle in no time. Looking for more cookie inspiration? Try making some delightful Chocolate Chip Cookies or even festive Samoa Cookies for your next occasion!
Simple Butterfly Cookie Ingredients
• Here’s everything you need to create these delightful treats!
For the Cookie Base
- All-Purpose Flour – A versatile flour that gives the cookies their structure; substitute with gluten-free flour for a friendly option.
- Granulated Sugar – Provides sweetness; remember that adjusting sugar could alter texture, so use as directed.
- Unsalted Butter – Adds richness and a buttery flavor, ensuring the cookies are soft and delectable.
- Egg – Acts as a binder; for a vegan alternative, try a flax egg.
- Vanilla Extract – Infuses a lovely aroma and flavor; feel free to use almond extract for a new twist.
For the Royal Icing
- Powdered Sugar – Creates a sweet, smooth icing essential for decorating.
- Meringue Powder – Helps achieve a stable icing; use egg white powder as a substitute if preferred.
- Water – To adjust the icing consistency; using filtered water can enhance the purity of flavor.
For the Colors
- Gel Food Colors (Americolor Recommended) – Brightens the cookies beautifully; natural colors can be used for an organic alternative.
By gathering these ingredients, you’re all set to embark on a colorful baking adventure with the family! Enjoy your time creating these Simple Butterfly Cookies that are sure to bring smiles all around!
Step‑by‑Step Instructions for Simple Butterfly Cookies
Step 1: Make the Cookie Dough
In a large mixing bowl, cream together 1 cup of softened unsalted butter and 1 cup of granulated sugar until light and fluffy, about 3-5 minutes. Beat in 1 egg and 2 teaspoons of vanilla extract, mixing well. Gradually add in 2 ½ cups of all-purpose flour and a pinch of salt, mixing until a soft dough forms. Chill the dough in the refrigerator for at least 30 minutes to firm up.
Step 2: Roll and Cut the Cookies
Preheat your oven to 350°F (175°C) and line baking sheets with parchment paper. On a lightly floured surface, roll out the chilled cookie dough to about ¼ inch thick. Use butterfly-shaped cookie cutters to cut out shapes, placing them on the prepared baking sheets with about 2 inches of space between each cookie. Bake for 8-10 minutes until the edges are lightly golden and the centers remain soft.
Step 3: Prepare the Royal Icing
While the cookies cool, prepare the royal icing by mixing 4 cups of powdered sugar with 3 tablespoons of meringue powder and 6 tablespoons of water. Whisk until smooth and glossy, achieving a consistency that flows easily but holds shape when piped. Divide the icing into bowls and color each with your chosen gel food colors, stirring until fully combined.
Step 4: Outline the Cookie Wings
Using a piping bag fitted with a fine tip, carefully outline the top part of each butterfly cookie with black royal icing. Then, flood the center sections with pink icing, ensuring there’s sufficient icing to hold its shape. This base will be the perfect canvas for more colorful designs on your Simple Butterfly Cookies.
Step 5: Create Designs with Wet Icing
While the icing is still wet, use a needle tool or toothpick to create swirls, lines, or dots by gently dragging through different colors. This step allows you to create beautiful patterns and make each butterfly unique. Work quickly to avoid the icing drying out before you finish decorating.
Step 6: Finish the Bottom Wings
Repeat the outlining and flooding process for the bottom wings, using your preferred colors. Don’t forget to add small white dots for additional detail, creating the look of delicate butterfly patterns. Allow the icing to set for about 30 minutes before moving on to the next step.
Step 7: Pipe the Cookie Body
With black royal icing, pipe a thin line down the center of the butterfly cookie to form the body. Add black sanding sugar while the icing is still wet to create texture and sparkle. This detail will make your Simple Butterfly Cookies exquisite and full of character.
Step 8: Dry the Cookies
Once all decorations are complete, let the cookies dry on a wire rack for a minimum of 4-6 hours, or overnight for best results. This drying time ensures that the royal icing hardens properly and maintains its beautiful glossy finish, making your butterfly cookies ready for display or gifting.
How to Store and Freeze Simple Butterfly Cookies
Airtight Container: Store your decorated Simple Butterfly Cookies in an airtight container at room temperature for up to one week to preserve their freshness and design.
Freezer Storage: If you’d like to keep them longer, freeze the cookies in a single layer on a baking sheet, then transfer to a freezer bag for up to 3 months.
Thawing Instructions: To thaw, simply take the cookies out and let them sit at room temperature for about 30 minutes before serving, ensuring they return to their delightful texture.
Avoid Moisture: When thawing or storing, avoid direct sunlight and moisture, as they can affect the shiny finish of your royal icing decorations.
Simple Butterfly Cookies Variations
Customize your Simple Butterfly Cookies to suit any occasion and satisfy every sweet tooth! Embrace your creative side and let these fun variations bring even more joy to your baking experience.
-
Gluten-Free: Substitute regular flour with a gluten-free blend to make these delightful cookies suitable for everyone.
-
Nutty Flavors: Add a pinch of almond extract or finely chopped nuts to the dough for a new flavor dimension that adds warmth and richness.
-
Vibrant Colors: Try different gel food colors to match any theme or season—pastels for spring, bold hues for parties, or autumnal tones for fall gatherings.
-
Cookie Sandwiches: Spread a layer of your favorite frosting or ganache between two butterfly cookies for a delightful twist. These decadent treats are great for birthdays!
-
Chocolate-Dipped Treats: Dip half of each cookie in melted chocolate and sprinkle with sea salt for a sophisticated flavor pairing that adds an indulgent touch.
-
Fruity Infusion: Incorporate citrus zest, like lemon or orange, into the cookie dough for a refreshing burst of flavor that complements the sweetness.
-
Scented Icing: Infuse your royal icing with flavorings like lavender or mint. This unexpected twist can turn a familiar cookie into an aromatic delight.
Looking for more dessert options? These Samoa Cookies are a fun and delicious treat, or you can try these classic Chocolate Chip Cookies for a timeless favorite!
Expert Tips for Simple Butterfly Cookies
-
Consistency Matters: Ensure your royal icing is at the right consistency—15 seconds for flooding and 20 seconds for detailing. This will help you achieve the best results without the icing running off.
-
Clean Edges: Use a needle tool to cleanup any messy lines or swirls while the icing is still wet. This simple technique will refine your designs and make your butterfly cookies look professionally done.
-
Layer Drying: Allow each layer of icing to dry for at least 30 minutes before adding additional colors or details, ensuring cleaner and more vibrant designs for your Simple Butterfly Cookies.
-
Chill Dough: Don’t skip chilling your cookie dough! This step not only helps maintain shape while baking but also results in a better-textured cookie.
-
Piping Tip: For even more control during decorating, choose a piping bag fitted with a small round tip. It makes outlining and detailing easier, giving your butterfly cookies a polished finish.
What to Serve with Colorful Butterfly Cookies
Indulge in a delightful array of pairings that will perfectly complement your whimsical treats and elevate your sweet gatherings.
-
Milk: This classic pairing works wonders, enhancing the cookies’ buttery flavor and providing a comforting touch. A tall glass of cold milk is always a crowd-pleaser, ideal for both kids and kids-at-heart.
-
Fresh Fruit Salad: A refreshing blend of berries, melons, and citrus adds vibrancy to your dessert table. The natural sweetness and acidity contrast beautifully with the sugary cookies, creating a balanced treat.
-
Whipped Cream: Light and airy, this fluffy topping can bring an extra layer of sweetness to your cookies. Try it alongside a scoop of vanilla ice cream for a truly dreamy dessert experience.
-
Tea Party Vibes: Brew a selection of herbal or fruit-flavored teas to sip while enjoying your sugary creations. The warmth and aromatic qualities of the tea will perfectly harmonize with the sweetness of the cookies.
-
Chocolate Ganache Dip: For a rich twist, serve a small bowl of chocolate ganache for dipping. This luscious combination brings a decadent experience, inviting you to indulge in every bite.
-
Vanilla Ice Cream: Scoops of creamy vanilla ice cream create a delightful contrast with the crunchy texture of your butterfly cookies. Don’t forget to drizzle with warm chocolate sauce for an extra touch of indulgence!
Bring these flavorful companions to your table, and watch as your colorful butterfly cookies transform into a centerpiece of joy and celebration!
Make Ahead Options
These Simple Butterfly Cookies are a fantastic choice for meal prep lovers! You can prepare the cookie dough up to 24 hours in advance by wrapping it tightly in plastic wrap and refrigerating it. For the royal icing, you can mix it and store it in an airtight container at room temperature for up to 3 days—just give it a gentle stir before using to restore its consistency. When it’s time to bake, just roll out the chilled dough, cut out your shapes, and follow the decorating instructions. This way, you save precious time while ensuring the cookies are just as delightful when served!
Simple Butterfly Cookies Recipe FAQs
What type of flour is best for Simple Butterfly Cookies?
For the best results, use all-purpose flour as it provides the perfect structure for these cookies. If you’re looking for a gluten-free alternative, substitute with a 1:1 gluten-free flour blend, which works wonderfully in this recipe.
How long do these cookies stay fresh?
Store your decorated Simple Butterfly Cookies in an airtight container at room temperature for up to one week. To maintain their delightful appearance and flavor, avoid exposing them to moisture or direct sunlight during storage.
Can I freeze Simple Butterfly Cookies?
Absolutely! To freeze, place the cookies in a single layer on a baking sheet for a few hours until they’re firm, then transfer them into a freezer bag. They can be kept frozen for up to 3 months. Just remember to thaw them at room temperature for about 30 minutes before enjoying!
What should I do if my royal icing is too runny?
If your royal icing is too runny, simply add more powdered sugar, a tablespoon at a time, until you achieve the desired consistency. It should flow smoothly but hold its shape when piped. If it’s too thick, add a few drops of water to thin it out, stirring well.
Can I use gel food colors for a different look?
Yes! Gel food colors are wonderful to use in this recipe, as they provide vibrant shades without watering down your icing. For a natural alternative, consider using vegetable or fruit-based dyes, though results may vary in intensity.
Are these cookies safe for pets or people with allergies?
These Simple Butterfly Cookies contain ingredients like butter, sugar, and eggs, which are not suitable for pets, especially dogs and cats. If you’re cooking for someone with allergies, consider checking each ingredient and substituting as necessary, such as using egg replacers or dairy-free butter if needed.
Vibrant Simple Butterfly Cookies for Every Celebration
Ingredients
Equipment
Method
- Cream together the softened butter and granulated sugar until light and fluffy, about 3-5 minutes. Beat in the egg and vanilla extract. Gradually add the flour and a pinch of salt until a soft dough forms. Chill the dough in the refrigerator for at least 30 minutes.
- Preheat your oven to 350°F (175°C) and line baking sheets with parchment paper. Roll out the chilled dough to about 1/4 inch thick. Use butterfly-shaped cookie cutters to cut out shapes, placing them on prepared baking sheets with 2 inches of space between each cookie. Bake for 8-10 minutes until edges are lightly golden.
- While the cookies cool, prepare the royal icing by mixing powdered sugar, meringue powder, and water. Whisk until smooth and glossy. Divide the icing into bowls and color each with gel food colors.
- Using a piping bag, outline the top part of each butterfly with black icing. Flood the center sections with pink icing, ensuring there's sufficient icing to hold its shape.
- While the icing is still wet, use a needle tool to create designs by gently dragging through the different colors. Work quickly to avoid drying.
- Outline and flood the bottom wings with preferred colors and add small white dots for detail. Allow the icing to set for about 30 minutes.
- Pipe a thin line down the center of each butterfly cookie to form the body and add black sanding sugar for texture. Allow the cookies to dry on a wire rack for 4-6 hours or overnight for best results.
Leave a Reply