
As the sun blazes down and the scent of barbecues wafts through the air, there’s nothing quite like a refreshing dessert to sweeten those vibrant summer days. Enter my No Bake Cheesecake Ice Cream Cones – the ultimate 4th of July treat that requires no oven, allowing your kitchen to stay cool while you whip up something delightful. Each cone is filled with a fluffy, creamy cheesecake mixture and adorned with colorful sprinkles, a luscious drizzle of blueberry sauce, and a cheerful maraschino cherry on top. Not only is this treat easy to make and a guaranteed crowd-pleaser, but it also adds a fun, festive flair that your guests will love. Ready to impress everyone at your summer gathering? Keep scrolling to discover how to make this delightful dessert!
Why Choose 4th of July Cheesecake Cones?
Simplicity at Its Best: You won’t need to turn on the oven for these delightful cones; they come together effortlessly, making them perfect for busy summer days.
Crowd-Pleasing Appeal: Filled with rich cheesecake goodness and topped with vibrant sprinkles, they are sure to be a hit at your next barbecue or picnic.
Versatile Toppings: Feel free to switch up the sauces and sprinkles to match any holiday or event—try strawberry sauce or themed sprinkles for a unique twist!
Light and Refreshing: The fluffy Cool Whip mixed with cream cheese creates a satisfying texture, perfect for cooling down on a hot summer afternoon.
Quick Assembly: Make ahead of time and fill the cones just before serving, allowing you to focus on spending quality time with friends and family.
Perfect for Everyone: Whether you’re a baking novice or a seasoned chef, these cones embody the joy of homemade treats without the hassle. Check out other desserts like my Apple Crumble Cheesecake for more easy summer inspirations!
4th of July Cheesecake Ice Cream Cones Ingredients
• For the Cheesecake Filling
- Cream Cheese – Provides structure and creamy texture; ensure it’s softened for easy mixing.
- Sugar – Adds sweetness to balance the tanginess of the cream cheese; can adjust amount to taste.
- Cool Whip – Lightens the cheesecake mixture and adds a fluffy texture; if unavailable, use homemade whipped cream.
- Vanilla – Enhances flavor; use pure vanilla extract for the best taste.
• For the Cones
- Ice Cream Cones – Serves as the base and vessel for the cheesecake; regular sugar cones work best for stability and flavor.
- White Chocolate Candy Melts – Coats the top of the cones for a sweet and festive touch; use vanilla candiquik as a substitute.
- Vegetable Shortening – Used to thin the melted chocolate for easier dipping; optional, can omit for a thicker coating.
• For the Toppings
- 4th of July Sprinkles – Decorative element to enhance visual appeal; use any festive sprinkles for different occasions.
- Maraschino Cherries – Decorative topping that adds sweetness and color; can replace with fresh cherries if desired.
- Blueberry Sauce – Drizzle for added flavor and color contrast; can substitute with any fruit sauce.
Step‑by‑Step Instructions for 4th of July Cheesecake Ice Cream Cones
Step 1: Melt the Chocolate
In a microwave-safe bowl, combine white chocolate candy melts and optional vegetable shortening. Microwave in 30-second intervals, stirring between each, until completely melted and smooth, about 1-2 minutes total. Keep an eye on the chocolate to prevent overheating. This will create a luscious coating for your ice cream cones.
Step 2: Prepare the Cones
Once the chocolate is melted, dip the top of each sugar cone into the chocolate, allowing excess to drip off. Immediately roll the dipped edge in 4th of July sprinkles for a festive touch and set them upright on a cooling rack or parchment paper. Let the chocolate harden at room temperature while you prepare the cheesecake filling.
Step 3: Mix the Cheesecake Filling
In a mixing bowl, use an electric mixer to beat together the softened cream cheese, sugar, and vanilla extract until the mixture is smooth and fluffy, about 2-3 minutes. Ensure there are no lumps in your mixture; the cheesecake filling should have a creamy texture that fills those delightful cones perfectly.
Step 4: Fold in the Cool Whip
Gently fold the Cool Whip into the cream cheese mixture using a spatula until well combined. Take care not to deflate the whipped topping, as this will keep your cheesecake light and airy. The final filling should be fluffy and ready to pipe into the cones.
Step 5: Chill if Necessary
If your cheesecake mixture feels too soft, place it in the refrigerator for 1-2 hours to firm up slightly. This step is especially helpful to ensure the mixture holds its shape when piped into the cones. Ensure it’s covered with plastic wrap to keep it fresh while chilling.
Step 6: Pipe the Cheesecake
Transfer the chilled cheesecake mixture into a piping bag fitted with a star tip. Just before serving, carefully pipe the filling into each prepared sugar cone until they are generously filled. This keeps the cones crisp and prevents sogginess, allowing for that crunchy, delightful bite.
Step 7: Add Toppings
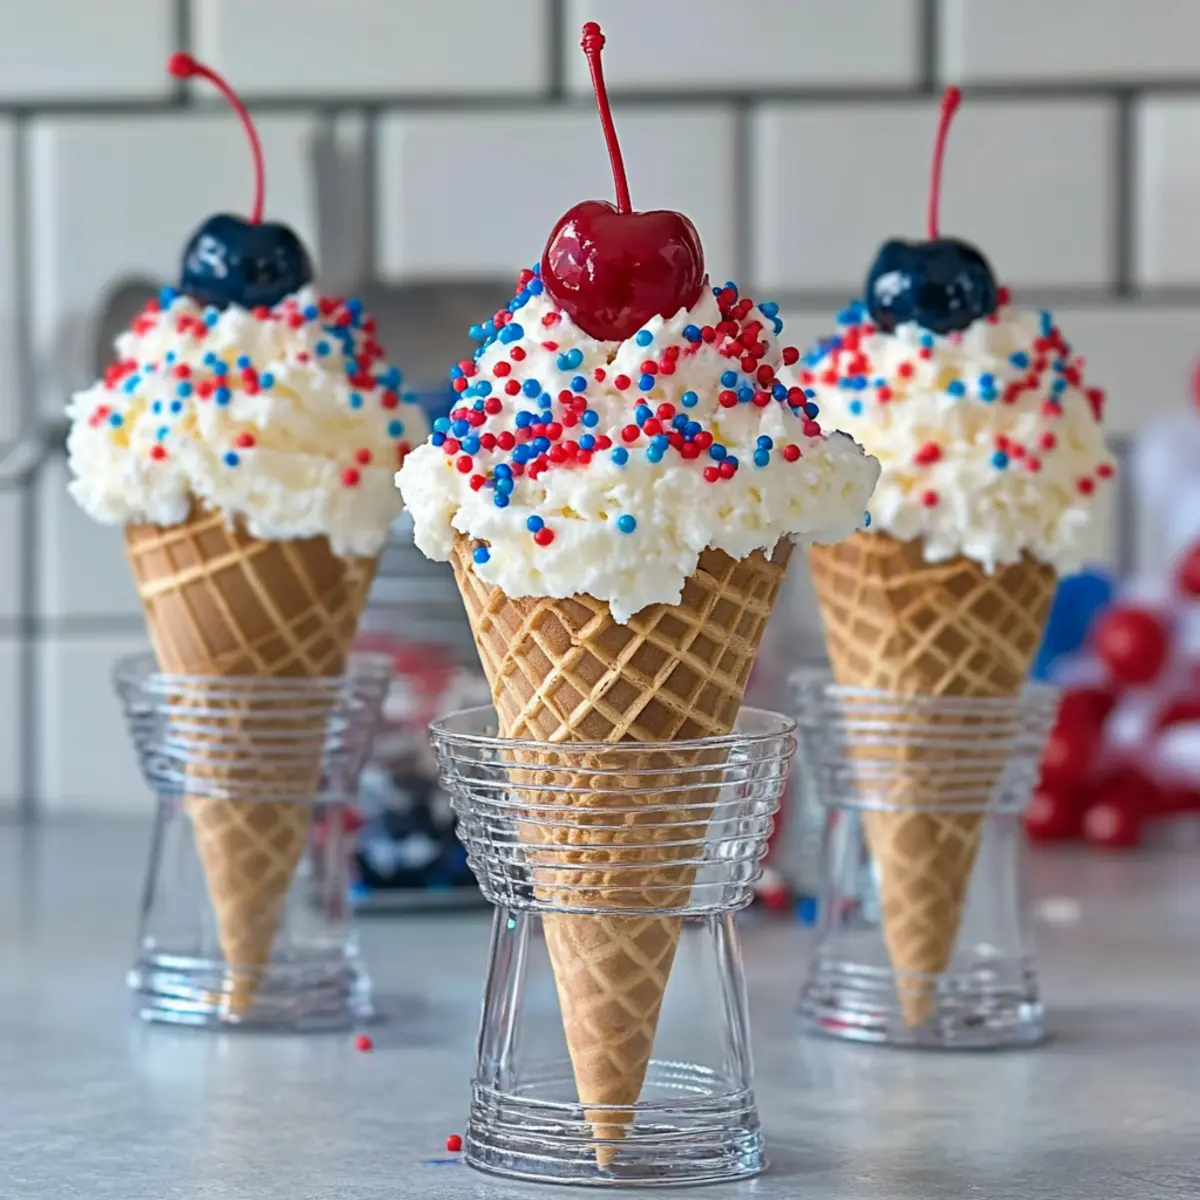
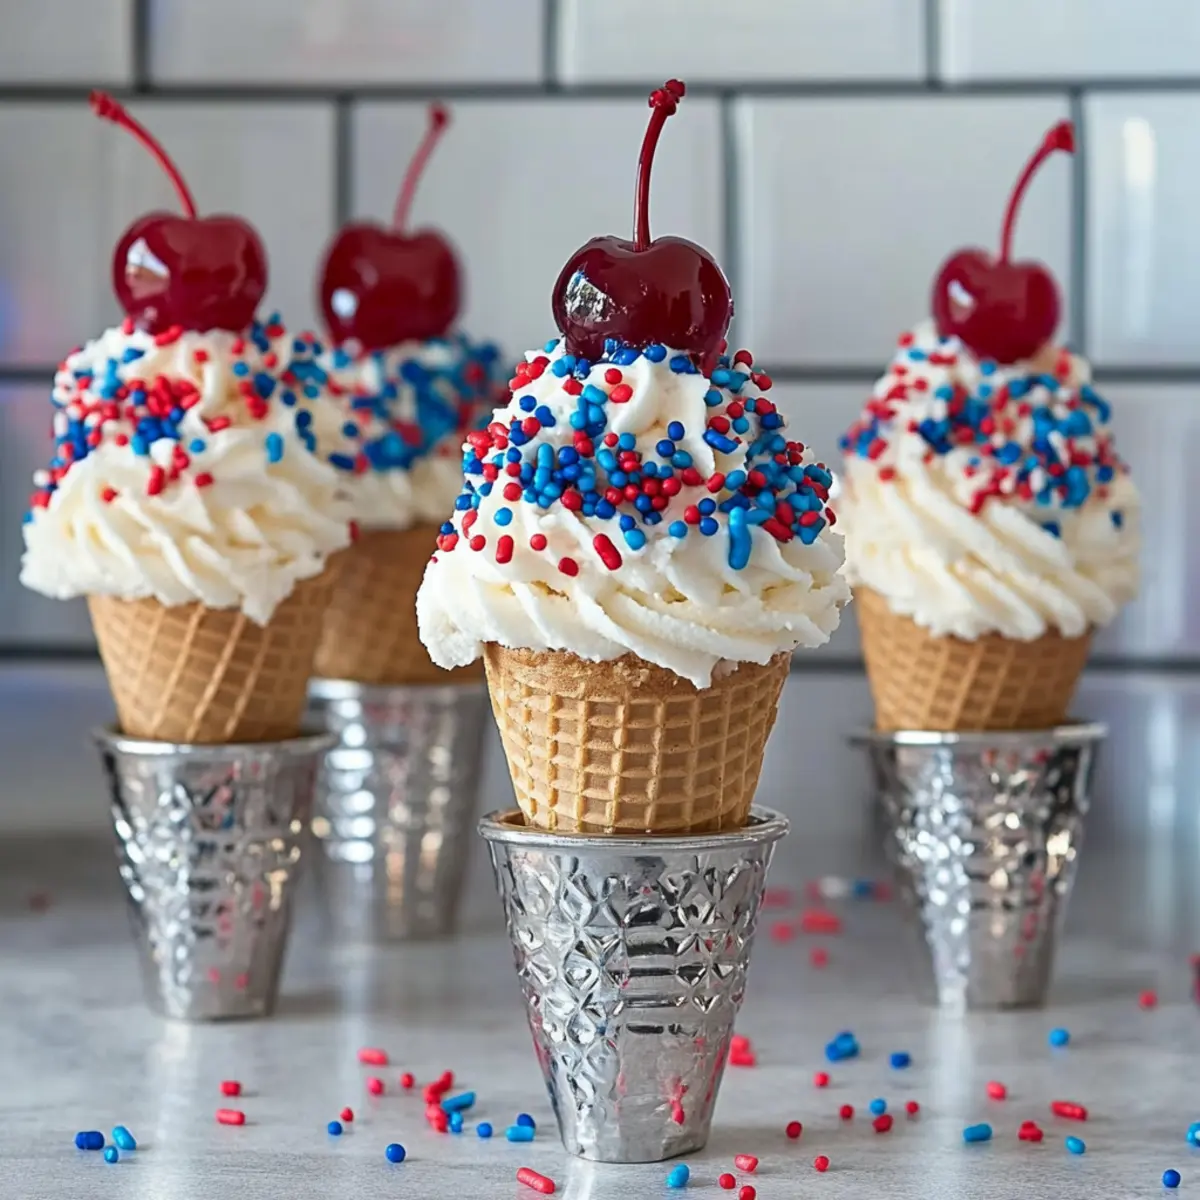
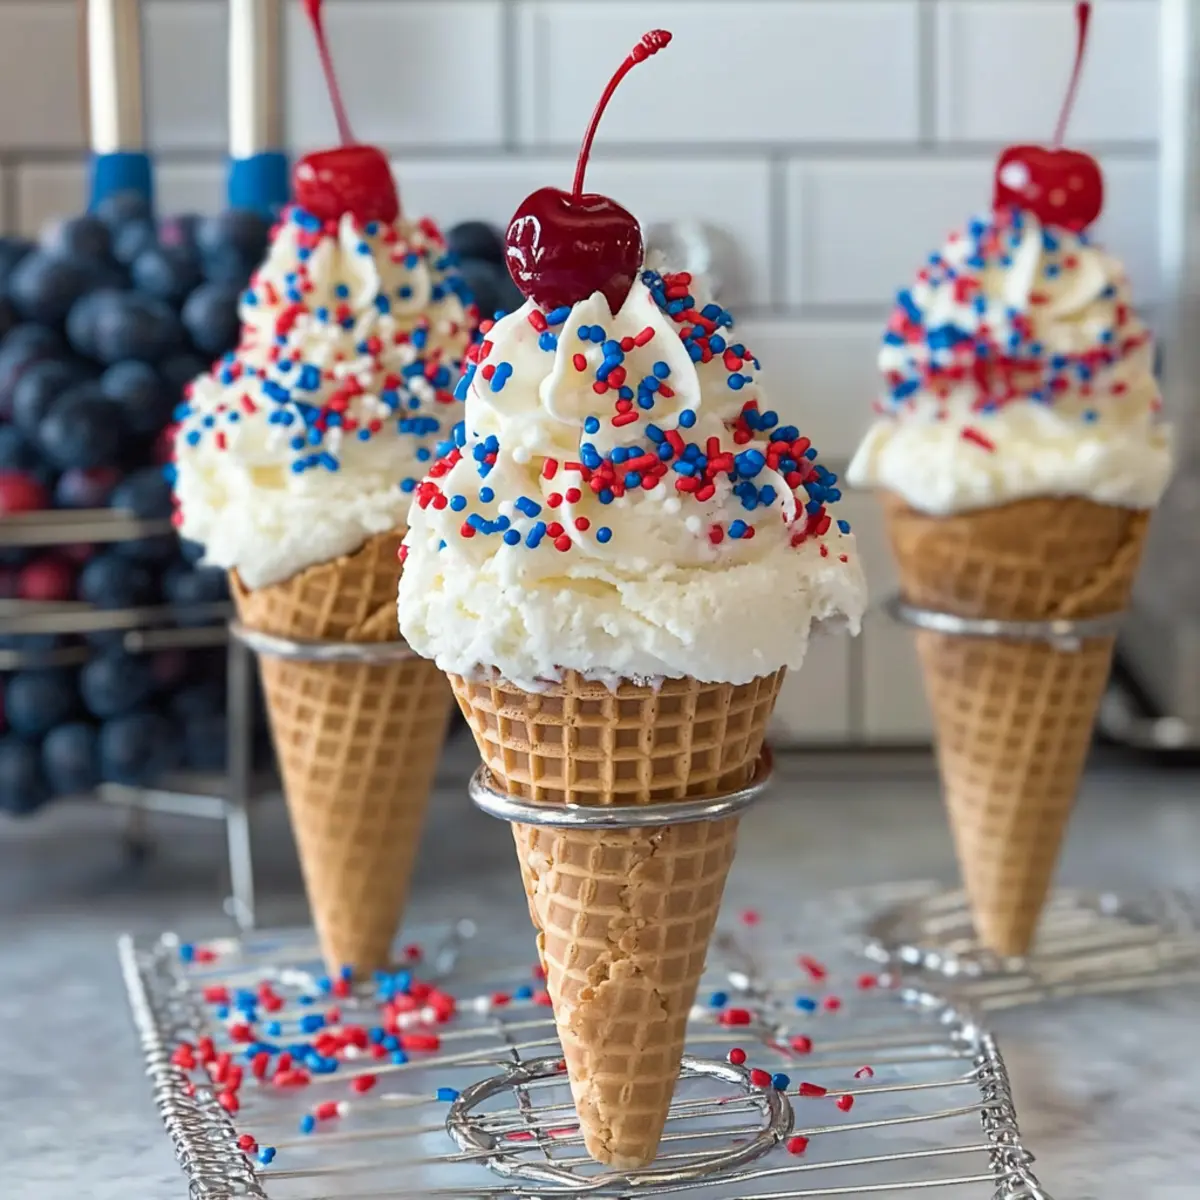
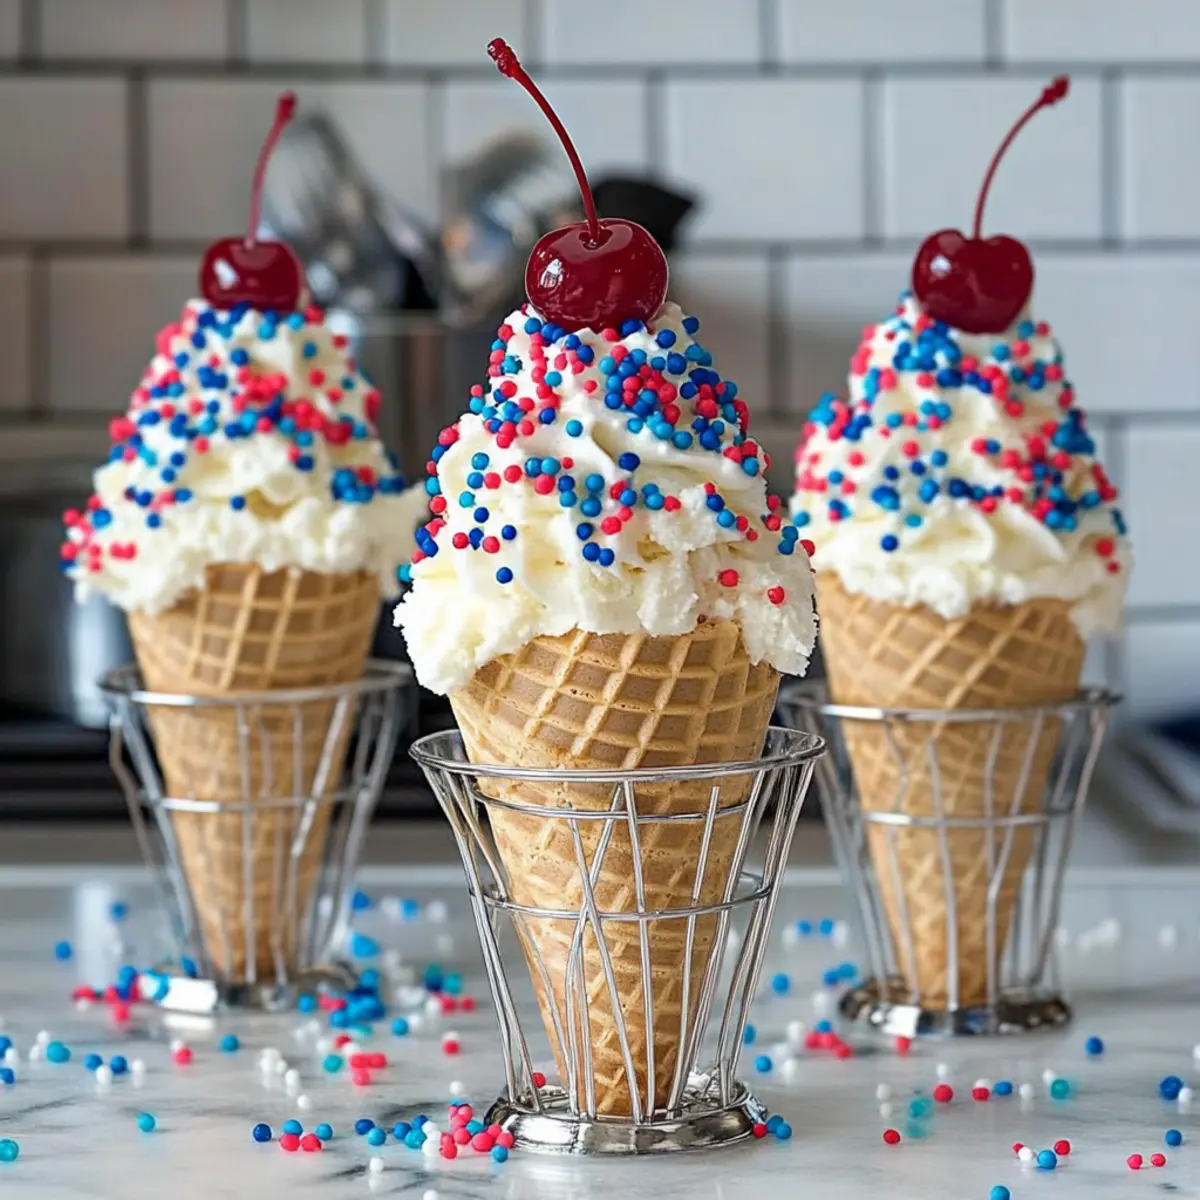
Once the cones are filled with the cheesecake mixture, drizzle with blueberry sauce for added flavor and visual appeal. Finally, top each cone with a maraschino cherry to give your 4th of July Cheesecake Ice Cream Cones that classic festive touch. Serve immediately for the best experience!
Step 8: Serve and Celebrate
Present your beautifully assembled no bake cheesecake ice cream cones to your guests. Make sure to have them chilled for optimal enjoyment on a warm summer day. These cones are not just delicious but also add a fun, festive spirit to your 4th of July gathering.
Make Ahead Options
These 4th of July Cheesecake Ice Cream Cones are perfect for meal prep, allowing you to enjoy more time with family and friends during your summer gatherings! You can prepare the cheesecake filling up to 3 days in advance. Simply mix the softened cream cheese, sugar, vanilla, and Cool Whip, then store it in an airtight container in the refrigerator. To prevent the cones from getting soggy, keep them unfilled; you can store the sugar cones in a cool, dry place. When you’re ready to serve, just pipe the cheesecake mixture into the cones, drizzle with blueberry sauce, and top with a maraschino cherry. This way, you’ll have a delightful dessert ready to impress with minimal effort!
Expert Tips for 4th of July Cheesecake Ice Cream Cones
Cream Cheese Temperature: Ensure your cream cheese is at room temperature before mixing to prevent lumps in your cheesecake filling.
Cone Crispness: Pipe the cheesecake filling into the cones just before serving to keep them crunchy and prevent sogginess.
Customize Toppings: Feel free to swap out the blueberry sauce for your favorite fruit sauce or change up sprinkles to match any occasion.
Chilling Time: If your cheesecake mixture is too soft to pipe, refrigerate for 1-2 hours to firm it up without compromising flavor or texture.
Storage Tips: Any leftover cheesecake mixture can be refrigerated for 2-3 days, but it’s best consumed fresh when made into cones.
4th of July Cheesecake Ice Cream Cones Variations
Feel free to personalize these delightful cones for a dessert that’s uniquely yours!
-
Flavor Twists: Experiment with different cheesecake filling flavors by using flavored cream cheese, such as strawberry or pumpkin.
-
Berry Bliss: Swap the blueberry sauce for a vibrant strawberry or raspberry sauce for a refreshing fruit twist. Each variation will bring a new layer of deliciousness to the cones!
-
Chocolatey Delight: Use chocolate wafer cones instead of sugar cones to infuse a rich chocolatey flavor into your treat. The additional depth of flavor pairs beautifully with the creamy filling.
-
Nutty Crunch: Add crushed nuts like almonds or pecans as a topping for an extra crunch. They provide a delightful contrast to the creamy texture of the cheesecake.
-
Crunchy Layer: Add a layer of graham cracker crumbs at the bottom of each cone for that classic cheesecake crust flavor. This adds a delightful crunch and flavor contrast, making each bite even more enjoyable.
-
Festive Toppings: Choose different sprinkle colors or types based on the occasion. Try using coconut flakes for a tropical twist or edible glitter for an extra sparkle!
-
Heat it Up: Looking for a hint of spice? Incorporate a sprinkle of cayenne or chili powder into the blueberry sauce for a surprising kick that contrasts beautifully with the sweetness.
-
Sundae Surprise: Transform the cones into mini sundaes by adding a scoop of your favorite ice cream on top of the cheesecake filling. Drizzle with chocolate syrup or caramel for an extra decadent treat.
For more delightful ideas, don’t miss out on my Apple Crumble Cheesecake, perfect for those who love a twist on classic flavors!
Storage Tips for 4th of July Cheesecake Ice Cream Cones
Fridge: Store filled cones in the refrigerator for up to 1 hour before serving to keep them fresh and cool.
Leftover Cheesecake Mixture: If you have extra cheesecake filling, place it in an airtight container and refrigerate for up to 2–3 days.
Unfilled Cones: Keep unfilled ice cream cones in a cool, dry place to maintain their crispness until you’re ready to assemble.
Reheating: Avoid reheating any assembled cones. Enjoy them cold for the best texture and flavor!
What to Serve with No Bake Cheesecake Ice Cream Cones?
As you gather with loved ones to celebrate summer, these delightful treats lend themselves perfectly to a variety of summery accompaniments.
-
Fresh Fruit Salad: A colorful mix of berries, melons, and citrus not only brightens the table but adds refreshing sweetness to balance the creaminess of the cones.
-
Grilled Peaches: The warm, caramelized sugar and juicy tenderness of grilled peaches create an irresistible contrast to the cold cheesecake cones, making every bite unforgettable.
-
Chocolate Dipped Strawberries: These classic treats add elegance to your dessert table and pair beautifully with the rich flavors of cheesecake, creating a perfect sweet harmony.
-
Sparkling Lemonade: The tangy bubbles and refreshing taste of sparkling lemonade will cleanse your palate and enhance the vibrant flavors of the cheesecake.
-
Miniature Cookies: Delightful small cookies, like buttery shortbreads or chocolate chip, offer a delightful crunch alongside the creamy cones, making for a very satisfying dessert experience.
-
Ice Cream Float: A fun twist on dessert! Pair your cheesecake cones with a berry soda float, amplifying the celebration and giving everyone a reason to smile.
-
Coconut Macaroons: Sweet, chewy, and a little tropical, these chewy delights offer a wonderful textural variety while complementing the cheesecake’s creamy goodness.
Imagine enjoying these brilliant additions as laughter and warm summer air fill your gathering, creating lasting memories around a table laden with culinary delights!
4th of July Cheesecake Ice Cream Cones Recipe FAQs
What ingredients should I use for the best results?
Absolutely! For the best flavor and texture, use softened cream cheese at room temperature to prevent lumps, and choose pure vanilla extract for a richer taste. Light and fluffy Cool Whip is also essential for the cheesecake filling, so ensure it’s properly mixed.
How should I store my filled cheesecake cones?
Keep filled cones in the refrigerator for up to 1 hour before serving to preserve their freshness. If you can’t serve them immediately, enjoy the cheesecake mixture loosely stored in an airtight container for up to 2–3 days. Just remember, it’s best to fill the cones right before serving to keep them crispy!
Can I make these cheesecake cones ahead of time?
Certainly! Prepare the cheesecake filling in advance and refrigerate it. You can fill the cones just before serving to keep them crispy and prevent sogginess. If you have unfilled cones, store them in a cool, dry place until you’re ready to assemble, which should help maintain their crunchiness.
How do I freeze leftovers?
If you have leftover cheesecake mixture that you want to freeze, follow these steps:
- Transfer the cheesecake filling to an airtight container.
- Label and date it for reference, then freeze for up to 3 months.
- When ready to use, simply thaw it overnight in the refrigerator before piping it into fresh cones. Just remember, do not freeze the filled cones, as the texture will not remain appealing once thawed.
Can my pets have any ingredients from this recipe?
No, it’s best to keep these delightful 4th of July Cheesecake Ice Cream Cones away from your pets. Ingredients like cream cheese and sugar are not healthy for animals, and chocolate can be toxic to dogs and cats. Always check ingredient safety before sharing with your furry friends!
What if my cheesecake mixture is too thick to pipe?
Don’t worry! If your cheesecake filling feels too thick after chilling, you can easily adjust it. Carefully add a splash of milk or additional whipped topping to loosen the mixture. Stir gently until you reach your desired piping consistency, then transfer it to your piping bag. Enjoy the process—the more the merrier in the kitchen!
4th of July Cheesecake Ice Cream Cones Your New Festive Favorite
Ingredients
Equipment
Method
- In a microwave-safe bowl, combine white chocolate candy melts and optional vegetable shortening. Microwave in 30-second intervals, stirring between each, until completely melted and smooth, about 1-2 minutes total.
- Once the chocolate is melted, dip the top of each sugar cone into the chocolate and roll in 4th of July sprinkles. Set them upright to let the chocolate harden.
- In a mixing bowl, beat together the softened cream cheese, sugar, and vanilla extract until smooth and fluffy, about 2-3 minutes.
- Gently fold the Cool Whip into the cream cheese mixture until well combined.
- If too soft, chill the mixture in the refrigerator for 1-2 hours to firm up.
- Transfer the cheesecake mixture into a piping bag fitted with a star tip and pipe into each cone.
- Drizzle with blueberry sauce and top each cone with a maraschino cherry.
- Serve immediately for the best experience.
Leave a Reply