
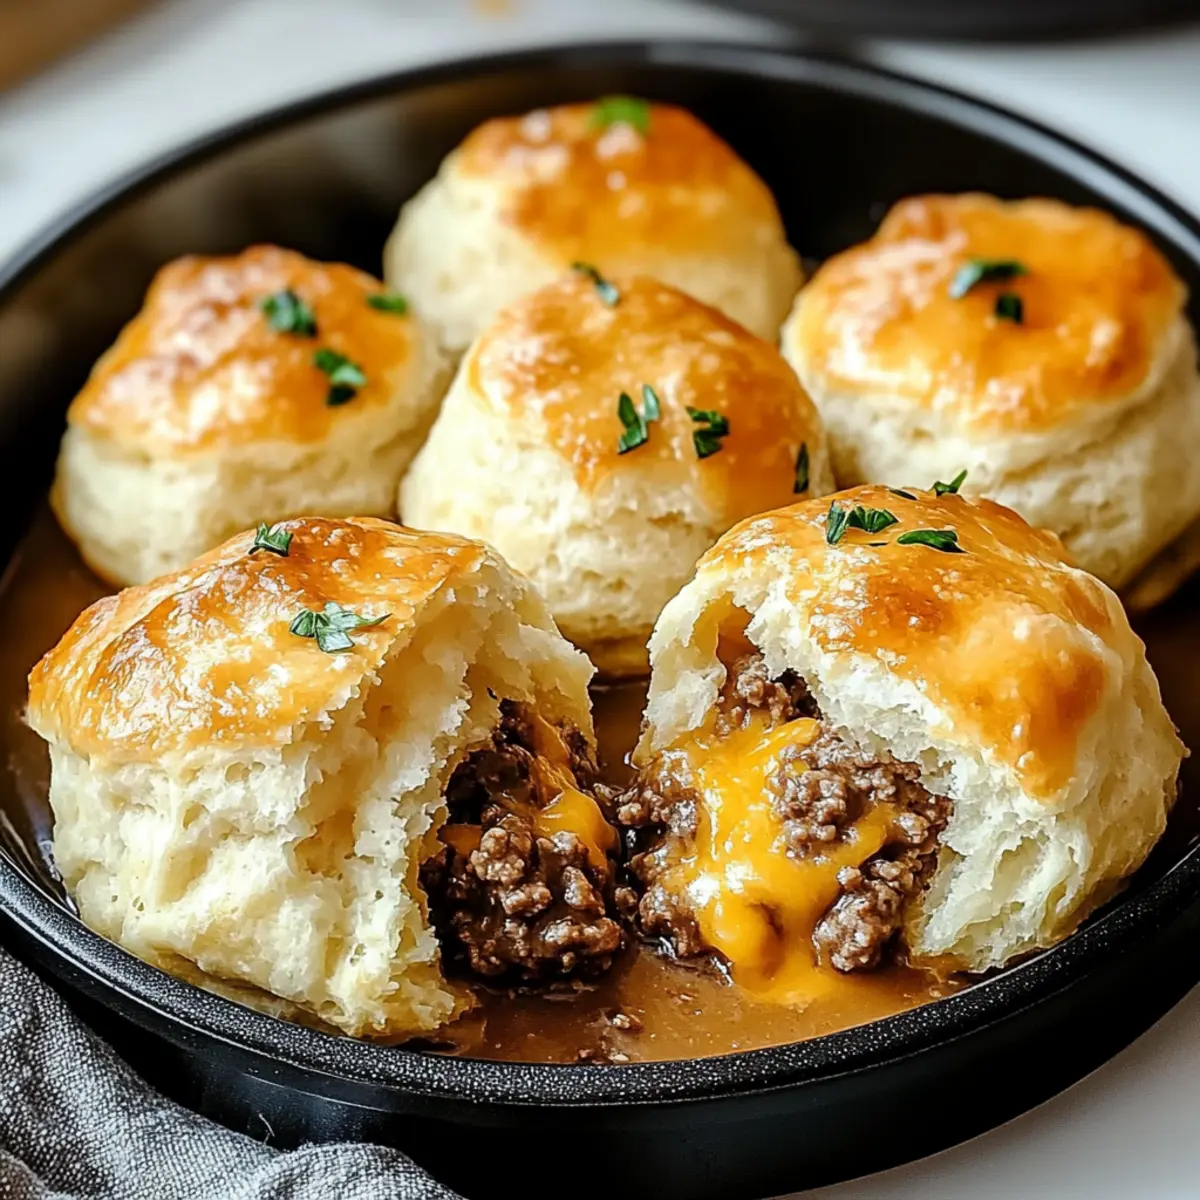
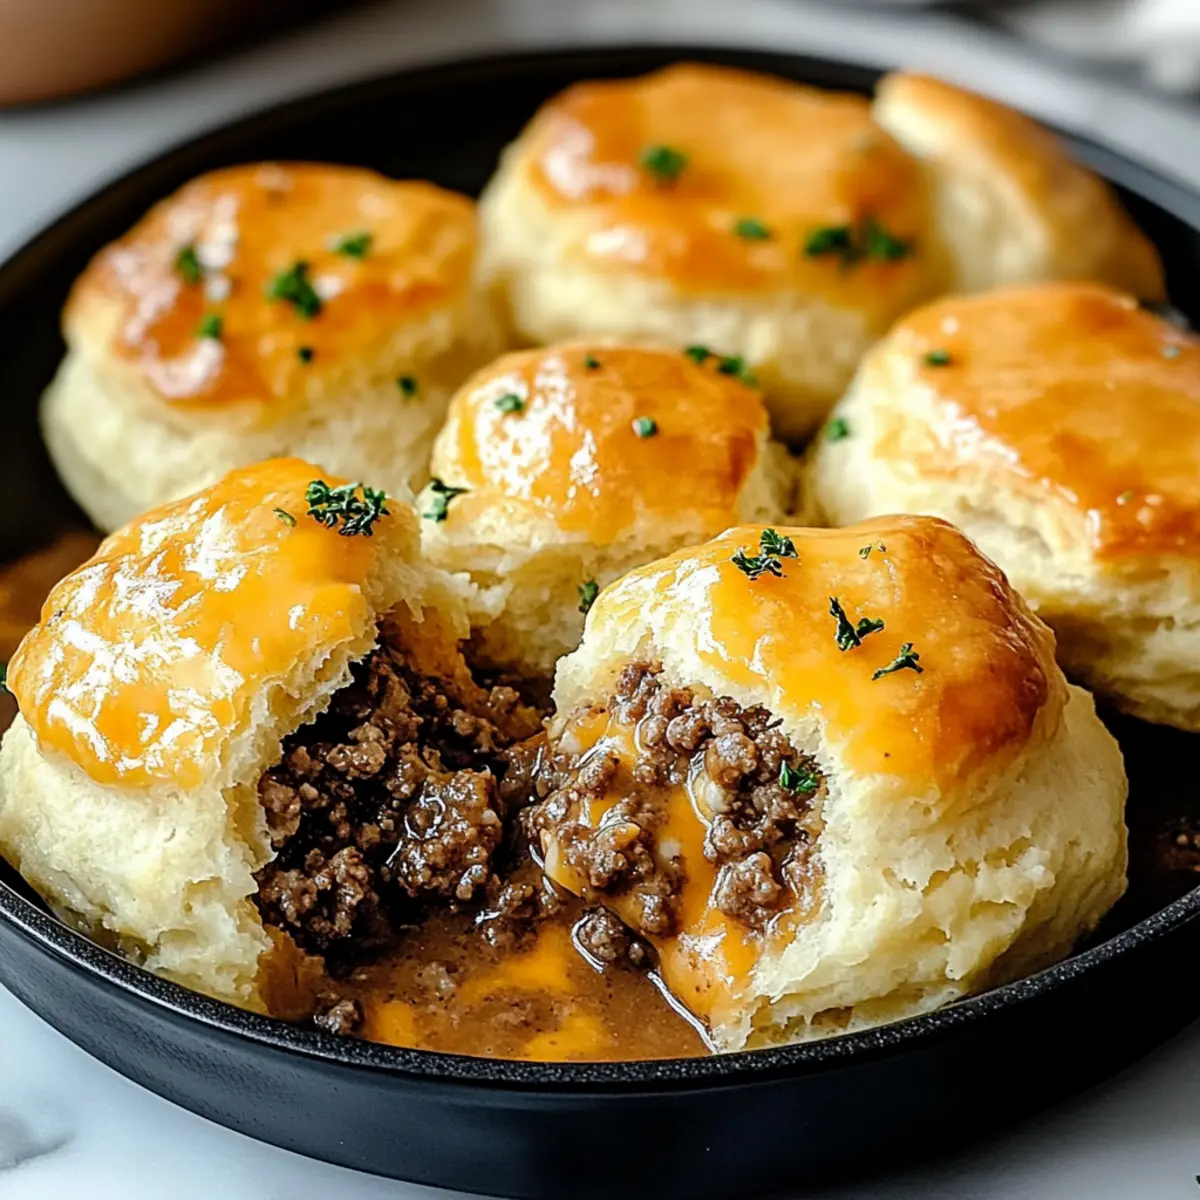
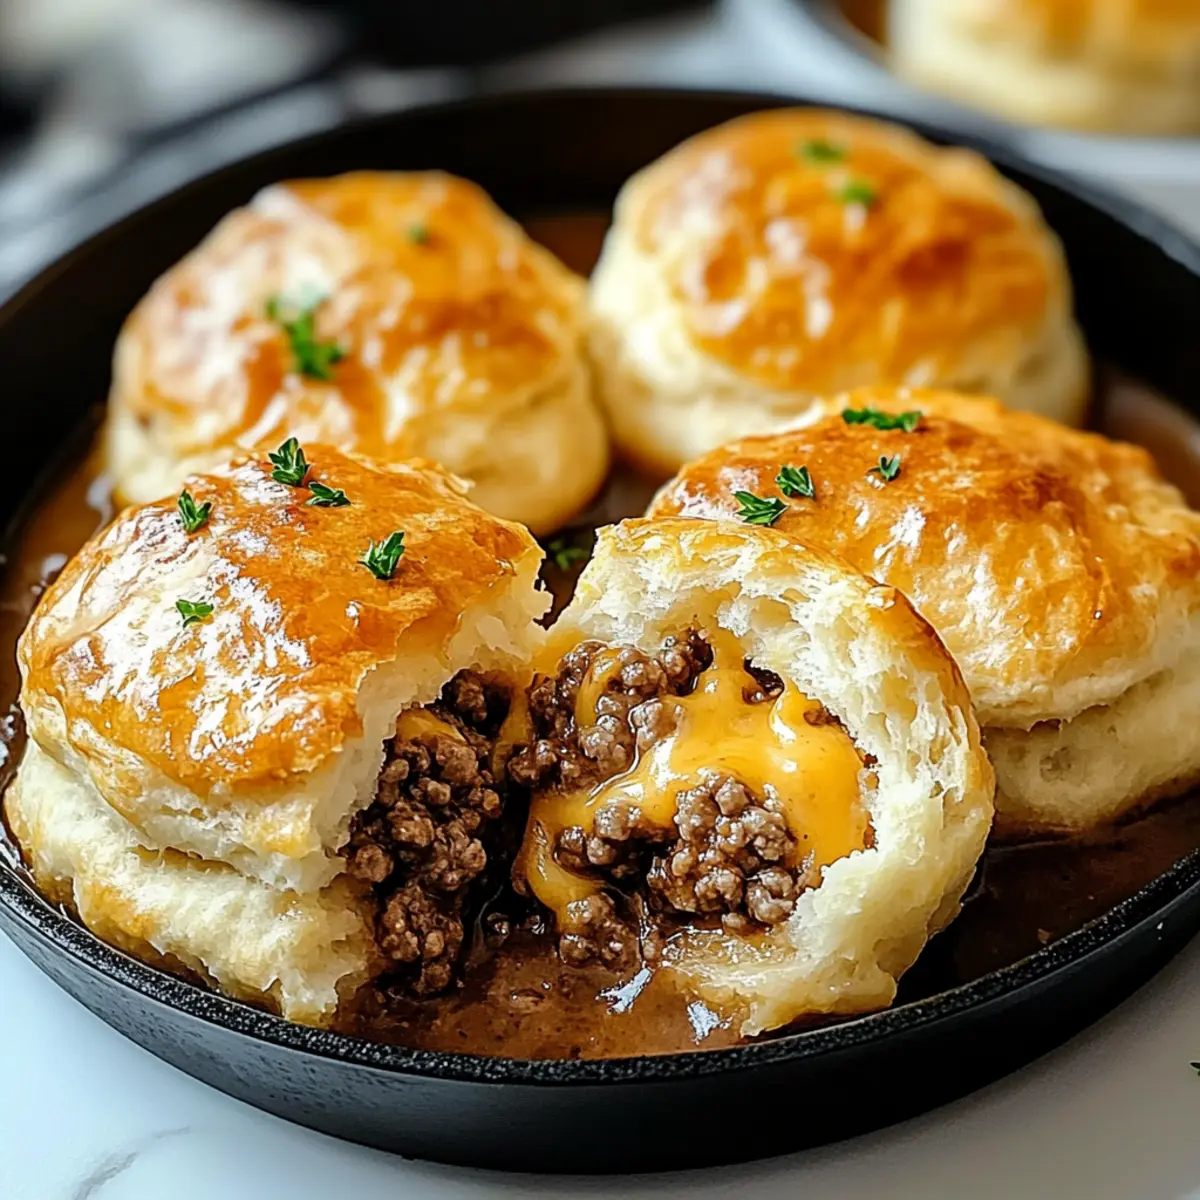
The aroma wafting from the oven as these Cheesy Beef Biscuit Bombs bake might just be one of life’s simplest pleasures. As I pulled the golden-brown biscuits from the oven, I couldn’t help but feel a sense of triumph; each fluffy bite encases a savory, gooey beef and cheese filling that merges comfort and flavor beautifully. These delightful treats are not only easy to whip up, but they also promise to impress your family or friends at any gathering. With endless opportunities for customization, you can easily adjust the fillings to suit any palate—making them a new favorite in your home-cooked repertoire. So, are you ready to create a culinary masterpiece that will leave everyone asking for seconds? Let’s dive into the recipe!
Why Are Cheesy Beef Biscuit Bombs a Must-Try?
Flavor Explosion: These Cheesy Beef Biscuit Bombs deliver a savory experience with every gooey bite, thanks to the delicious blend of beef and melted cheese nestled in flaky biscuits.
Simple Preparation: Whip them up in no time, making them a perfect choice for busy weeknights or impromptu gatherings.
Endless Customization: Feel free to swap in your favorite ingredients like diced jalapeños for a spicy twist or even chopped vegetables for added nutrition!
Crowd-Pleasing Comfort Food: These bites are sure to be a hit at any gathering, reminiscent of classic dishes like Beef Stew Cozy or Ground Beef Cucumber.
Great for Meal Prep: Store leftovers easily in the fridge or freezer to enjoy these delicious treats even on your busiest days!
Cheesy Beef Biscuit Bombs Ingredients
For the Filling
• Ground Beef – Provides a rich, savory filling; substitute with ground turkey or chicken for a lighter variation.
• Shredded Cheddar Cheese – Creates a gooey center; other cheese options include mozzarella or Monterey Jack.
• Cream Cheese (softened) – Adds creaminess and binds the filling; there’s no direct substitute, but omitting it will reduce the rich texture.
• Grated Parmesan Cheese – Enhances savory depth and adds an umami kick; omit for a milder flavor.
For the Biscuit Shell
• Refrigerated Biscuit Dough – Forms the outer layer that bakes up flaky; homemade dough can also be used for a personal touch.
• Melted Butter – Creates a crispy, golden finish on biscuits; olive oil serves as a healthier alternative.
For Seasoning
• Garlic Powder – Provides a subtle aromatic flavor; fresh garlic can be used for a stronger taste.
• Onion Powder – Adds sweetness and savory depth; fresh onions can be used but should be cooked first.
• Black Pepper – Adds a balancing kick; adjust according to your heat preference.
These Cheesy Beef Biscuit Bombs promise to be an indulgence that’s not just comforting but also customizable to suit any palate!
Step‑by‑Step Instructions for Cheesy Beef Biscuit Bombs
Step 1: Preheat the Oven
Begin by preheating your oven to 375°F (190°C). This step is crucial to ensure your Cheesy Beef Biscuit Bombs bake evenly and achieve that perfect golden brown crust. While the oven heats, gather your ingredients and prepare your workspace for a fun cooking experience.
Step 2: Cook the Ground Beef
In a large skillet over medium heat, add the ground beef and cook for about 6–8 minutes, breaking it apart with a spatula. Sauté until it’s browned and no longer pink, ensuring it’s fully cooked for safety. Once done, remove from heat and prepare to season it for the ultimate filling.
Step 3: Season the Beef
Drain any excess grease from the skillet to keep your filling light. Return the cooled beef to the skillet, then mix in garlic powder, onion powder, and black pepper to taste. Stir well until the seasonings are evenly distributed, allowing the savory aroma to fill your kitchen.
Step 4: Cool the Beef Mixture
Set the skillet aside and let the beef mixture cool slightly. This is a critical step to prevent the biscuit dough from melting while assembling the Cheesy Beef Biscuit Bombs. Cooling the beef for about 5 minutes will allow for easy handling and preparation of the filling.
Step 5: Prepare the Cheese Filling
In a mixing bowl, combine softened cream cheese, shredded cheddar cheese, and grated Parmesan cheese. Mix thoroughly using a spatula until everything is well blended and creamy. This cheesy mixture will provide a luscious, gooey center for your biscuit bombs.
Step 6: Incorporate Beef into Cheese Mixture
Once the beef has cooled, fold it into the cheese mixture, ensuring that all ingredients are well combined. This melding of flavors creates that delicious filling, perfect for stuffing into the flaky biscuit dough ahead. Set this mixture aside as you prepare the biscuit shells.
Step 7: Shape the Biscuit Dough
Open your refrigerated biscuit dough and separate the biscuits, laying them out on a clean surface. Use your hands or a rolling pin to flatten each biscuit into a round disc about 4 inches wide. Make sure they’re not too thick, as this will ensure a crispy outer layer when baked.
Step 8: Fill and Seal the Biscuits
Spoon a generous amount of the beef and cheese filling into the center of each flattened biscuit. Carefully fold over the edges to encase the filling completely, pinching to seal securely. This step is essential to prevent any filling from leaking during baking, ensuring all that cheesy goodness stays inside.
Step 9: Arrange and Brush
Place the filled biscuit bombs seam-side down on a parchment-lined baking sheet. Brush the tops with melted butter to help them achieve a beautiful, crispy, golden finish as they bake. Position them evenly apart to allow for rising and airflow in the oven.
Step 10: Bake to Perfection
Slide the baking sheet into the preheated oven and bake for 12–15 minutes, or until the biscuits are a lovely golden brown and have puffed up nicely. Keep an eye on them, as the aroma will fill your kitchen, signaling it’s almost time to enjoy these Cheesy Beef Biscuit Bombs!
Cheesy Beef Biscuit Bombs Customization
Feel free to unleash your creativity and transform these cheesy delights into your very own culinary masterpiece!
-
Spicy Kick: Add diced jalapeños to the filling for a zesty and bold flavor. Perfect for spice lovers!
-
Vegetarian Option: Substitute ground beef with plant-based alternatives like lentils or mushrooms for a hearty vegetarian treat. You’ll still enjoy that savory goodness!
-
Veggie Boost: Mix in chopped vegetables like bell peppers or spinach for added nutrition and color. Fresh veggies can also bring a crunch to each bite!
-
Cheese Lovers’ Delight: Experiment with different cheeses such as mozzarella or pepper jack to vary tastes and textures. The gooeyness will be heavenly!
-
Herb Infusion: Toss in fresh herbs like chopped basil or cilantro into the filling for a fragrant and flavorful twist. A sprinkle of freshness can elevate the dish beautifully.
-
Homemade Dough: Make your own biscuit dough for a customized shape or flavor—think garlic herb or whole wheat to suit your style!
-
Serve with Dips: Pair your biscuit bombs with rich marinara sauce or creamy ranch for dipping. It adds extra layers of flavor that’ll have everyone reaching for more!
These Cheesy Beef Biscuit Bombs are not just a recipe—they’re a canvas for your culinary creativity. For more comforting ideas, try out these delightful dishes like Beef Stew Cozy or Asian Ground Beef to keep that flavor journey going!
Expert Tips for Cheesy Beef Biscuit Bombs
Cool the Beef: Allow the beef mixture to cool slightly before filling; otherwise, it can melt the biscuit dough, creating a mess.
Use Parchment Paper: Line your baking sheet with parchment paper to prevent sticking and ensure easy cleanup after cooking the cheesy beef biscuit bombs.
Check the Temperature: Use a meat thermometer to ensure the filling reaches 165°F (74°C) for proper food safety.
Seal Well: Make sure to pinch the edges of the biscuits tightly; this prevents any filling from leaking out during baking.
Experiment with Fillings: Don’t hesitate to customize your filling by adding chopped veggies or using different cheeses for a personal twist!
How to Store and Freeze Cheesy Beef Biscuit Bombs
Fridge: Store any leftovers in an airtight container for up to 3-4 days, ensuring they stay fresh and ready for quick reheating.
Freezer: For longer storage, freeze the biscuit bombs on a baking sheet until solid, then transfer to a freezer-safe container; they can last up to 3 months.
Reheating: To enjoy the Cheesy Beef Biscuit Bombs again, bake at 350°F (175°C) for 8-10 minutes for the best texture and warmth.
Quick Note: Avoid using the microwave for reheating; it can make the biscuits soggy instead of keeping them crispy and delightful!
Make Ahead Options
These Cheesy Beef Biscuit Bombs are perfect for meal prep, allowing you to savor homemade comfort even on the busiest days! You can prepare the beef and cheese filling up to 24 hours in advance—just store it in an airtight container in the fridge to maintain its flavor and quality. The biscuit dough can also be formed and filled, then wrapped tightly and refrigerated for 3 days. When you’re ready to enjoy them, simply bake the prepped bombs at 375°F (190°C) for 12-15 minutes until golden brown. With these make-ahead options, you’ll have delicious bites ready to indulge in with minimal effort!
What to Serve with Cheesy Beef Biscuit Bombs
The perfect accompaniment can elevate your Cheesy Beef Biscuit Bombs into a delightful feast that captivates every sense.
-
Marinara Sauce:
This classic dipping sauce provides a rich tomato flavor that perfectly balances the savory, cheesy filling. A little herbaceousness from fresh basil adds an aromatic finish. -
Fresh Green Salad:
A crisp salad brings a refreshing crunch that contrasts with the warm, gooey bites. Toss in zingy lemon vinaigrette for an extra bright touch! -
Creamy Coleslaw:
The creamy, tangy texture of coleslaw complements the biscuits’ fluffiness and adds crunchy freshness. It’s a delightful side that rounds out your meal beautifully. -
Savory Roasted Vegetables:
Roasted carrots, broccoli, or bell peppers provide warmth and a hint of sweetness, balancing the richness of the cheesy filling. Drizzle with balsamic glaze for an exquisite touch. -
Garlic Breadsticks:
These add a delightful crunch and garlicky flavor, enhancing the overall taste experience while echoing the comforting nature of the biscuit bombs. -
Sweet Potato Fries:
Their crispy exterior and soft interior harmonize beautifully with the Cheesy Beef Biscuit Bombs, offering a sweet contrast that brings balance to your plate. -
Cold Brewed Iced Tea:
This light, refreshing drink provides a delightful contrast, making it the perfect beverage to cleanse your palate after each cheesy bite.

Cheesy Beef Biscuit Bombs Recipe FAQs
How do I choose the right ground beef for my Cheesy Beef Biscuit Bombs?
Absolutely! Opt for lean ground beef, ideally 80/20 (lean-to-fat ratio), which offers the perfect balance of flavor and moisture. If you’re looking for a lighter option, ground turkey or chicken works beautifully as a substitute while still delivering that delicious filling.
What’s the best way to store leftover Cheesy Beef Biscuit Bombs?
Very easy! Store any leftovers in an airtight container in the refrigerator for up to 3-4 days. To keep them fresh without compromising texture, make sure they are fully cooled before sealing them up.
Can I freeze Cheesy Beef Biscuit Bombs, and how do I do that?
Yes, you can! To freeze, first arrange the baked biscuit bombs on a baking sheet and freeze them until solid (about an hour). Then, transfer them to a freezer-safe container. They can be stored for up to 3 months. This way, they’ll be ready for a quick snack or meal whenever you need!
What should I do if my biscuit bombs leak while baking?
No worries! If you experience leaking, ensure that you are sealing the edges of the biscuits tightly. Use your fingertips to pinch them well, which helps keep all that precious filling intact as they bake. If you’re still having issues, try rolling the biscuit dough a bit thicker next time for a sturdier shell.
Are Cheesy Beef Biscuit Bombs safe for pet consumption?
Not recommended! While the ingredients themselves aren’t toxic to pets, the seasonings, particularly garlic and onion powder, can be harmful. It’s best to stick to pet-friendly treats for your furry friends to ensure their safety.
How can I customize the filling for my Cheesy Beef Biscuit Bombs?
The more the merrier! Feel free to add chopped vegetables like bell peppers or spinach for an extra nutritional boost. If you prefer spice, diced jalapeños can kick things up a notch. Don’t shy away from experimenting with different cheeses for a unique flavor profile, like mozzarella or pepper jack!
Cheesy Beef Biscuit Bombs That Will Melt Your Heart
Ingredients
Equipment
Method
- Preheat your oven to 375°F (190°C).
- In a large skillet over medium heat, cook the ground beef for about 6–8 minutes until browned.
- Drain excess grease and mix in garlic powder, onion powder, and black pepper.
- Let the beef mixture cool for about 5 minutes.
- In a mixing bowl, combine softened cream cheese, shredded cheddar cheese, and grated Parmesan cheese.
- Fold the cooled beef into the cheese mixture.
- Separate the refrigerated biscuit dough and flatten each biscuit into a round disc.
- Fill each biscuit with the beef and cheese filling, folding over and sealing the edges.
- Place filled bombs seam-side down on a parchment-lined baking sheet and brush with melted butter.
- Bake for 12–15 minutes until golden brown.
Leave a Reply