
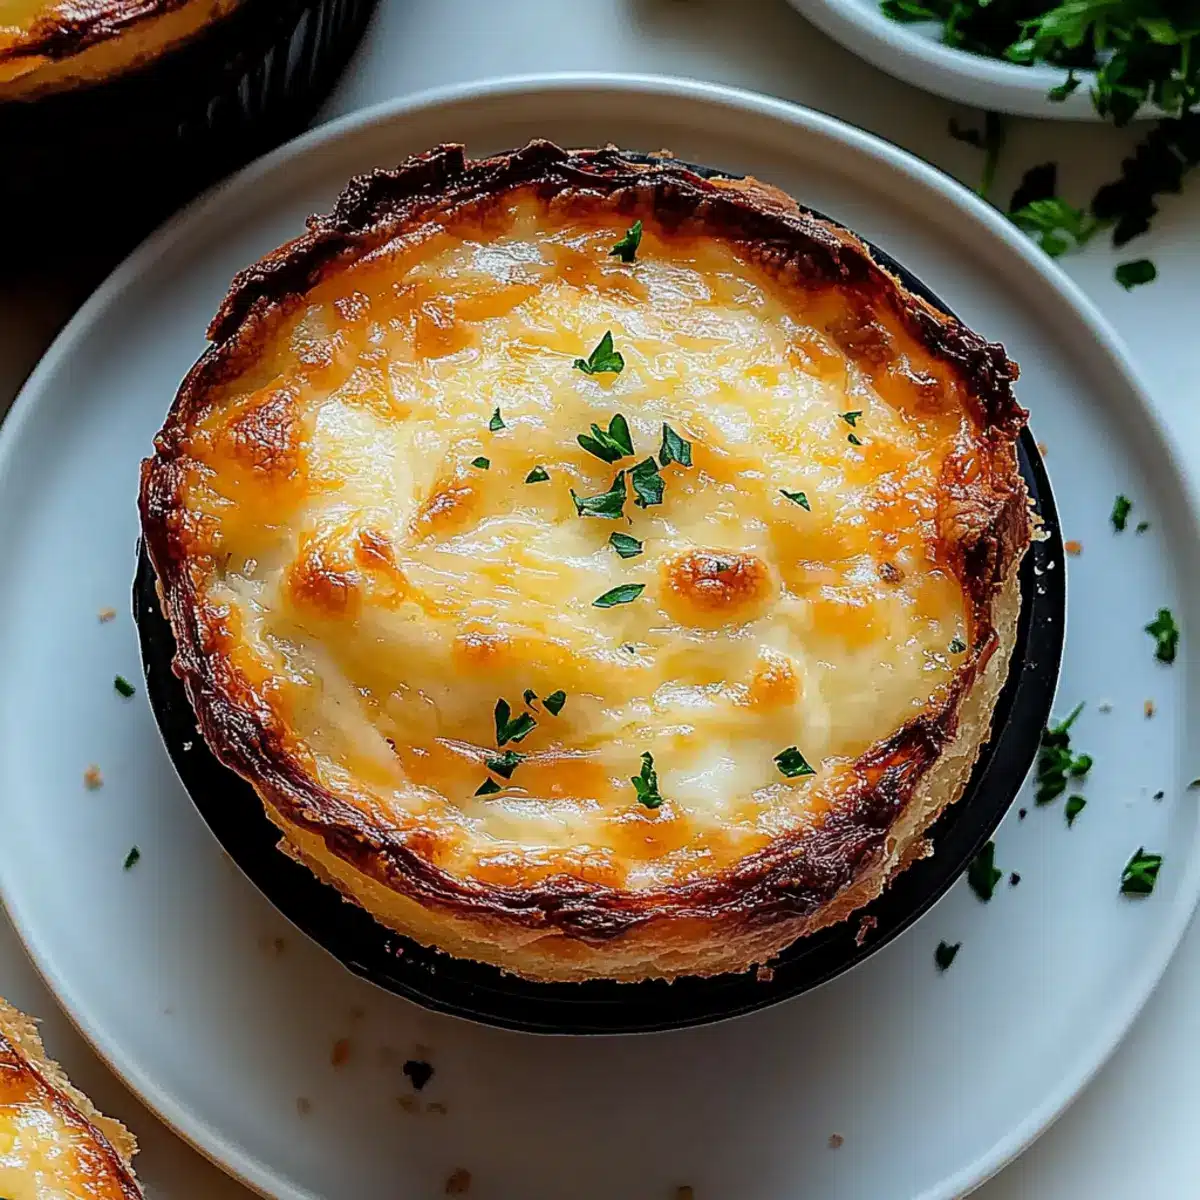
As I pulled the warm, golden-brown Cheesy Garlic Cruffin from the oven, the air filled with an irresistible aroma that made my mouth water. These flaky delights are not just a culinary treat but a savory homecoming for anyone tired of fast food. With their buttery layers enveloping gooey melted cheese and bold garlic, they strike the perfect balance between crispy edges and pillowy softness—an experience that’s both comforting and indulgent. Not to mention, they come together quickly, making them an ideal choice for impromptu gatherings or cozy weekends. Join me as we embark on this delightful journey to create these heavenly cruffins—are you ready to elevate your homemade baking game?
Why Should You Make Cruffins Today?
Irresistible Aroma: As they bake, the scent of garlic and cheese will transform your kitchen into a delightful haven.
Crowd-Pleasing Snack: Perfect for gatherings, these savory cruffins are bound to impress friends and family alike. Pair them with a warm bowl of creamy tomato soup for a match made in heaven!
Quick and Easy: With minimal rising time, you can whip up these flaky treats even on a busy day, ready to enjoy in just over an hour.
Endless Variations: Feel free to experiment by switching cheeses or adding your favorite herbs. Want to shake things up? Try adding some spinach or bacon!
Comfort in Every Bite: These cruffins bring together the flaky texture of a croissant and the comforting flavors of garlic and cheese, creating a cozy treat that feels like a warm hug. Try these with our Garlic Butter Tofu for a stunning contrast!
Cheesy Garlic Cruffin Ingredients
For the Dough
• All-Purpose Flour – Provides structure; helps achieve the desired flaky texture.
• Granulated Sugar – Balances flavors beautifully; substitute with brown sugar if you prefer a hint of caramel.
• Salt – Enhances overall flavor; kosher or sea salt works best for this recipe.
• Instant Yeast – Leavens the dough, giving it that perfect rise; active dry yeast can also be used with slight adjustments.
• Warm Milk – Hydrates the dough and activates the yeast; almond or soy milk can be used for a dairy-free cruffin.
• Unsalted Butter (melted) – Adds richness and flavor; coconut oil can replace it for a dairy-free version.
• Warm Water – Essential for activating the yeast; no substitutions needed here.
• Large Egg – Binds the ingredients together; for a vegan option, use a flaxseed egg instead.
For the Filling
• Grated Parmesan Cheese – Adds a savory depth to the filling; substitute with pecorino or nutritional yeast for a dairy-free alternative.
• Shredded Mozzarella Cheese – Provides that gooey texture that we all love; feel free to swap in cheddar for a sharper flavor.
• Minced Garlic – Infuses the filling with bold flavor; adjust according to your taste, or use roasted garlic for a milder note.
• Softened Unsalted Butter – Combines with garlic for a luscious filling; coconut oil is a great non-dairy option here.
• Fresh Parsley (chopped) – Adds a fresh, herbal note; you can replace with chives or simply omit if desired.
Get everything ready, and soon you’ll be enjoying the thrill of your very own Cheesy Garlic Cruffin, straight from your oven!
Step‑by‑Step Instructions for Cheesy Garlic Cruffin
Step 1: Prepare the Dough
In a large mixing bowl, combine 4 cups of all-purpose flour, ¼ cup of granulated sugar, 1 teaspoon of salt, and 1 tablespoon of instant yeast. Stir these dry ingredients until evenly distributed. Next, create a well in the center, and pour in 1 cup of warm milk, ½ cup of melted unsalted butter, and ½ cup of warm water, ensuring the liquids do not exceed 110°F to protect the yeast.
Step 2: Mix the Ingredients
Crack in one large egg and mix until the dough just comes together. Use a wooden spoon or your hands to bring the mixture into a shaggy ball. As the dough begins to form, you’ll see bits of flour being incorporated until no dry flour remains. This is a key step for your cheesy garlic cruffin, helping achieve a tender texture.
Step 3: Knead the Dough
Transfer the dough onto a lightly floured surface and knead for 8-10 minutes. You’re aiming for a smooth and elastic consistency; the dough should bounce back when lightly pressed. Use this time to get those muscles working! If it feels sticky, sprinkle a bit more flour as needed to keep it manageable.
Step 4: Let the Dough Rise
Once kneaded, place your dough in a well-oiled bowl, turning it to coat all sides. Cover the bowl with a clean kitchen towel or plastic wrap, and let it rise in a warm spot for 1 hour. The dough should double in size and become soft and airy. Look for a puffed-up dome that promises tender cruffins ahead!
Step 5: Prepare the Garlic Filling
In a small mixing bowl, combine ¼ cup of softened unsalted butter, 4 cloves of minced garlic, and 2 tablespoons of chopped fresh parsley. Mix well until it forms a cohesive spread. This delicious garlic butter will be slathered into the cruffins, infusing them with flavor.
Step 6: Preheat the Oven and Prepare for Baking
Preheat your oven to 375°F (190°C) and prepare a muffin tin by greasing it lightly with butter or cooking spray. As the oven heats, this gives the cruffins ideal baking conditions, ensuring they come out perfectly golden brown and flaky.
Step 7: Roll Out the Dough
Once risen, punch down the dough gently to release air. On a floured surface, roll it out into a rectangle about ¼ inch thick, ensuring it maintains an even thickness throughout. Visualize your future cheesy garlic cruffin layers while doing this; it’s a crucial stage in creating that trademark flaky texture!
Step 8: Add the Filling and Cheese
Spread the prepared garlic butter mixture evenly over the rolled-out dough. Sprinkle 1 cup of grated Parmesan cheese and 1 cup of shredded mozzarella cheese on top of the garlic butter. The cheese mix adds a savory depth, heightening the flavor of your cruffins. Be generous—this is where the magic happens!
Step 9: Roll and Cut the Dough
Starting from one long end of the rolled dough, carefully roll it into a tight log. Once rolled, use a sharp knife or pizza cutter to slice the log into equal portions, about 1-2 inches wide. This will help your cheesy garlic cruffins achieve that inviting layered appearance.
Step 10: Arrange in the Muffin Tin
Place each dough piece standing upright into the prepared muffin cups. Stack them if you’d like more layers in each cruffin, creating a visually appealing rise. Each piece should fill the cup but not spill over, ensuring they bake into perfect, fluffy servings.
Step 11: Second Rise
Cover the muffin tin with a cloth or plastic wrap and let the cruffins rise for another 20 minutes. This brief second rise allows the dough to puff slightly again, leading to an airy texture that beautifully contrasts with the gooey cheese filling once baked.
Step 12: Bake the Cruffins
Bake in the preheated oven for 20-25 minutes, until the cruffins are golden brown and puffed, with a delightful crispy exterior. Keep an eye on them as they bake; the kitchen will fill with a heavenly aroma that speaks to the savory goodness awaiting your taste buds!
Step 13: Cool and Serve
Once baked, remove the cheesy garlic cruffins from the oven and allow them to cool for a few minutes in the tin. Carefully transfer them to a cooling rack or serve warm right from the tin. These flaky, golden treats are best enjoyed fresh—perfectly paired with soup or on their own!

Cheesy Garlic Cruffin Variations
Feel free to get creative and customize your Cheesy Garlic Cruffin recipe with these delicious ideas!
-
Cheddar Swap: Replace mozzarella with cheddar for a sharper, bolder flavor that adds extra depth.
-
Bacon Boost: For a savory twist, fold in crispy, cooked bacon bits into the cheese filling—it pairs wonderfully with the garlic!
-
Spinach Addition: Incorporate fresh spinach or kale for a nutritious pop of color and flavor. These greens blend beautifully with cheese!
-
Herbed Delight: Switch out parsley for fresh herbs like thyme or rosemary to introduce exciting aromatic profiles that transform your cruffins!
-
Dairy-Free Twist: Use non-dairy cheese in place of shredded mozzarella and grated Parmesan, perfect for vegan options.
-
Roasted Garlic: Substitute minced garlic with roasted garlic for a milder, sweeter flavor that brings out the richness of the cheeses.
-
Heat It Up: Add a pinch of red pepper flakes to the garlic butter for a delightful kick that will make your taste buds tingle!
-
Savory Scallions: Mix in chopped scallions or green onions for an extra layer of flavor that brightens each bite.
Each variation adds a new layer of excitement to the classic cruffin! If you’re in the mood for something different, you might enjoy trying our Garlic Parmesan Crusted Halibut as a side or main course option!
Storage Tips for Cheesy Garlic Cruffin
Room Temperature: Store cruffins in an airtight container at room temperature for up to 2 days to maintain their flaky texture.
Fridge: If you need to keep them longer, refrigerate the cruffins for up to 1 week. Reheat in the oven to restore their warmth and crispiness.
Freezer: For longer storage, freeze the cruffins in a sealed freezer bag for up to 2 months. Thaw in the fridge overnight, then reheat in the oven before serving.
Reheating: Always warm your cruffins in the oven at 350°F (175°C) for about 10 minutes for the best texture and flavor recovery—every bite will be like fresh from the oven!
Make Ahead Options
These Cheesy Garlic Crusffins are a fantastic option for meal prep enthusiasts! You can prepare the dough up to 24 hours in advance; just mix and knead the ingredients, then cover it tightly and refrigerate. The garlic butter filling can also be made a day ahead, simply refrigerate it in an airtight container. When you’re ready to bake, let the dough come to room temperature for about 30 minutes before shaping and adding the filling. This method ensures your cruffins stay just as delicious with that perfect flaky texture, all while saving you precious time during busy weeknights! Enjoy the fresh-baked aroma with minimal effort!
Expert Tips for Cheesy Garlic Cruffin
• Fresh Yeast Check: Ensure your instant yeast is fresh and active for the best rise. If your dough isn’t rising, the yeast may be the culprit!
• Prevent Sticking: When rolling out your dough, use ample flour on the surface to prevent sticking. This will make shaping your cruffins a breeze.
• Cheese Combinations: Don’t hesitate to experiment with different cheese blends! Mixing in some cheddar or feta can take your cheesy garlic cruffin to a whole new level.
• Resting Time Matters: Give your cruffins a chance to cool slightly before serving. This helps enhance the flaky layers and prevents burning your tongue on molten cheese!
• Perfect Portions: Aim for consistent size when cutting your dough. Equal pieces will ensure uniform baking, resulting in a heavenly cheesy garlic cruffin that’s perfectly fluffy!
What to Serve with Cheesy Garlic Cruffin
Imagine a gathering around the table, everyone savoring the warm, buttery goodness of your freshly baked cruffins, paired with delightful accompaniments.
-
Creamy Tomato Soup: The rich, velvety texture and sweet acidity of the soup beautifully balance the savory flavors of the cruffin.
-
Simple Green Salad: A mix of fresh greens with light vinaigrette adds a crisp, refreshing contrast to the rich cruffins, enhancing your dining experience.
-
Roasted Vegetables: Seasoned and slightly caramelized veggies bring earthy flavors to the table, complementing the savory notes of the cheesy filling.
-
Butternut Squash Soup: This sweet and creamy soup creates a lovely harmony with the cruffin’s garlic and cheese, turning your meal into an autumn-inspired feast.
-
Bruschetta: Fresh tomatoes, basil, and a drizzle of balsamic glaze over toasted bread create a delightful freshness, providing a bright contrast to the indulgence of the cruffins.
-
Wine Pairing: A chilled Sauvignon Blanc or a light-bodied red, like Pinot Noir, enhances the meal, balancing the richness of the cruffin with their acidity.
-
Herb-Infused Olive Oil: Drizzling a bit of fragrant herb-infused olive oil over the cruffins before serving can elevate their flavors, creating a luxurious finishing touch.
-
Fruit Salad: A bowl of fresh, seasonal fruit adds a sweet and juicy element that cuts through the richness, making the meal feel light and vibrant.

Cheesy Garlic Cruffin Recipe FAQs
How do I choose the right garlic for the filling?
Absolutely! When selecting garlic, look for firm bulbs with no dark spots or sprouting. Fresh garlic will be plump and feel heavy for its size. For a more subtle flavor, you can roast the garlic before mixing it into the filling—this sweetens its taste and adds a beautiful depth!
What’s the best way to store my cruffins?
Very good question! To keep your Cheesy Garlic Cruffins fresh, store them in an airtight container at room temperature for up to 2 days. If you need a longer shelf life, refrigerate them for up to a week. Just remember to reheat in the oven to restore that crispy texture—about 10 minutes at 350°F (175°C) will do the trick!
Can I freeze cruffins for later enjoyment?
Yes, you can! To freeze your cruffins, allow them to cool completely, then wrap each one in plastic wrap and place them in a sealed freezer bag. They’ll stay fresh for up to 2 months. When you’re ready to indulge, simply thaw them in the fridge overnight, then reheat them in the oven for the most delightful texture.
What should I do if my dough isn’t rising?
A common concern! If your dough isn’t rising, it might be due to inactive yeast. Check the freshness of your instant yeast; it should be kept in a cool, dry place and used before the expiration date. If you’re using active dry yeast, make sure to activate it in warm liquid first (110°F/43°C) before adding it to the dough. If all goes well, your cruffins will rise beautifully!
Are there any dietary considerations I should keep in mind?
Certainly! If you’re baking for someone with lactose intolerance or a dairy allergy, substitute the butter and cheese with non-dairy alternatives—coconut oil and vegan cheeses work beautifully in this recipe. Additionally, for egg-free options, a flaxseed egg (1 tablespoon of ground flaxseed mixed with 3 tablespoons of water) can be an excellent alternative. Happy baking!
Cheesy Garlic Cruffin: Your New Favorite Comfort Treat
Ingredients
Equipment
Method
- In a large mixing bowl, combine the flour, sugar, salt, and yeast. Stir until even, then create a well in the center and pour in the warm milk, melted butter, and warm water.
- Crack in the egg and mix until the dough comes together into a shaggy ball.
- Knead the dough on a lightly floured surface for 8-10 minutes until smooth and elastic.
- Place the dough in a well-oiled bowl, cover, and let rise in a warm spot for 1 hour.
- Combine softened butter, minced garlic, and parsley in a small bowl to create the garlic filling.
- Preheat the oven to 375°F (190°C) and grease a muffin tin.
- Roll out the dough to a ¼ inch thick rectangle, then spread the garlic filling over it.
- Sprinkle the cheeses on top of the filling, then roll the dough tightly from one end.
- Cut the rolled dough into 1-2 inch portions and place each piece standing up in the muffin tin.
- Cover and let the cruffins rise for another 20 minutes before baking.
- Bake for 20-25 minutes until golden brown and puffed, then cool slightly before serving.
Leave a Reply