
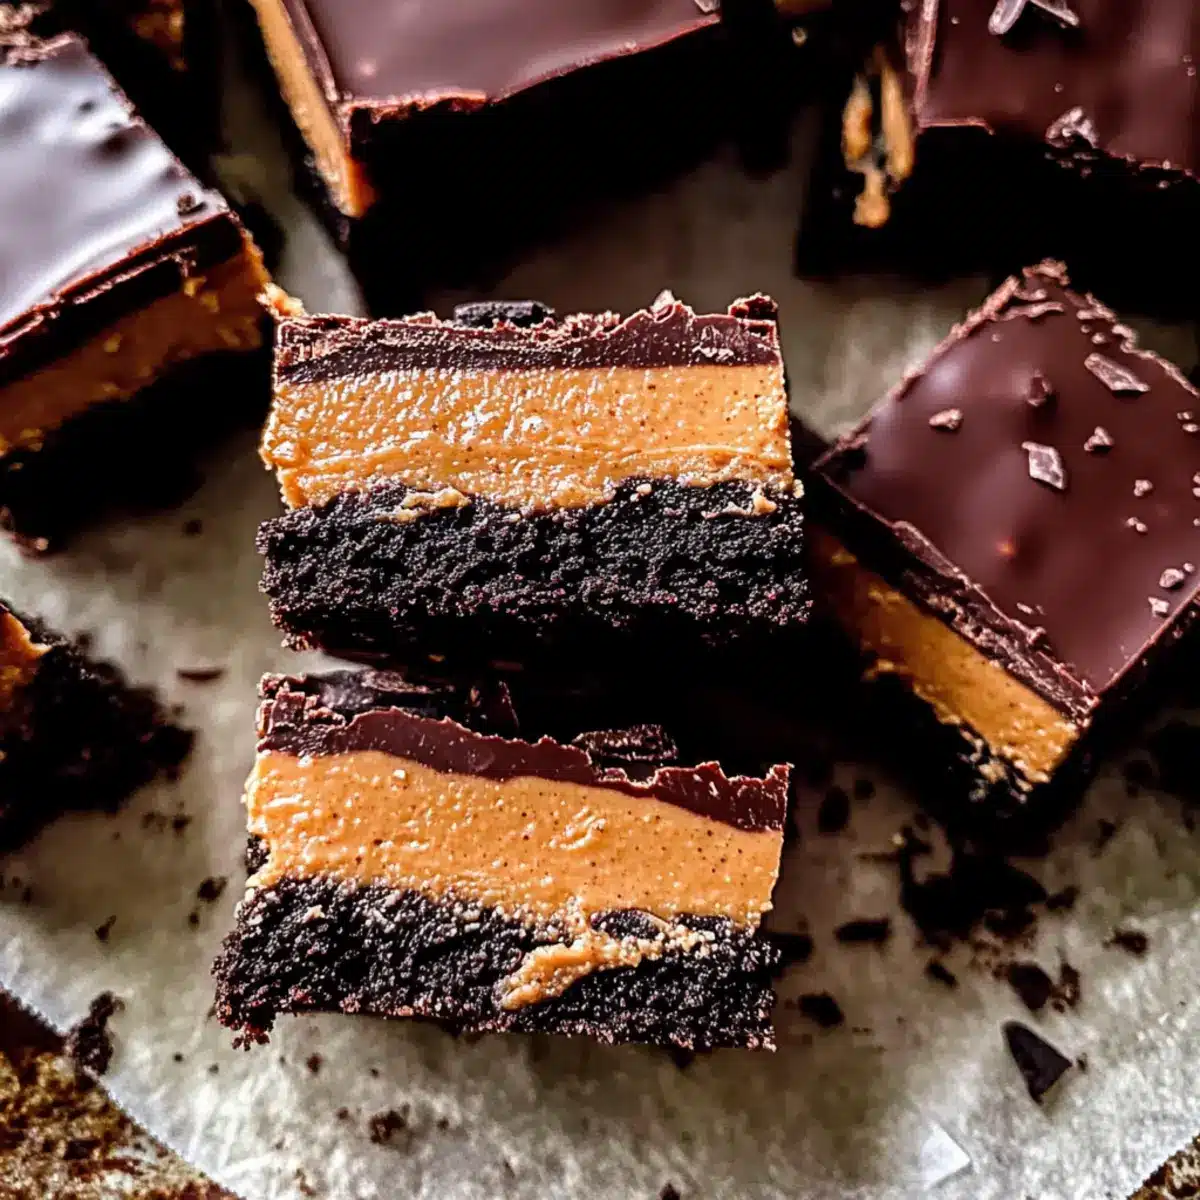
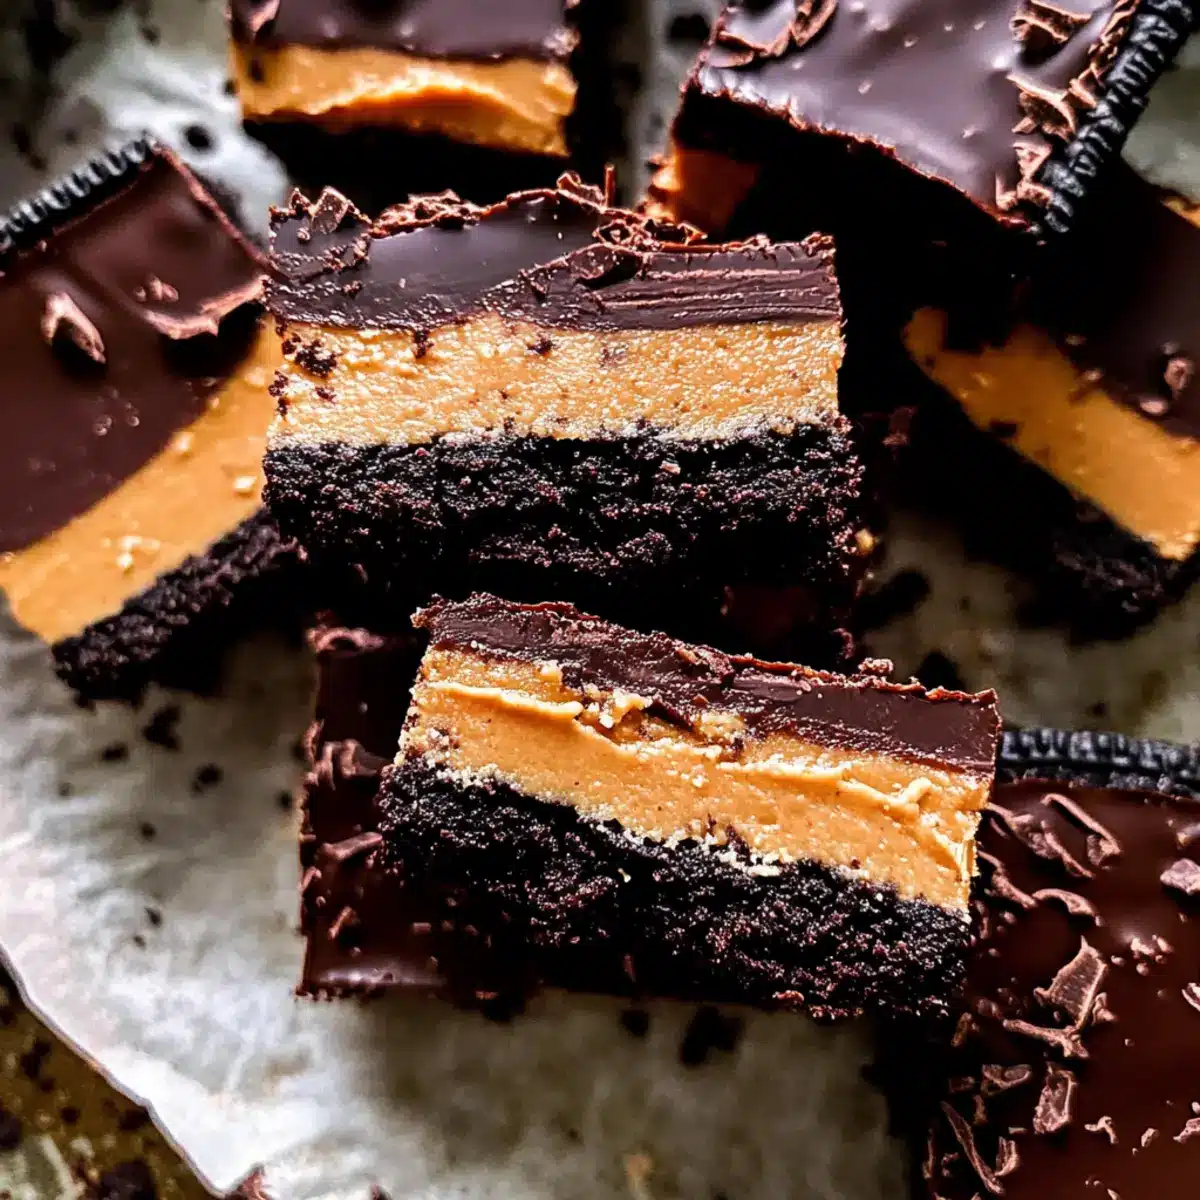
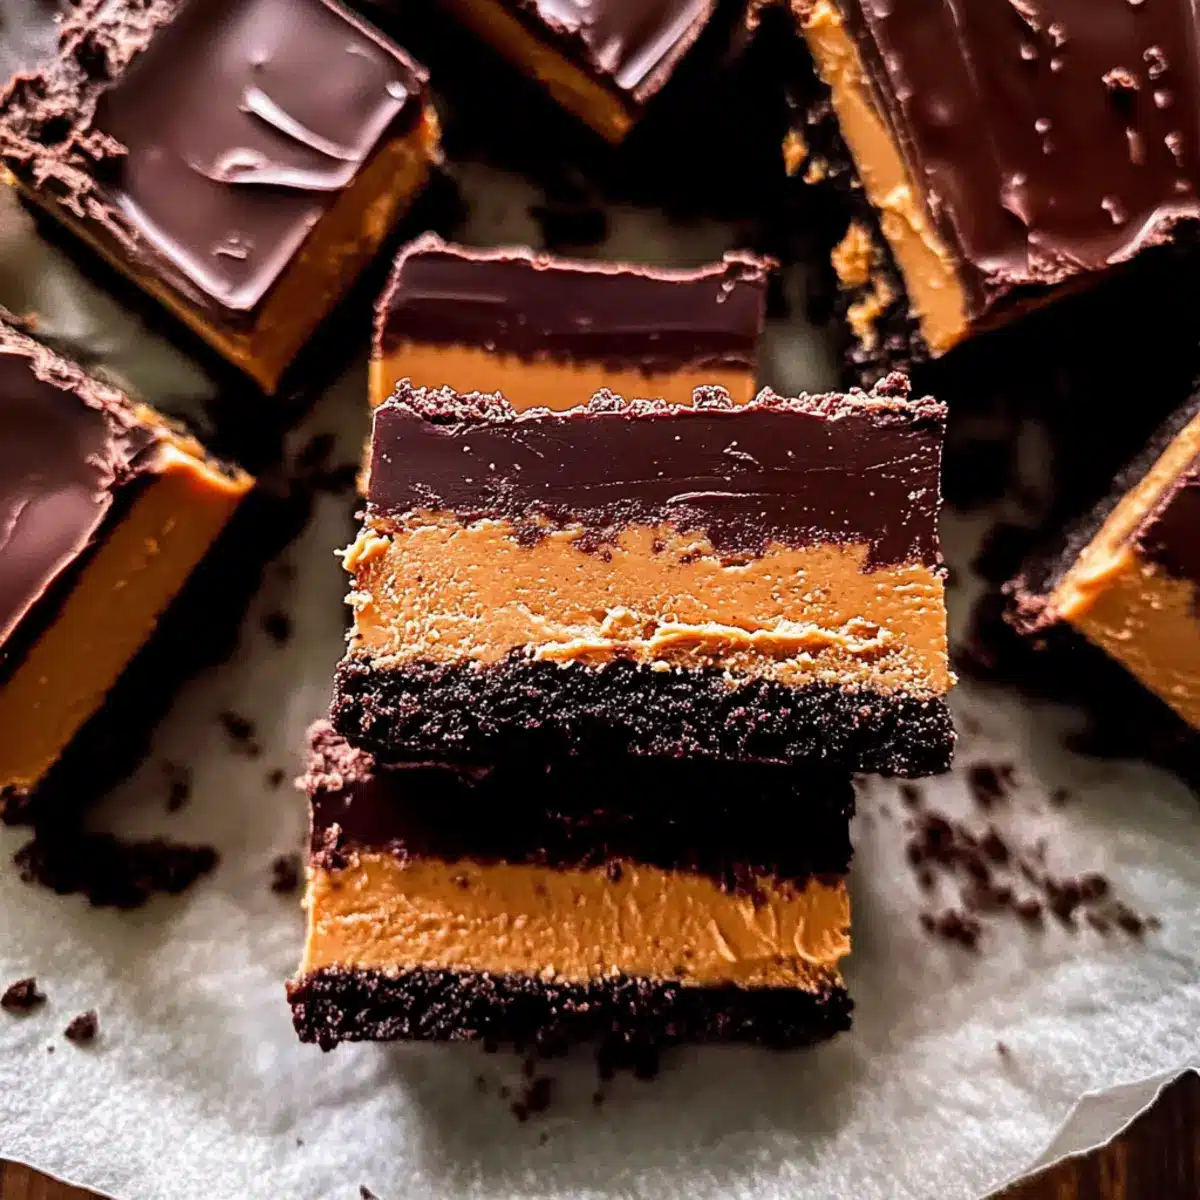
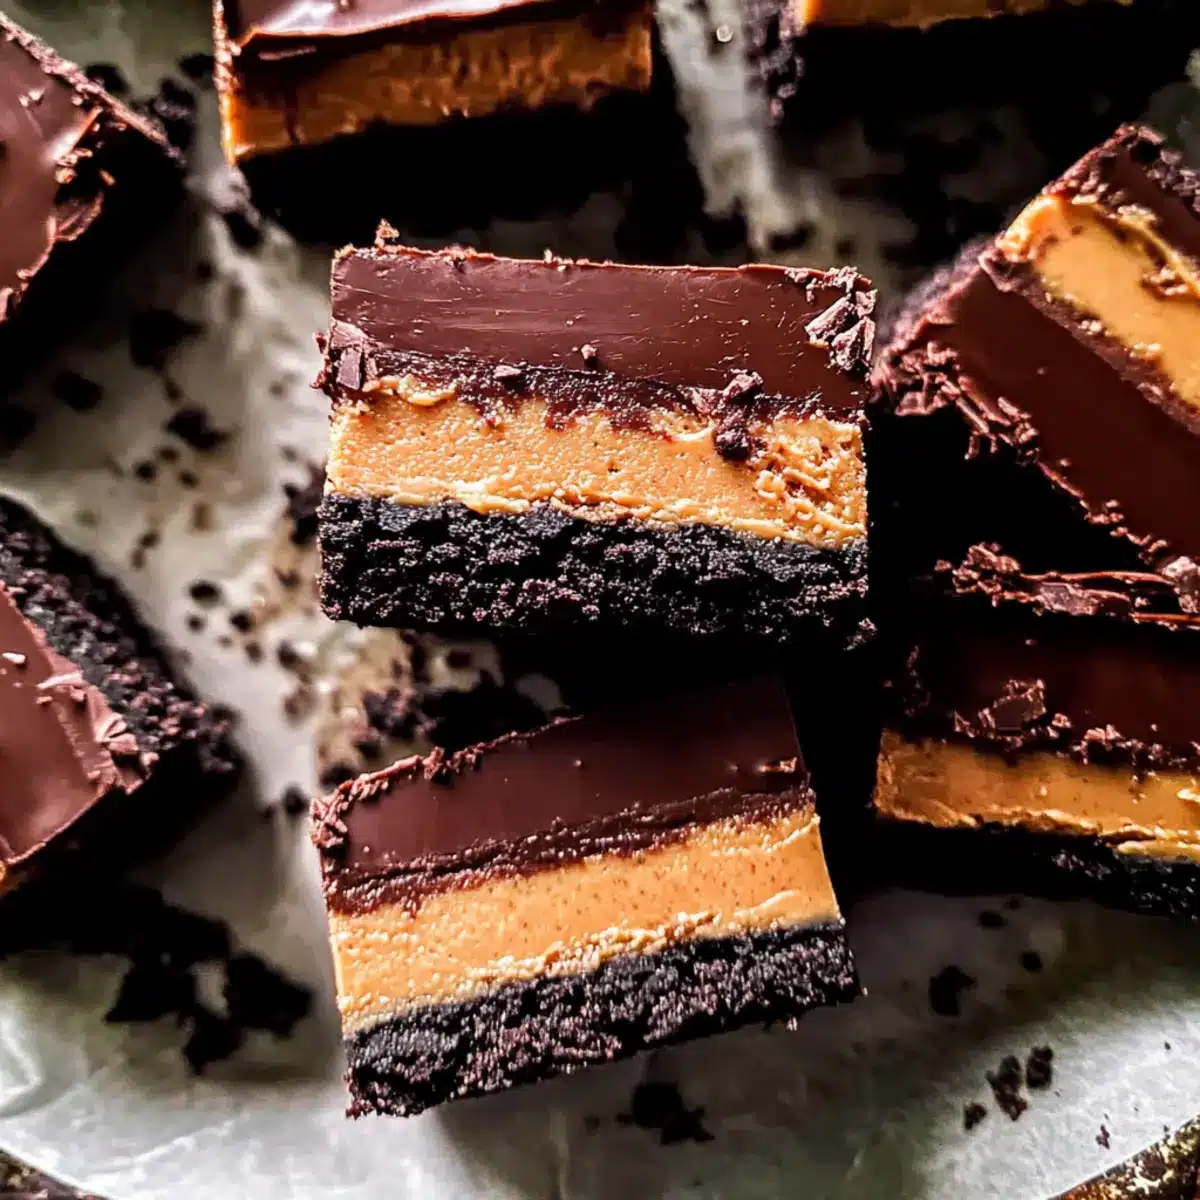
As the warm summer sun dips below the horizon, I find myself mingling with family and friends, dessert in hand. That’s where my irresistible No-Bake Chocolate Peanut Butter Fudge Bars come into play, creating sweet smiles all around. This simple recipe combines creamy peanut butter with silky chocolate, forming a delightful three-layer treat that’s as fun to make as it is to savor. Not only does it require no oven—perfect for those warm evenings—but it’s also a foolproof crowd-pleaser for any gathering or spontaneous craving. Ready to impress your loved ones and indulge your sweet tooth? Let’s dive into these decadent bars that redefine dessert joy!
Why Are These Fudge Bars Irresistible?
Indulgence, these No-Bake Chocolate Peanut Butter Fudge Bars are a triple threat of creamy, crunchy, and chocolaty goodness that simply delights the senses. Simplicity, with an easy preparation process, they can be whipped up in no time, perfect for those spontaneous dessert cravings. Versatility, you can customize them by swapping out peanut butter for sunflower seed butter for a nut-free option. Crowd-pleaser, whether at a picnic, potluck, or family gathering, these bars will surely impress everyone. Pre-made goodness, no need to turn on the oven on hot days, making them a must for summer entertaining. Enjoy a slice alongside a cozy cup of coffee or try them with your family favorite, Garlic Butter Tofu for a delightful treat!
Chocolate Peanut Butter Fudge Bars Ingredients
For the Crust
• Oreo Cookies – A deliciously sweet and crunchy base that complements the fudge beautifully.
• Unsalted Butter – Helps bind the crust and adds richness for an indulgent taste.
For the Peanut Butter Layer
• Creamy Processed Peanut Butter – Essential for a rich, creamy layer; avoid natural varieties as they may not set properly.
• Powdered Sugar – Sweetens the filling and aids in achieving the right consistency.
For the Fudge Layer
• Baker’s Chocolate/Couverture Chocolate – Melts beautifully for a smooth fudge layer; avoid chocolate chips unless you’ve tested them for melting.
• Unsalted Butter – Adds extra richness to the fudge layer and helps achieve that perfect silky texture.
Enjoy these Chocolate Peanut Butter Fudge Bars that are not only easy to make but also irresistibly delicious!
Step‑by‑Step Instructions for Chocolate Peanut Butter Fudge Bars
Step 1: Prepare the Oreo Crust
Begin by crushing 24 Oreo cookies into fine crumbs using a food processor or a zip-top bag and rolling pin. In a mixing bowl, combine the crushed cookies with melted unsalted butter until thoroughly mixed. Once the mixture resembles wet sand, press it firmly into an 8×8-inch parchment-lined pan to form an even crust layer. Chill in the refrigerator while you prepare the next layer.
Step 2: Make the Peanut Butter Layer
In a medium bowl, whisk together 1 cup of creamy processed peanut butter and 1 cup of powdered sugar until smooth and well combined. Spread this luscious peanut butter mixture evenly over the set Oreo crust using a spatula, ensuring it reaches the edges. Place the pan back in the freezer for about 30 minutes, or until the layer feels firm to the touch.
Step 3: Prepare the Fudge Layer
In a saucepan over low heat, melt together 8 ounces of Baker’s chocolate and 4 tablespoons of unsalted butter, stirring continuously until the mixture is smooth and glossy. Be careful to avoid burning the chocolate. Once melted, remove the saucepan from heat and allow it to cool slightly before pouring it over the chilled peanut butter layer, spreading it evenly for a glossy finish.
Step 4: Final Set
Cover the pan with plastic wrap and refrigerate the entire dish for at least 1 hour, or until the fudge layer is fully set and firm to the touch. When ready, carefully lift the fudge bars out of the pan using the parchment paper and transfer them to a cutting board. Use a hot knife to slice them into squares for clean edges. Enjoy your delicious Chocolate Peanut Butter Fudge Bars!
Storage Tips for Chocolate Peanut Butter Fudge Bars
Fridge: Keep your Chocolate Peanut Butter Fudge Bars in an airtight container in the refrigerator for up to 7 days to maintain freshness and firmness.
Freezer: For longer storage, you can freeze the bars wrapped tightly in plastic wrap for up to 3 months; just make sure to thaw in the fridge before serving.
Room Temperature: If serving at room temperature, limit exposure to keep them from becoming too soft; enjoy within a few hours for the best texture.
Reheating: These bars don’t require reheating—enjoy them chilled or at room temperature for that rich fudge experience!
Make Ahead Options
These No-Bake Chocolate Peanut Butter Fudge Bars are a dream come true for busy home cooks looking to save time! You can easily prepare the Oreo crust and the peanut butter layer up to 3 days in advance by storing them covered in the refrigerator. To maintain their delightful texture, ensure the peanut butter layer is tightly wrapped. When you’re ready to serve, simply melt the fudge layer and pour it over the peanut butter layer, allowing them to set in the fridge for at least 1 hour. This way, you’ll have an impressive dessert ready without the last-minute rush, keeping them just as delicious and satisfying!
Expert Tips for Chocolate Peanut Butter Fudge Bars
• Use Quality Ingredients: Always opt for high-quality Baker’s chocolate and creamy processed peanut butter to elevate the flavor of your Chocolate Peanut Butter Fudge Bars.
• Avoid Overmixing: When combining the peanut butter layer, mix just until smooth. Overmixing can lead to a dense and overly sweet filling.
• Chill Thoroughly: Don’t skip the chilling times mentioned in the instructions; they ensure the layers set properly and hold their structure when sliced.
• Hot Knife Trick: For clean cuts, run a knife under hot water for 20-30 seconds before slicing. This will give your bars a beautiful finish without crumbling.
• Storage Tips: Store your fudge bars in an airtight container in the fridge for optimal freshness and firmness; they can soften at room temperature.
• Experiment with Toppings: Feel free to sprinkle crushed nuts or sea salt on top before chilling for an extra layer of flavor and texture in your Chocolate Peanut Butter Fudge Bars.
What to Serve with Chocolate Peanut Butter Fudge Bars
There’s nothing quite as delightful as a spread of goodies to accompany your sweet masterpiece; let’s explore some perfect pairings!
-
Creamy Vanilla Ice Cream: A scoop of creamy vanilla ice cream provides a refreshing contrast to the richness of the fudge bars. The cold creaminess perfectly balances the dense flavors, creating a delightful experience with each bite.
-
Fresh Berries: Juicy strawberries or raspberries add a burst of freshness that cuts through the sweetness. Their vibrant colors and tangy flavor bring a lightness to the dessert table, making it visually appealing and refreshing.
-
Nutty Trail Mix: Sprinkle a handful of nutty trail mix on the side for added crunch. The mix of textures and flavors complements the creamy fudge while giving an extra layer of wholesome goodness to the indulgence.
-
Rich Coffee: Serve with a cup of freshly brewed coffee for a delightful adult twist. The slight bitterness of coffee cuts through the sweet bars, enhancing the chocolate and peanut butter flavors beautifully.
-
Chocolate Sauce Drizzle: For the ultimate indulgence, drizzle some warm chocolate sauce over the fudge bars before serving. It elevates the dessert to a new level, making it a totally irresistible treat.
-
Creamy Whipped Topping: A dollop of whipped cream offers a light, airy texture that pairs wonderfully with the rich layers of the fudge bars. It creates a delightful contrast while adding a touch of elegance to your dessert.
-
Mint Leaves Garnish: Fresh mint leaves not only add a pop of color but also infuse a refreshing flavor. Place a sprig atop the fudge bars to surprise your guests with a hint of coolness that enhances the overall experience.
Chocolate Peanut Butter Fudge Bars Variations
Feel free to get creative and personalize these delectable treats to suit your taste preferences.
-
Nut-Free Option: Substitute peanut butter with sunflower seed butter for a nut-free treat suitable for everyone.
Sunflower seed butter not only mimics the creaminess of peanut butter but also lends its own unique flavor, making your fudge bars irresistibly yummy. -
Salted Caramel Twist: Drizzle some salted caramel over the fudge layer before it sets for an added flavor dimension.
The sweet and salty combination elevates these fudge bars, making them even more irresistible! -
Crunchy Nutty Layer: Fold in chopped nuts, like almonds or pecans, into the peanut butter layer for delightful crunch.
This pairing enhances the texture while introducing a roasted flavor that complements the chocolate beautifully. -
Spicy Kick: Add a sprinkle of cayenne pepper or chili powder to the fudge layer for a surprising heat twist.
This unexpected kick brings a little zing to the sweet experience, delighting adventurous taste buds! -
Flavorful Extracts: Mix in a teaspoon of vanilla extract into the peanut butter layer to deepen the flavor.
The aromatic sweetness balances perfectly with the chocolate, making each bite truly enchanting. -
Fruit Fusion: Top your fudge bars with fresh raspberries or sliced strawberries for a fruity burst.
This adds freshness and a touch of tartness that beautifully contrasts the rich fudge and peanut butter. -
Dessicated Coconut: Sprinkle toasted coconut flakes on top of the fudge layer before setting.
This adds a tropical vibe that pairs wonderfully with chocolate and peanut butter, transforming your treats into an island getaway!
Explore these variations and find the one that makes your heart sing! For even more delightful desserts, consider diving into a slice of German Chocolate Poke or indulging in a rich French Butter Cake.
Chocolate Peanut Butter Fudge Bars Recipe FAQs
How do I choose ripe ingredients for this recipe?
Absolutely! Selecting the right ingredients is key. For the creamy processed peanut butter, make sure it’s from a reliable brand labeled as “creamy” as this texture is crucial for the fudge layer. Avoid natural peanut butter as it could lead to a runny filling that doesn’t set properly.
How should I store my Chocolate Peanut Butter Fudge Bars?
To store your fudge bars properly, keep them in an airtight container in the refrigerator where they will stay fresh for up to 7 days. I often line the container with parchment paper to prevent sticking. If you notice them getting a bit soft, it’s time to pop them back in the fridge!
Can I freeze these fudge bars? How do I do it?
Very! You can absolutely freeze your Chocolate Peanut Butter Fudge Bars for longer storage. Wrap each bar individually in plastic wrap and then place them in a zip-top freezer bag. They can last for up to 3 months! When you’re ready to enjoy them, simply transfer them to the refrigerator overnight to thaw before serving.
What should I do if my fudge layer isn’t setting properly?
If your fudge layer isn’t setting, it might be due to using chocolate chips instead of Baker’s chocolate. For best results, always use a quality melting chocolate, like Baker’s, which is designed for this purpose. In case of a mishap, I recommend placing the entire batch back into the freezer for another hour to help it firm up.
Are there any allergy considerations with this recipe?
Definitely! Be cautious as the primary ingredients include peanut butter, which can be an allergen for many. For a nut-free version, I’ve found that sunflower seed butter works wonderfully as a replacement. Always check labels for potential allergens, especially if you’re sharing these treats with guests.
Decadent Chocolate Peanut Butter Fudge Bars You’ll Love
Ingredients
Equipment
Method
- Prepare the Oreo Crust: Crush 24 Oreo cookies into fine crumbs and mix with melted butter. Press into an 8x8-inch pan and chill.
- Make the Peanut Butter Layer: Whisk together 1 cup of peanut butter and 1 cup of powdered sugar; spread over the crust and freeze for 30 minutes.
- Prepare the Fudge Layer: Melt 8 ounces of chocolate and 4 tablespoons of butter in a saucepan over low heat; spread it over the peanut butter layer.
- Final Set: Refrigerate for at least 1 hour, then lift out and cut into squares.
Leave a Reply