
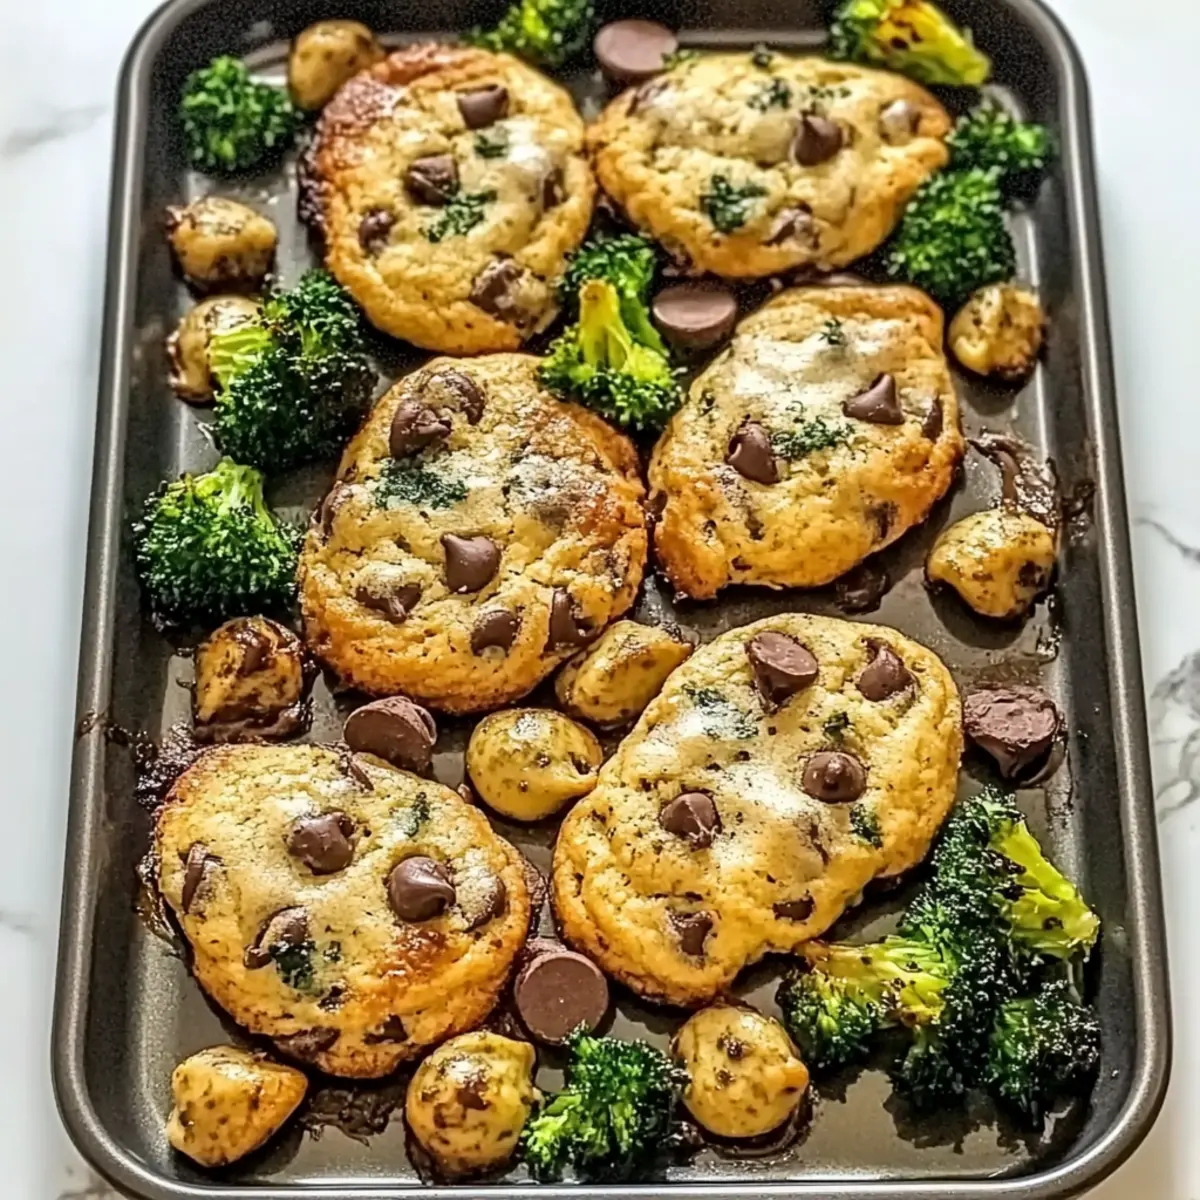
The comforting aroma of freshly baked cookies wafts through the air, wrapping around you like a warm hug. As I pull a tray of Classic Chocolate Chip Cookies from the oven, I feel an overwhelming sense of joy—there’s nothing quite like the magic of homemade treats. This easy recipe not only delivers cookies that are soft in the center and delightfully crisp-edged, but it’s also super adaptable for any dietary preference, whether you’re gluten-free or dairy-free. Making these cookies is more than just a baking project; it’s a wonderful way to bring friends and family together, creating delicious moments that you’ll cherish long after the last crumb has disappeared. Are you ready to discover how to create your own batch of blissful cookies? Let’s get started!

Why Are These Cookies a Must-Bake?
Irresistible aroma: The smell of chocolate chip cookies baking is enough to bring smiles to everyone in your home.
Customizable options: With gluten-free and dairy-free variations, everyone can enjoy them.
Quick and easy: Whip these up in under an hour, making them perfect for spontaneous cravings or gatherings.
Timeless classic: These cookies are loved by all ages, making them a hit at parties or family events.
Perfect for sharing: Gift a tray to a friend or neighbor, spreading sweetness and joy with each bite.
Don’t forget to pair your cookies with a glass of milk or try them alongside a savory dish like Sheet Pan Garlic Butter Chicken and Veggies for a delightful meal!
Classic Chocolate Chip Cookie Ingredients
Here’s everything you need to create your own delightful batch of cookies!
For the Cookie Dough
- All-Purpose Flour – Structure is key; ensure proper measurement for that perfect cookie texture. Can substitute with a gluten-free flour blend for a gluten-free version.
- Unsalted Butter – Adds flavor and moisture; use softened butter for easy mixing, or coconut oil for a dairy-free alternative.
- Granulated Sugar – Provides sweetness and crunch; consider brown sugar for a chewier cookie experience.
- Brown Sugar – Brings richness and moisture; feel free to swap it with coconut sugar for a refined-sugar-free treat.
- Eggs – Acts as a binding agent and helps with leavening; replace with flaxseed meal (1 tbsp mixed with 2.5 tbsp water) for a vegan option.
- Vanilla Extract – Enhances flavor, so always go for pure extract for the best taste.
- Baking Soda – This leavening agent is crucial; check it’s fresh for optimal cookie rise.
- Salt – Enhances flavor and balances sweetness; don’t skip this small but mighty ingredient!
- Chocolate Chips – The star of the show, delivering rich chocolatey goodness; choose semi-sweet, dark, or dairy-free chips as you like!
Get ready to indulge in these delicious cookies that everyone will be raving about!
Step-by-Step Instructions for Classic Chocolate Chip Cookies
Step 1: Preheat and Prepare
Begin by preheating your oven to 350°F (175°C). While the oven heats up, line two baking sheets with parchment paper to ensure easy clean-up and prevent sticking. The parchment will keep your cookies from spreading too much while baking, maintaining that perfect chewy center.
Step 2: Cream the Butters and Sugars
In a large mixing bowl, combine softened unsalted butter, granulated sugar, and brown sugar. Using an electric mixer, cream the mixture on medium speed for about 2-3 minutes until it’s light and fluffy. This process involves incorporating air into the butter, which will give your cookies that delightful texture everyone loves.
Step 3: Incorporate Eggs and Vanilla
Once your butter and sugar are creamed, add in the eggs one at a time, beating well after each addition. Then, pour in the vanilla extract, mixing until fully combined. The eggs help bind the cookie dough together while adding moisture, and the vanilla enhances the overall flavor of your Classic Chocolate Chip Cookies.
Step 4: Mix Dry Ingredients
In a separate bowl, whisk together the all-purpose flour, baking soda, and salt. Ensure these dry ingredients are well combined to promote even distribution throughout the cookie dough. Gradually incorporate this mixture into the butter mixture, stirring until just combined. Take care not to overmix, as this can lead to tough cookies.
Step 5: Add Chocolate Chips
Now it’s time to fold in those luscious chocolate chips! Gently mix them into the dough until evenly distributed. This step gives your Classic Chocolate Chip Cookies that iconic burst of chocolate in every bite. If you’re customizing for dietary preferences, feel free to substitute with dairy-free chocolate chips as needed.
Step 6: Scoop and Shape the Dough
Using a cookie scoop or two spoons, drop tablespoonfuls of dough onto the prepared baking sheets, spacing them about 2 inches apart. The spacing helps them spread evenly while baking without running together. Each scoop should be heaping to ensure a satisfying cookie size.
Step 7: Bake to Golden Perfection
Place the baking sheets in the preheated oven and bake for 10-12 minutes, or until the edges of the cookies turn golden brown while the centers remain soft. This visual cue is key; you want them to be soft in the center for that perfect cookie texture.
Step 8: Cool and Transfer
Once baked, remove the cookies from the oven and let them cool on the pan for about 5 minutes. This short wait allows them to set before transferring to a wire rack for complete cooling. The wire rack will help air circulate, ensuring they stay soft and delicious.
Storage Tips for Classic Chocolate Chip Cookies
Room Temperature: Store cookies in an airtight container at room temperature for up to 1 week to keep them soft and fresh.
Fridge: If your kitchen is warm, consider placing cookies in the refrigerator to maintain their texture for up to 2 weeks. Ensure they’re wrapped tightly.
Freezer: Freeze cookies in a single layer on a baking sheet, then transfer to a freezer-safe bag for up to 3 months. Thaw at room temperature when ready to enjoy.
Reheating: If you prefer warm cookies, microwave them for about 10-15 seconds or pop them in the oven at 350°F (175°C) for a few minutes to regain that fresh-baked texture.
Variations & Substitutions for Classic Chocolate Chip Cookies
Customize these delicious cookies to suit your taste and dietary needs—you’ll enjoy the sweet rewards!
-
Gluten-Free: Substitute all-purpose flour with a gluten-free flour blend for a guilt-free indulgence. Your cookies will still taste phenomenal, with that classic texture intact.
-
Dairy-Free: Use coconut oil or a dairy-free butter alternative in place of unsalted butter. This swap keeps your cookies rich and buttery while catering to lactose sensitivities.
-
Vegan: Replace the eggs with flaxseed meal (1 tbsp mixed with 2.5 tbsp water) for a plant-based twist. Your cookies will still hold together superbly and be just as delightful.
-
Chewy Texture: Swap granulated sugar for more brown sugar, increasing the moisture and achieving that irresistible chewiness we all love in cookies.
-
Nutty Surprise: Add chopped nuts like walnuts or pecans for a crunchy contrast. It provides an enjoyable texture and a subtle flavor that pairs beautifully with chocolate.
-
Flavor Boost: Mix in a pinch of espresso powder to enhance the chocolate flavor, making your cookies rich and deep. Elevate your baking game with this simple addition!
-
Seasonal Twist: Incorporate seasonal spices like cinnamon or nutmeg for a festive flair. Perfect for holiday gatherings or cozy family nights.
-
Extra Chocolate: Use a mix of chocolate chips, such as semi-sweet and dark, or add chocolate chunks for more melt-in-your-mouth goodness. More chocolate can only mean more joy!
Adding your personal touch to these cookies is a wonderful way to experiment in the kitchen, just like you can with a delectable dish of Sheet Pan Garlic Butter Chicken and Veggies on a weeknight when you crave something satisfying. Enjoy the journey, and happy baking!
What to Serve with Classic Chocolate Chip Cookies?
Indulge your senses as you explore delightful pairings that take your sweet treat experience to a whole new level.
- Freshly Brewed Coffee: The bold flavors of coffee beautifully complement the sweetness of the cookies, creating the perfect afternoon pick-me-up.
- Vanilla Ice Cream: A scoop on the side adds a creamy contrast, turning your cookies into an irresistible ice cream sandwich.
- Chilled Milk: This classic pairing brings out the cookie’s flavors while providing a nostalgic comfort that warms the heart.
Let’s not forget the fun side events! Imagine gathering with loved ones, sharing cookies warm from the oven. Perhaps even serving them at a family BBQ alongside a platter of juicy grilled veggies. Whatever the occasion, don’t skimp on joy—create those joyous moments around the table!
- Fruit Salad: A refreshing mix of seasonal fruits brightens the palate, balancing the sweetness of your cookies with a burst of freshness.
- Cheese Platter: Try an assortment of cheeses for an unexpected twist, where the savory bites offset the sweet delight of your cookies.
- Homemade Hot Chocolate: For the ultimate cozy experience, sipping on rich hot chocolate while nibbling on warm cookies is a moment to savor.
- Warm Brownies: Dive into double chocolate goodness; the contrast between textures is a heavenly experience with every bite.
- Sheet Pan Garlic Butter Chicken and Veggies: A savory dish like this creates a beautiful meal spread that leaves room for dessert!
- Sparkling Water with Lime: A refreshing drink offers a light finish, cleansing the palate and enhancing the cookie enjoyment.
Let these pairings elevate your cookie baking journey into a full culinary adventure!
Expert Tips for Classic Chocolate Chip Cookies
-
Measure Accurately: Use a kitchen scale or measuring cups to ensure you have the right amounts of flour and sugar. Incorrect measurements can lead to dry or overly sticky cookies.
-
Don’t Overmix: Once you’ve added the flour, mix just until combined. Overmixing can lead to tough cookies instead of the soft, melt-in-your-mouth texture we all love.
-
Chill the Dough: Refrigerate the cookie dough for about 30 minutes before baking. This not only enhances the flavor but also prevents unwanted spreading during baking.
-
Use Quality Ingredients: Opt for pure vanilla extract and high-quality chocolate chips. The better the ingredients, the better the flavor of your cookies!
-
Watch the Baking Time: Keep an eye on your cookies as they bake. Ovens can vary, so start checking around the 10-minute mark to avoid overbaking.
-
Adjust for Dietary Needs: Don’t hesitate to try gluten-free flour or dairy-free chocolate chips. These adaptations won’t compromise your cookies’ classic taste!
Make Ahead Options
These Classic Chocolate Chip Cookies are perfect for meal prep enthusiasts! You can prepare the cookie dough up to 3 days in advance by mixing all the ingredients and storing the dough in an airtight container in the refrigerator. This prevents any unwanted spreading and helps the flavors deepen. If you prefer, you can also scoop the dough into individual balls and freeze them for up to 3 months. When you’re ready to bake, simply place the frozen dough balls directly onto a baking sheet and bake for 1-2 additional minutes than the recipe calls for. This way, you’ll benefit from warm, fresh cookies anytime with minimal effort!
Classic Chocolate Chip Cookies Recipe FAQs
How do I know if my ingredients are ripe or fresh for this recipe?
Absolutely! For the best results, ensure your eggs are within their expiration date and that your baking soda is fresh (test by adding a bit of vinegar; it should fizz). Check butter to ensure it’s creamy and has no off smell. If using chocolate chips, make sure they’re within their shelf life, ensuring optimal melt and flavor.
What’s the best way to store my cookies, and how long do they last?
Store these delightful cookies in an airtight container at room temperature for up to 1 week to maintain their chewiness. If your kitchen is warm, you can also refrigerate them for up to 2 weeks. Just make sure to wrap them tightly to prevent drying out!
Can I freeze the cookie dough or baked cookies?
Very! To freeze cookie dough, scoop individual portions onto a baking sheet and freeze until solid. Then transfer them to a freezer-safe bag, where they can stay fresh for up to 3 months. Bake directly from frozen, adding a couple of extra minutes to the baking time. You can also freeze baked cookies in a single layer and transfer them to a freezer bag. Just remember to thaw them at room temperature when you’re ready for a sweet treat!
What should I do if my cookies turn out flat?
If your cookies spread too much, it might be due to soft butter or overmixing. Here’s a step-by-step solution: 1) Always cream your butter and sugars until light and fluffy, about 2-3 minutes. 2) Chill the dough for 30 minutes before baking. 3) Ensure that you’re measuring flour accurately, as too little can cause spreading. Following these steps should yield the perfect puffed cookies every time!
Are there any dietary considerations for my friends and family?
Absolutely! If you need gluten-free cookies, simply substitute all-purpose flour with a gluten-free flour blend. For a dairy-free option, replace unsalted butter with coconut oil and use dairy-free chocolate chips. These swaps maintain the cookie’s wonderful flavor while accommodating dietary needs, ensuring everyone can join in the cookie joy!
Can I use substitutes for the chocolate chips?
The more the merrier! If you want to change things up, consider using nuts, dried fruits, or even a mix of different chocolate types like dark or semi-sweet. A pinch of cinnamon or espresso powder can also enhance flavor. Feel free to experiment; your taste buds will thank you!
Sheet Pan Garlic Butter Chicken and Veggies Made Easy
Ingredients
Equipment
Method
- Preheat your oven to 400°F (200°C). Line a baking sheet with parchment paper.
- In a mixing bowl, combine melted butter, minced garlic, Italian seasoning, salt, and pepper.
- Place chicken breasts on the prepared baking sheet and brush with the butter mixture.
- Add your mixed vegetables to the baking sheet and drizzle with any remaining butter mixture.
- Bake for 25-30 minutes or until the chicken is cooked through and the vegetables are tender.
- Remove from the oven and let it rest for a few minutes before serving.
Leave a Reply