
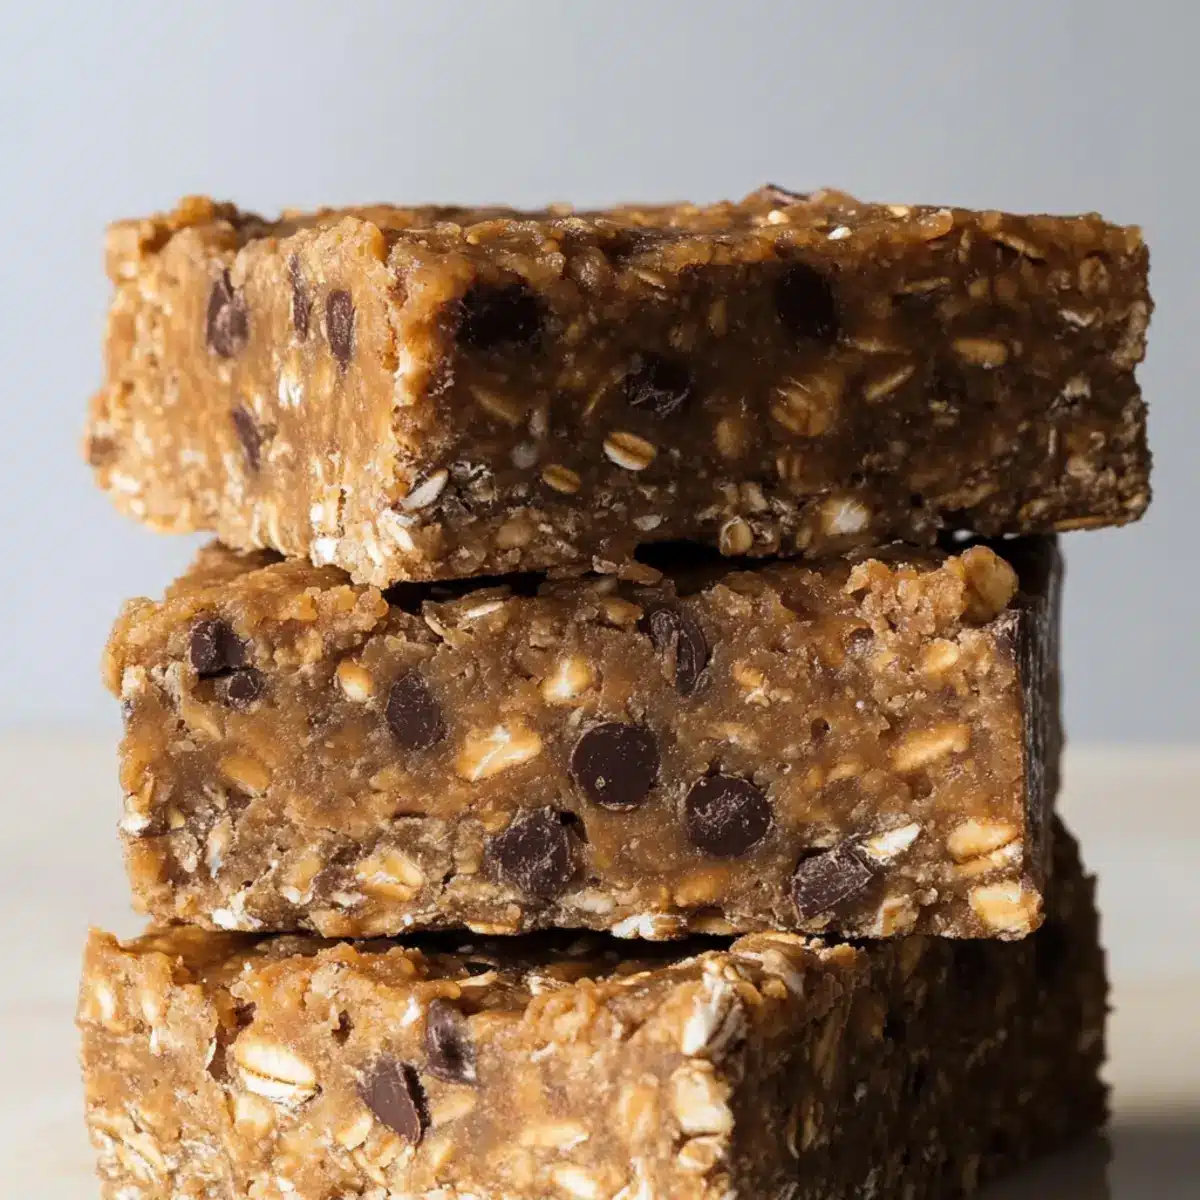
“Quick, what’s a healthy snack that you can whip up in under 10 minutes?” I overheard my friend ask during our latest workout session. The answer? Easy No-Bake Workout Bars! These delightful bars not only satisfy that post-exercise hunger but also fuel you with protein and energizing superfoods. With a chewy texture and a rich chocolate flavor, you’ll find these homemade treats are a game-changer against the sugar-laden options at the store. Plus, they’re versatile—gluten-free, vegetarian, and perfect for anyone looking to ditch fast food. Whether you need a quick breakfast or a guilt-free dessert, these bars cater to all your cravings. Curious how easy it is to make them? Let’s dive in!
Why are Easy No-Bake Bars a Must-Try?
Simplicity at Its Best: The recipe requires minimal equipment, making it perfect for busy lifestyles.
Nutritious Energy Boost: Packed with protein and wholesome ingredients, these bars fuel your day effectively.
Customizable Flavors: You can swap ingredients like peanut butter or chocolate chips to fit your taste or dietary needs.
Guilt-Free Indulgence: Enjoy the sweet, rich flavor without the added sugars often found in store-bought options.
Perfect for Sharing: Whether at home or the gym, these bars are a hit with friends and family alike! If you love quick, tasty snacks, check out how to Bake Samoa Cookies or try something savory like Mediterranean Baked Fish.
Easy No-Bake Workout Bar Ingredients
For the Base
• Rolled Oats – Provides structure and fiber; opt for certified gluten-free oats if necessary.
• Clean Protein Powder – Supports muscle recovery; choose any clean, natural protein powder for the best results.
• Chia Seeds or Ground Flax Seeds – Rich in Omega-3 fatty acids and fiber; using one or the other works perfectly.
For Sweetness and Flavor
• Mini Chocolate Chips – Adds a touch of sweetness; dark chocolate makes a healthier substitution.
• Raisins – Brings moisture and sweetness; feel free to replace with chopped dried fruits if desired.
For Binding and Creaminess
• Peanut Butter – Binds ingredients while adding healthy fats; almond butter is a great nut-free alternative.
• Lite Coconut Milk – Contributes creaminess; any plant-based milk can be used for flavor variety.
• Raw Honey – Natural sweetener; maple syrup is a vegan swap for those looking for alternatives.
Step‑by‑Step Instructions for Easy No-Bake Workout Bars
Step 1: Prepare Oat Flour
In a blender, pulse 1 ½ cups of rolled oats until they reach a fine, flour-like consistency. This will serve as the base for your Easy No-Bake Workout Bars, providing essential fiber and structure. Scrape down the sides to ensure even blending, and set aside for the next steps.
Step 2: Mix Dry Ingredients
In a large bowl, combine the oat flour with the remaining ½ cup of rolled oats, protein powder, mini chocolate chips, chia or flax seeds, and raisins. Stir the mixture well until fully blended, ensuring the dry ingredients are evenly distributed for consistent flavor in every bite of your bars.
Step 3: Combine Wet Ingredients
In a separate medium bowl, whisk together ½ cup of peanut butter, ⅓ cup of lite coconut milk, and ¼ cup of raw honey until smooth and creamy. This mixture acts as the binding agent for your Easy No-Bake Workout Bars, blending flavors and adding moisture. Ensure there are no lumps for a silky texture.
Step 4: Incorporate the Mixtures
Pour the wet mixture over the dry ingredients, using a spatula to fold everything together thoroughly. Mix until every bit of the dry ingredients is coated. The mixture should form a sticky, thick batter that holds together, ensuring your bars will maintain their shape after chilling.
Step 5: Shape Bars
Line a 9×9-inch square pan with parchment paper for easy removal. Spread the mixture into the pan, using your hands or a spatula to press it down firmly and evenly. Cover the pan with plastic wrap and refrigerate for at least 4 hours or overnight. This step is vital for the bars to fully set and achieve the perfect chewy texture.
Step 6: Cut and Store
Once set, carefully remove the mixture from the pan using the parchment paper. Place it on a cutting board and cut into 12 equal bars. Store the bars in an airtight container in the refrigerator for freshness or freeze for longer storage. Enjoy your nutritious Easy No-Bake Workout Bars as a quick snack whenever you need a boost!
What to Serve with Easy No-Bake Workout Bars
When you’re ready to elevate your snacking experience, consider these delightful pairings that will complement the wholesome goodness of your bars.
-
Fresh Fruit Salad: A bright medley of seasonal fruits adds refreshing sweetness and balances the rich flavors of the bars. The juicy bursts of strawberries, blueberries, and oranges create a beautiful contrast in textures.
-
Greek Yogurt Dip: Serve with a dollop of honey-sweetened Greek yogurt for added creaminess. This protein-packed addition not only enhances your snack but also offers a deliciously tangy flavor that pairs wonderfully.
-
Nutty Trail Mix: A handful of your favorite nuts and seeds adds a satisfying crunch. This mix brings extra nutrients and a touch of saltiness that beautifully complements the sweetness of the bars.
-
Chilled Almond Milk: For a refreshing drink, enjoy a glass of unsweetened almond milk. Its light flavor and creamy texture make it the perfect beverage to wash down your Easy No-Bake Workout Bars.
-
Cinnamon Apple Slices: Crisp apple slices dusted with cinnamon create a delightful treat with a crunchy bite. These sweet and spicy slices bring an autumnal flair that pairs perfectly with a chocolatey bar.
-
Chocolate Protein Smoothie: Blend your favorite protein powder with banana, spinach, and almond milk for a frosty drink that harmonizes well with your bars. It’s a satisfying way to keep your energy up post-workout.
-
Oatmeal Bowl: Start your day right by serving the bars alongside a warm bowl of oatmeal topped with berries and honey. This combination not only gives a hearty breakfast but also satisfies the appetite beautifully.
With these tasty pairings, you’ll create a vibrant and satisfying meal that showcases the versatility of your Easy No-Bake Workout Bars!
Expert Tips for Easy No-Bake Workout Bars
-
Press Firmly: Make sure to press the mixture down strongly into the pan; this ensures your Easy No-Bake Workout Bars hold together nicely when sliced.
-
Monitor Texture: If substituting nut butters, you may need to adjust the coconut milk amount. The consistency should be thick yet sticky for the best results.
-
Flavor Additions: Don’t hesitate to expand your flavor profile! Adding spices like cinnamon or a splash of vanilla extract can elevate your workout bars to the next level.
-
Store Right: Keep your bars in an airtight container in the refrigerator for up to a week, or freeze them for longer shelf life. This ensures freshness and minimizes waste.
-
Experiment with Variations: Swap ingredients based on your dietary preferences. Try different nut butters or include crunchy nuts for an exciting twist!
Easy No-Bake Workout Bars: Variations & Substitutions
Feel free to customize your Easy No-Bake Workout Bars to suit your taste and dietary needs!
- Nut-Free: Replace peanut butter with sunflower seed butter to keep it school-friendly and nut-free.
- Vegan Option: Use maple syrup instead of honey and any plant-based milk for a fully vegan treat.
- Chocolate-Free: Swap mini chocolate chips with dried fruits like apricots or cranberries for a fruity twist.
- Texture Boost: Add in a handful of chopped nuts for a satisfying crunch in every bite.
- Flavor Infusion: Stir in a teaspoon of cinnamon or a splash of vanilla extract for an added flavor layer.
- Protein Kick: Use flavored protein powder like chocolate or vanilla to enhance the overall taste experience.
- Lower Sugar: Reduce the amount of honey or maple syrup to control sweetness and still enjoy the texture.
- Fruity Surprise: Mix in a scoop of freeze-dried berries for bursts of flavor that elevate your snack!
If you’re looking for more delightful recipes and ideas, don’t forget to check out how to Bake Samoa Cookies or experiment with Mediterranean Baked Fish. Enjoy making your bars uniquely yours!
Make Ahead Options
These Easy No-Bake Workout Bars are ideal for meal prep, allowing you to conveniently stock up on healthy snacks! You can prepare the mixture and shape the bars up to 24 hours before serving. Simply mix all your dry ingredients and wet ingredients as instructed, then press the mixture into a lined pan and refrigerate it overnight. To maintain quality, it’s best to keep the bars stored in an airtight container in the refrigerator or freezer. When you’re ready to enjoy, simply cut them into squares and indulge in these nutritious treats that are just as delicious as when they were freshly made!
Storage Tips for Easy No-Bake Workout Bars
Fridge: Store your Easy No-Bake Workout Bars in an airtight container in the refrigerator for up to 1 week. This keeps them fresh, chewy, and ready for snacking!
Freezer: Freeze the bars as a great option for longer storage. Wrap each bar in plastic wrap or foil, then place them in a freezer-safe bag, where they can last up to 1 month.
Reheating: If you prefer your bars slightly warm, pop them in the microwave for 10-15 seconds. This revives their soft texture, making them even more enjoyable!
Serving: For easy grab-and-go snacks, consider slicing the bars before freezing. This allows you to take out a single portion whenever you need a nutritious boost.
Easy No-Bake Workout Bars Recipe FAQs
How do I know when my ingredients are ripe or fresh?
Absolutely! When selecting ingredients, like oats, ensure they are free of any weird smells or dark spots. Fresh rolled oats should be light and smell slightly nutty. For nut butters, look for jars with no separation or oil pooling on top—this indicates freshness. Always use protein powder that is within its expiration date for best results!
How should I store my Easy No-Bake Workout Bars?
Wonderful question! Store your bars in an airtight container in the refrigerator for up to 1 week. It helps maintain their chewy texture and delightful flavor. If you want to keep them longer, place them in a freezer-safe bag. These bars can be frozen for up to 1 month, ensuring you always have a healthy snack on hand!
Can I freeze my Easy No-Bake Workout Bars?
Yes, indeed! To freeze, wrap each bar tightly in plastic wrap or aluminum foil, then place them in a labeled freezer-safe bag. This prevents freezer burn and keeps them fresh. When you’re ready to enjoy one, you can let it thaw overnight in the fridge or warm it up in the microwave for 10-15 seconds for a deliciously soft treat!
What if the mixture doesn’t hold together properly?
Very good to ask! If your mixture seems too crumbly, it might need more binding. Add a bit more peanut butter or coconut milk until it reaches a thick, sticky consistency. However, if it feels overly wet, sprinkle in a bit more oat flour or protein powder until it’s perfectly moldable. Remember, pressing the mixture firmly into the pan is key too!
Are these bars suitable for people with nut allergies?
Absolutely! You can substitute peanut butter with sunflower seed butter or tahini to cater to nut allergies. Just ensure all other ingredients, like the chocolate chips and protein powder, are free from cross-contamination with nuts. This way, everyone can enjoy a delicious Easy No-Bake Workout Bar without worry!
Can I modify the recipe for dietary restrictions?
Very much so! You can easily adjust this recipe to meet various dietary needs. For a vegan option, swap honey for maple syrup. Use any nut or seed butter to accommodate allergies, and choose gluten-free oats for a celiac-friendly snack. The beauty of this recipe lies in its versatility, so feel free to experiment!
Easy No-Bake Workout Bars for a Healthy Energy Boost
Ingredients
Equipment
Method
- Prepare Oat Flour: In a blender, pulse rolled oats until they reach a fine, flour-like consistency. This will serve as the base for your Easy No-Bake Workout Bars.
- Mix Dry Ingredients: In a large bowl, combine the oat flour with the remaining rolled oats, protein powder, mini chocolate chips, chia or flax seeds, and raisins. Stir until fully blended.
- Combine Wet Ingredients: In a separate bowl, whisk together peanut butter, lite coconut milk, and raw honey until smooth and creamy.
- Incorporate the Mixtures: Pour the wet mixture over the dry ingredients, folding everything together until thoroughly mixed.
- Shape Bars: Line a pan with parchment paper and spread the mixture into the pan, pressing down firmly. Cover and refrigerate for at least 4 hours or overnight.
- Cut and Store: Once set, remove the mixture from the pan and cut into bars. Store in an airtight container in the refrigerator or freeze.
Leave a Reply