
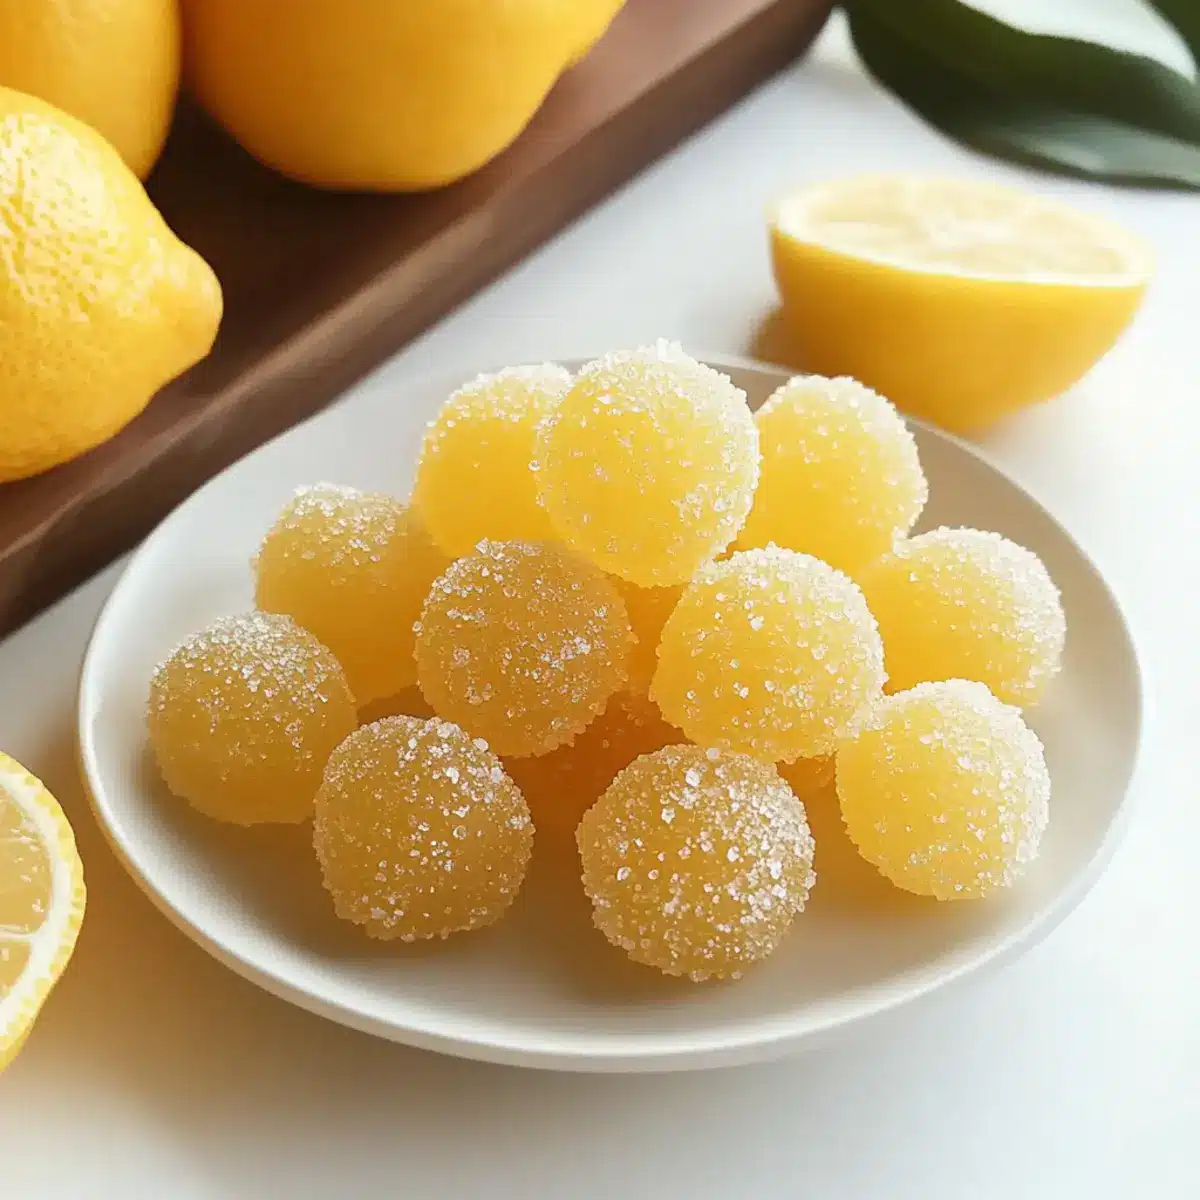
The kitchen buzzes with excitement as I prepare to make something truly zestful: homemade lemon drops! These tangy little gems are more than just candy; they bring a burst of sunshine to any occasion. What I love most about this easy-to-make recipe is how it effortlessly elevates a classic treat without any fancy equipment, making it accessible to all home chefs. With just a handful of ingredients, you can create brightly flavored, chewy delights that are perfect for sharing—or savoring all to yourself. Plus, the option to add thrilling variations like lemon-lavender or spicy ginger-lemon takes this treat to another level. Are you ready to transform simple pantry staples into a delightful candy experience? Let’s dive into the sweetness together!
Why Make Homemade Lemon Drops?
Delightful Experience: Making homemade lemon drops is a fun and rewarding adventure in candy-making. You’ll enjoy the burst of citrus flavor that these tangy treats offer, bringing a refreshing twist to your day.
Easy and Accessible: This recipe is straightforward, perfect for both novice cooks and seasoned chefs. No special equipment is needed, making it a hassle-free option for anyone.
Customizable Flavors: Experiment with variations like Lemon-Lavender Drops for a floral touch or Spicy Ginger-Lemon Drops for an exciting kick. There’s something for everyone!
Perfect for Gifting: These homemade treats are ideal for sharing, whether in a jar for friends or at parties. They add a personal touch that store-bought candies can’t match.
Long-Lasting Treats: Properly stored, these lemon drops can last up to three weeks, ensuring you indulge in these zesty delights whenever the mood strikes! Enjoy the sweetness!
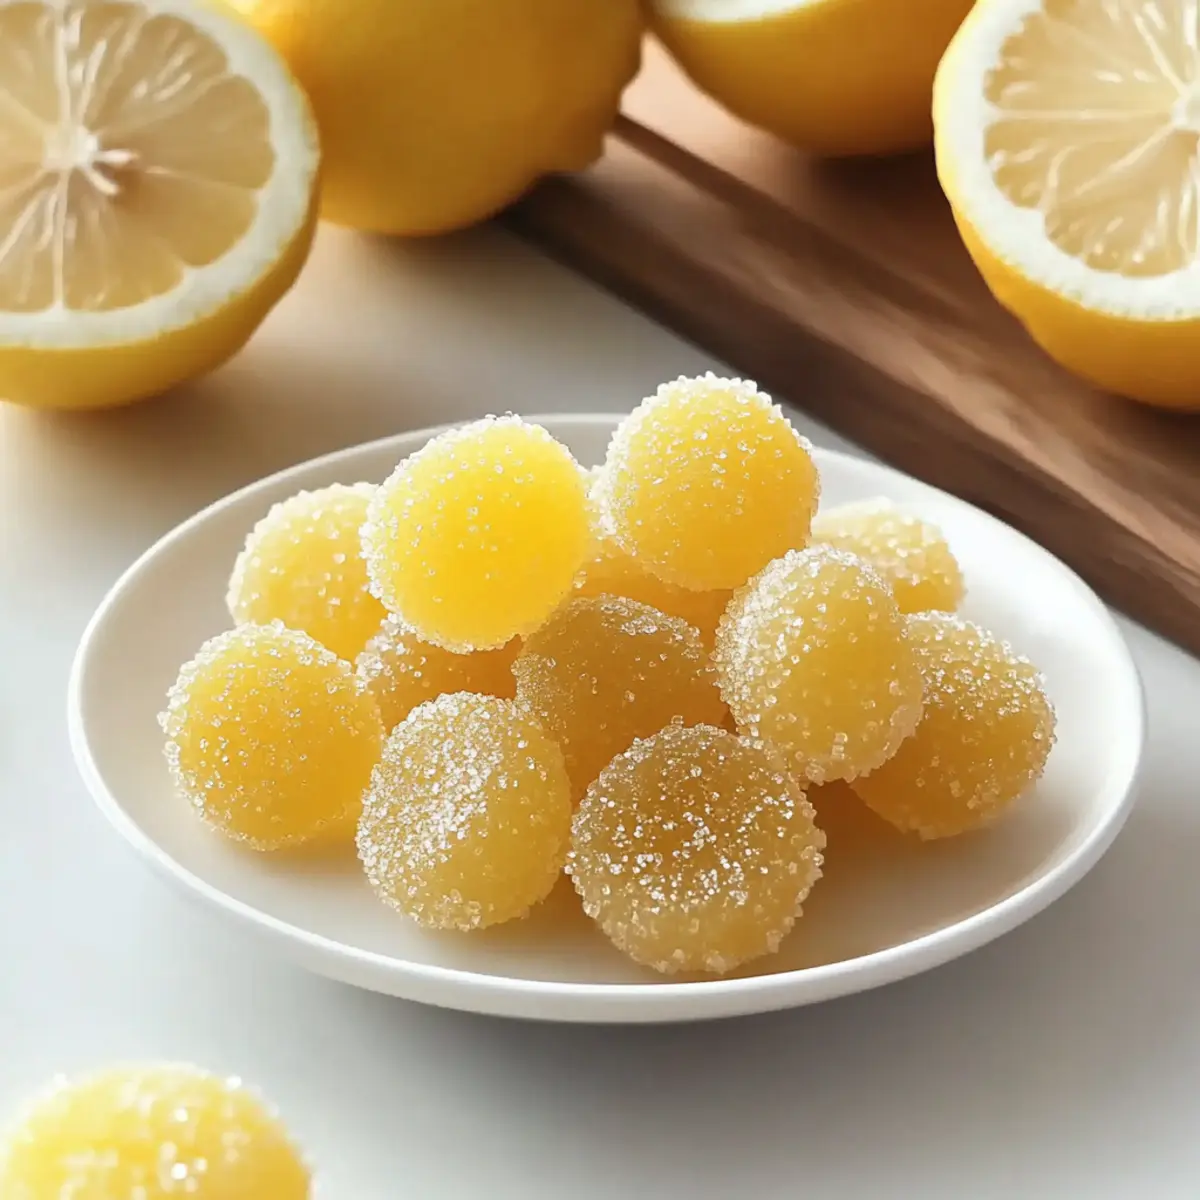
Homemade Lemon Drops Ingredients
• Unleash your inner candy maker with these delicious homemade lemon drops!
For the Syrup
- Granulated Sugar – Provides sweetness and structure; make sure it’s fully dissolved for the best texture.
- Light Corn Syrup – Prevents crystallization; you can use golden syrup as a substitute if needed.
- Water – Essential for dissolving sugar; opt for filtered water to enhance flavor.
For the Flavor
- Fresh Lemon Juice – The star ingredient that infuses bright citrus flavor; fresher is always better than bottled.
- Lemon Zest – Adds a zippy intensity; consider Meyer lemon zest for a sweeter twist.
- Lemon Extract – Enhances the lemony goodness; can be omitted or replaced with lemon oil for a stronger flavor boost.
- Yellow Food Coloring – Optional, but gives your drops an eye-catching vibrant hue.
For Coating
- Additional Granulated Sugar – Used to coat the drops, ensuring they don’t stick together; perfect for achieving that classic finish.
Step‑by‑Step Instructions for Homemade Lemon Drops
Step 1: Prep Baking Sheet
Begin by preparing your workspace. Line a baking sheet with parchment paper, ensuring it’s smooth and even. Lightly dust the surface with granulated sugar to create a non-stick layer for your homemade lemon drops. This will help the drops release easily once they set.
Step 2: Make Syrup
In a medium saucepan, combine granulated sugar, light corn syrup, and filtered water. Set your heat to medium and stir continuously until the sugar dissolves, which will take about 3-4 minutes. Keep an eye on the mixture; it should appear clear with no granules remaining, creating the perfect base for your candy.
Step 3: Cook to Hard Crack
Once the sugar is fully dissolved, stop stirring and allow the syrup to boil. Monitor the temperature with a candy thermometer, aiming for 300°F, which is the hard crack stage. This process will take about 10-15 minutes, so stay attentive to avoid any bubbling over or burning on the bottom.
Step 4: Add Flavorings
Upon reaching 300°F, remove the saucepan from heat immediately. Carefully stir in the fresh lemon juice, lemon zest, and lemon extract. Expect the syrup to bubble vigorously—this exciting reaction enhances the flavor of your homemade lemon drops. Optionally, add a few drops of yellow food coloring for a vibrant appearance.
Step 5: Form Drops
Using a spoon, drop small, evenly spaced amounts of the bubbling syrup onto the prepared baking sheet. Aim for evenly sized drops to ensure consistent textures. If the syrup hardens too much during this step, gently reheat it over low heat to maintain its pourable consistency for forming the drops.
Step 6: Sugar Coating
Allow the drops to cool slightly, which should take around 5 minutes. Once they are manageable to touch, roll each drop in additional granulated sugar to coat them completely. This final touch not only looks lovely but also helps prevent the drops from sticking together in storage.
Step 7: Cool Completely
Finally, let your homemade lemon drops set at room temperature for 20-30 minutes. During this time, they will firm up to the perfect chewiness while retaining their delightful tangy flavor. Once cooled, they’re ready to enjoy or be stored for later delight!
Make Ahead Options
These homemade lemon drops are perfect for meal prep enthusiasts! You can make the syrup up to 24 hours in advance by following the initial steps. Simply prepare the syrup and allow it to cool completely before storing it in an airtight container in the refrigerator. This prevents crystallization and maintains the bright flavor. When you’re ready to finish making your lemon drops, reheat the syrup gently if needed, then add the lemon juice, zest, and other flavorings. Drop the syrup onto your prepared baking sheet, coat in sugar, and let them sit until set. You’ll have delicious candy ready to enjoy with minimal effort!
Homemade Lemon Drops Variations
Feel free to get creative with your lemon drops and explore different flavor profiles that will tantalize your taste buds!
- Lemon-Lavender Drops: Add culinary lavender to the syrup for a soothing floral hint that beautifully complements the tartness of lemon. This delightful addition creates a unique twist, perfect for a summer picnic.
- Spicy Ginger-Lemon Drops: Infuse your candy with ground ginger or ginger extract to create a sweet and spicy sensation. The warmth of ginger combined with the citrus brightness forges a candy like no other.
- Herbal Citrus Drops: Try incorporating fresh herbs like mint or basil for an unexpected burst of flavor. The refreshing notes will elevate your homemade confectionery experience.
- Coconut Lemon Drops: Mix in some shredded coconut before the syrup sets to add a chewy texture and tropical twist. This is an ideal option for coconut lovers who want a sweet escape!
- Honey Lemon Drops: Substitute granulated sugar for honey for a natural sweetness and a more complex flavor. This swap will provide a hint of floral notes that nicely blends with the tangy lemon.
- Raspberry-Lemon Drops: Fold in raspberry puree into the syrup for a fruity flair. This variation creates gorgeous color and a sweet-tart flavor that won’t disappoint!
- Meyer Lemon Drops: Use Meyer lemons instead of regular lemons for a sweeter profile. The rich flavor enhances the overall treat while keeping that refreshing lemon essence.
- Chili Lemon Drops: Add a pinch of chili powder to create a zesty and spicy version that will excite your palate. It’s a fabulous kick for those who enjoy a little heat in their sweets.
These variations not only expand your candy horizons but also encourage customization for specific tastes. If you’re interested in other citrus delights, consider trying these Lemon Scones Zesty or an unforgettable Zesty Lemon Chicken for your next meal! Enjoy experimenting!
Storage Tips for Homemade Lemon Drops
- Room Temperature: Store your homemade lemon drops in an airtight container at room temperature for up to 2-3 weeks. This keeps them fresh and prevents stickiness.
- Refrigeration: In humid climates, consider refrigerating the drops to maintain their texture and prevent them from becoming gooey.
- Freezing: For longer storage, freeze the lemon drops in a single layer on a baking sheet, then transfer them to an airtight container. They can be kept in the freezer for up to 3 months.
- Thawing: When ready to enjoy, simply thaw at room temperature for a few minutes. They will retain their delightful tangy flavor and chewy texture!
What to Serve with Homemade Lemon Drops?
Picture yourself savoring zesty homemade lemon drops while enjoying a lovely gathering with friends or family, and you’ll want the perfect accompaniments to enhance the experience.
- Iced Tea Refreshment: The cool, crisp flavor of iced tea complements the tangy sweetness of lemon drops, providing a delightful contrast that refreshes your palate.
- Cheese Platter: A selection of creamy brie or tangy goat cheese balances the bold lemon flavor, creating a delightful sweet and savory pairing.
- Shortbread Cookies: These buttery cookies are subtle enough to let the lemon drops shine while providing a delightful, crumbly texture alongside the chewy sweetness.
- Fruit Salad: A medley of berries, citrus, and melons echoes the bright zest of lemon drops, offering a fresh, juicy counterpoint that uplifts your dessert experience.
- Champagne or Prosecco: The bubbles and light sweetness of sparkling wine add an elegant touch and make for a celebratory pairing with your tangy lemon treats.
- Chocolate Dipped Strawberries: The rich, luscious chocolate wraps around fresh berries pairs harmoniously with the citrus notes, making every bite a luxurious treat.
- Mint Tea: A soothing cup of mint-infused tea adds a refreshing note that enhances the vibrant lemony flavor without overpowering it.
- Vanilla Ice Cream: Serve with a scoop of creamy vanilla ice cream for a classic dessert combo—each lemon drop brightens the rich, sweet creaminess beautifully.
Expert Tips for Homemade Lemon Drops
- Perfect Sugar Dissolution: Ensure all granulated sugar is fully dissolved in Step 2. Testing the syrup with a spoon prevents grittiness in your final candies.
- Accurate Temperature Monitoring: Use a reliable candy thermometer during the cooking process. This ensures you reach the hard crack stage at 300°F, crucial for the right texture in your homemade lemon drops.
- Avoid Stirring: Once the syrup comes to a boil, refrain from stirring to prevent crystallization. This helps maintain a smooth, glossy finish on your candy.
- Handle the Heat: Be prepared for the bubbling reaction when adding lemon juice and zest. It’s a normal reaction that enhances the flavor—just watch your fingers!
- Reheating Syrup: If the syrup hardens too quickly, gently reheat it over low heat to return it to a pourable consistency, ensuring that you can form beautiful drops.
Homemade Lemon Drops Recipe FAQs
How do I select the best lemons for this recipe?
Absolutely! For the best flavor in your homemade lemon drops, choose fresh lemons that are bright yellow and firm to the touch. Avoid lemons with dark spots or wrinkles, as these can indicate overripeness. Meyer lemons are a delightful alternative as they offer a sweeter, less acidic profile.
How should I store the lemon drops?
I recommend storing your homemade lemon drops in an airtight container at room temperature for up to 2-3 weeks. If you live in a humid climate, refrigeration can help prevent them from becoming sticky. Either way, make sure they’re kept away from direct sunlight to maintain their delicious texture.
Can I freeze homemade lemon drops for later?
Very! For longer storage, you can freeze your lemon drops. Begin by laying them out in a single layer on a baking sheet and placing them in the freezer until solid. Once frozen, transfer the drops to an airtight container or freezer bag. They can be frozen for up to 3 months. When you’re ready to enjoy, simply thaw them at room temperature for a few minutes!
What should I do if the syrup crystallizes while cooking?
If you find that your syrup has started to crystallize, don’t worry—it can happen! The best way to remedy this is to add a few tablespoons of warm water back into the pot and gently heat it over low heat, stirring until the crystals dissolve. Remember, it’s important to avoid stirring when the syrup is boiling to prevent crystallization in the first place.
Are these lemon drops safe for my pets or those with citrus allergies?
Certainly! While these homemade lemon drops are delightful, keep in mind that dogs and cats generally should not consume citrus fruits, including lemons, as it can upset their stomachs. If you’re making these treats for a gathering, be sure to check with guests regarding allergies to ensure a safe and enjoyable experience for everyone.
Delicious Homemade Lemon Drops: A Sweet Citrus Adventure
Ingredients
Equipment
Method
- Line a baking sheet with parchment paper and dust with granulated sugar.
- In a medium saucepan, combine granulated sugar, light corn syrup, and filtered water. Stir continuously until sugar dissolves, about 3-4 minutes.
- Allow the syrup to boil until it reaches 300°F (hard crack stage), about 10-15 minutes.
- Remove from heat and stir in fresh lemon juice, lemon zest, and lemon extract. Optionally, add yellow food coloring.
- Drop small amounts of syrup onto the prepared baking sheet.
- Once cooled slightly, roll each drop in additional granulated sugar to coat.
- Let the drops set at room temperature for 20-30 minutes until firm.
Leave a Reply