
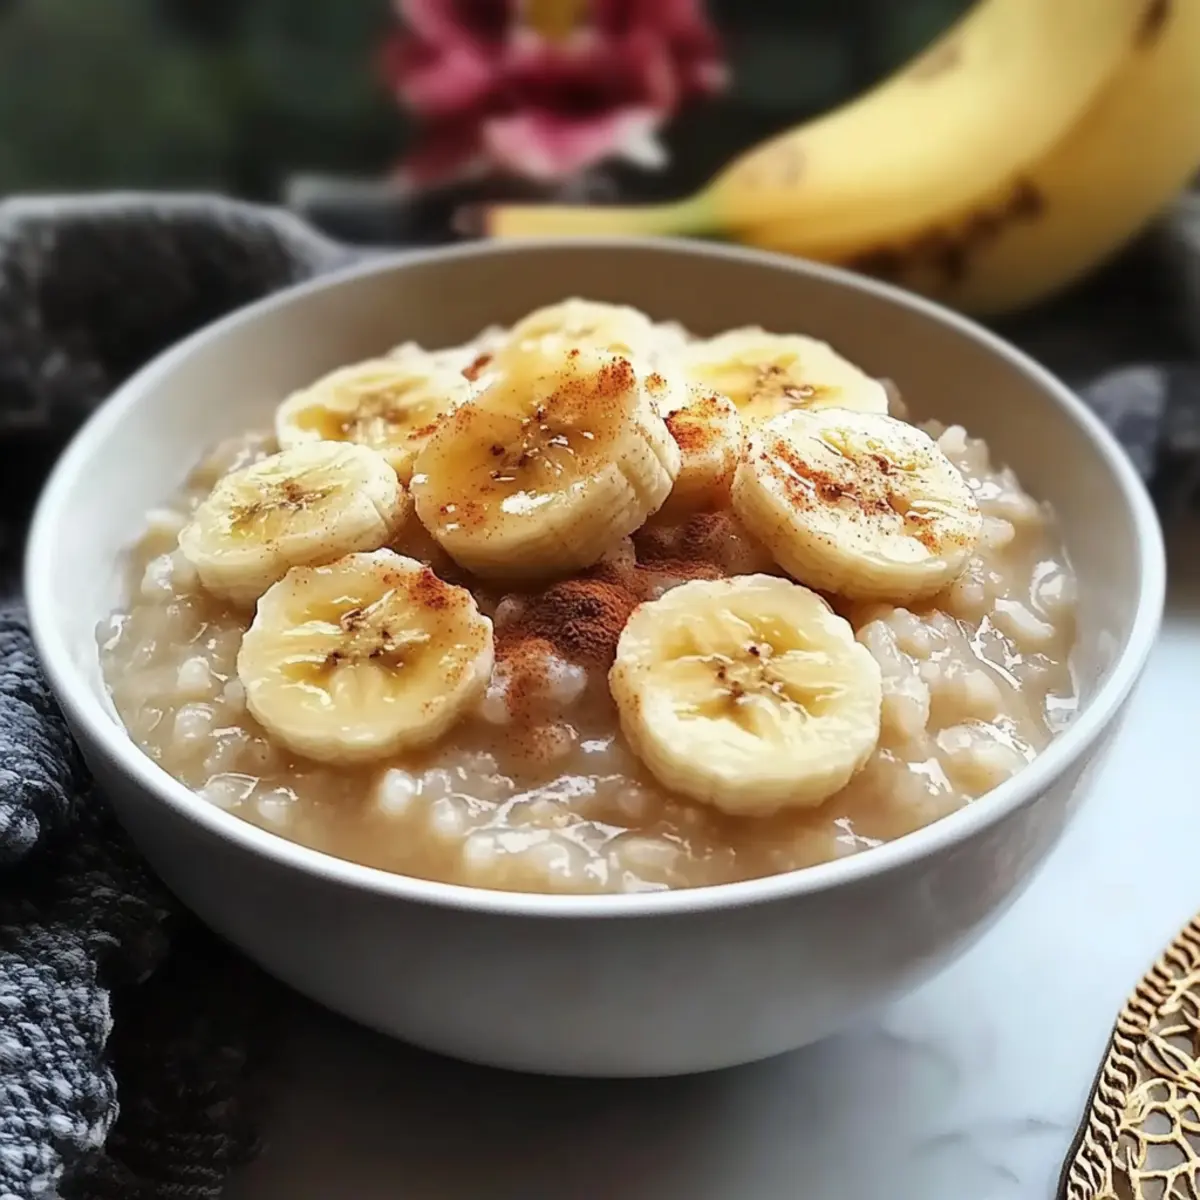
As I stirred the rice, the enticing aroma of coconut enveloped my kitchen, transporting me to the heart of Japan. That’s when I knew my evening would be a sweet adventure with this Creamy Vegan Japanese Banana Rice Pudding. Just imagine indulging in a dessert that combines the creamy richness of coconut milk with the natural sweetness of ripe bananas, all while being completely plant-based and easy to whip up! This delightful pudding is perfect for impressing friends at your next gathering or simply satisfying your sweet cravings after a long day. Whether enjoyed warm or chilled, its versatility makes it a must-try for anyone seeking a comforting treat that’s good for the soul. Are you ready to discover how to create this deliciously simple dessert?
Why is this pudding a must-try?
Simplicity at its core: Only a few basic ingredients come together to create a delightful treat.
Creamy texture: The combination of short-grain rice and coconut milk delivers a luxurious mouthfeel.
Natural sweetness: Ripe bananas provide wholesome sweetness without the need for excessive sugar.
Vegan-friendly: This recipe is perfect for anyone looking for a delectable plant-based dessert.
Versatile serving options: Whether warm or chilled, this Japanese Banana Rice Pudding adapts effortlessly to any occasion.
Crowd-pleaser: Impress your guests with this unique dish that combines comforting flavors with cultural flair. Don’t forget to check out our tips on storing and reheating to keep it fresh and delicious!
Japanese Banana Rice Pudding Ingredients
For the Pudding Base
• Short-Grain Rice – Provides the creamy structure essential to traditional rice pudding.
• Ripe Bananas – These add natural sweetness and a delightful flavor profile to the pudding.
• Coconut Milk – This rich dairy-free alternative gives the pudding a decadent, creamy texture.
For Sweetening and Flavoring
• Sugar – Sweetens the pudding while balancing the natural sugars in the bananas; maple syrup can be a healthier substitute.
• Vanilla Extract (Optional) – Incorporate for added depth of flavor; almond extract can give it a nutty twist.
• Cinnamon (Optional) – Adds warmth and spice to your Japanese Banana Rice Pudding; adjust based on personal taste.
With these simple yet essential ingredients, you’re just a few steps away from indulgence!
Step‑by‑Step Instructions for Japanese Banana Rice Pudding
Step 1: Prepare the Rice
Start by rinsing 1 cup of short-grain rice under cold running water until the water runs clear, which removes excess starch. This step ensures a creamy texture for your Japanese Banana Rice Pudding. Once rinsed, drain the rice thoroughly and set it aside while you gather the other ingredients.
Step 2: Cook the Rice
In a medium saucepan, combine the rinsed rice with 3 cups of coconut milk. Bring the mixture to a gentle boil over medium heat, stirring occasionally to prevent sticking. Once boiling, reduce the heat to low and let it simmer for about 15-20 minutes, or until the rice is tender and has absorbed most of the milk, achieving a creamy consistency.
Step 3: Add Bananas and Sweetener
Carefully fold in 2 sliced ripe bananas and 1/4 cup of sugar into the cooked rice mixture. Stir gently to combine, allowing the bananas to soften and infuse their natural sweetness into the pudding. Continue to cook on low for an additional 5 minutes, ensuring everything is heated through and well-mixed for a delightful flavor in your Japanese Banana Rice Pudding.
Step 4: Incorporate Flavorings
If desired, add 1 teaspoon of vanilla extract and a sprinkle of cinnamon to enhance the flavors of the pudding. Stir until fully combined, tasting as you go to adjust the sweetness if necessary. Allow the mixture to simmer for a couple more minutes, which lets the flavors meld beautifully together.
Step 5: Serve the Pudding
Once the pudding is cooked and well-combined, remove it from the heat. You can serve your Japanese Banana Rice Pudding warm immediately for a comforting dish or allow it to cool to room temperature before refrigerating for a few hours. Serving it chilled offers a refreshing treat that retains its creamy texture.
Expert Tips for Japanese Banana Rice Pudding
• Perfect Rice Prep: Rinse it well: Clear water after rinsing indicates excess starch has been removed, ensuring your pudding’s creaminess.
• Optimal Cooking Time: Simmer gently: Cooking on low heat prevents burning and allows the rice to absorb coconut milk for a luscious texture.
• Sweetness Adjustment: Taste as you go: Add sugar gradually to avoid over-sweetening your Japanese Banana Rice Pudding; let the natural banana flavor shine.
• Chill for Texture: Let it cool: If serving chilled, allow the pudding to cool at room temperature first—this helps it thicken beautifully.
• Serve with Style: Pair it beautifully: Accompany your pudding with fresh fruit or a sprinkle of nuts to enhance both flavor and presentation!
What to Serve with Creamy Vegan Japanese Banana Rice Pudding
Create the perfect culinary experience to complement this delightful dessert!
-
Fresh Berries: Serve alongside a mix of strawberries, blueberries, and raspberries for a burst of color and tangy contrast. The tartness of berries beautifully balances the creamy sweetness of the pudding.
-
Toasted Coconut Flakes: Sprinkle these on top for an extra layer of texture and a hint of tropical flavor. They bring a wonderful crunch that makes every bite uniquely satisfying.
-
Chilled Matcha Green Tea: This clean, earthy drink pairs excellently to refresh the palate, enhancing the pudding’s sweetness while adding a touch of Japanese flair.
-
Crispy Banana Chips: Add a playful crunch alongside your pudding. These can mirror the banana flavor while providing a delightful texture contrast.
-
Coconut Whipped Cream: This luscious topping takes the pudding to the next level, providing an airy contrast to the rich dessert. It’s also a wonderful way to enhance the coconut flavor profile.
-
Nuts and Seeds Medley: A mixture of chopped almonds, walnuts, and chia seeds offers a delicious crunch and healthy fats, enriching the dessert experience with a nutty surprise.
For a cozy gathering or a relaxed dinner, these pairings transform your meal into an indulgent treat that warms the heart!
Make Ahead Options
These creamy Japanese Banana Rice Pudding are perfect for busy home cooks looking to save time without sacrificing flavor! You can prepare the pudding base, including the rice, coconut milk, and sugar, up to 24 hours in advance. Simply store it in an airtight container in the refrigerator to keep it fresh. When you’re ready to enjoy, fold in the sliced ripe bananas and any optional flavorings like vanilla and cinnamon, and warm it gently on the stove until heated through. This ensures that the pudding retains its delightful creamy texture and is just as delicious when served. Trust me, you’ll appreciate having a comforting dessert ready at your fingertips!
How to Store and Freeze Japanese Banana Rice Pudding
Fridge: Store leftover pudding in an airtight container in the refrigerator for up to 3 days. This will keep your Japanese Banana Rice Pudding fresh and ready to enjoy later.
Freezer: For longer storage, freeze portions of the pudding in an airtight freezer-safe container for up to 2 months. Thaw in the fridge overnight before reheating.
Reheating: Gently reheat the pudding in a saucepan over low heat, adding a splash of coconut milk for creaminess, or enjoy it chilled straight from the fridge.
Texture Tip: If chilled pudding becomes too thick, simply stir in a little coconut milk before serving to restore that luscious consistency.
Japanese Banana Rice Pudding Variations
Feel free to play with these delightful twists to make this comforting dessert your own!
-
Fruit Explosion: Add a burst of color and flavor by mixing in fresh berries, diced apples, or tropical fruits like mango for a fruity twist. The sweetness and texture enhance the overall experience, making every bite a surprise.
-
Nutty Goodness: Stir in some toasted almonds, walnuts, or pecans for a lovely crunch. Not only do they add texture, but they also introduce healthy fats, making this pudding even more satisfying.
-
Warm Spices: Experiment with a dash of nutmeg or cardamom to elevate the warm notes of your pudding. The aromatic spices will wrap you in a cozy embrace, setting a lovely ambiance in your kitchen.
-
Coconut Milk Twist: Blend half coconut milk with almond milk or oat milk for a lighter option that still maintains creaminess. This subtle change can refresh the flavor profile while keeping it dairy-free.
-
Sweet Swaps: Try replacing sugar with maple syrup or coconut sugar to explore deeper, natural flavors. Each sweetener brings its own character, allowing you to customize your pudding’s sweetness and depth.
-
Creamy Add-in: For an extra creamy texture, mix in some silken tofu. This secret ingredient gives a protein boost while maintaining that lovely mouthfeel, perfect for those seeking a heartier dessert.
-
Spicy Heat: If you love a bit of warmth, add a pinch of cayenne pepper or sliced jalapeños for unexpected heat. The kick complements the sweetness, creating an intriguing balance.
-
Cereal Crunch: Top it off with your favorite granola or a sprinkle of chia seeds just before serving for a delightful contrast in texture. This addition can make your dessert feel more like an elegant breakfast too!
Do you want to learn more about enhancing your desserts? Check out our tips on storing and reheating to keep your creamy rice pudding fresh and delicious for those later cravings!
Japanese Banana Rice Pudding Recipe FAQs
How do I choose ripe bananas for my pudding?
Absolutely! Look for bananas with a yellow peel and small brown spots. These indicate they are sweet and perfectly ripe for your Japanese Banana Rice Pudding. Avoid bananas that are too green, as they won’t provide the desired sweetness and flavor.
How should I store leftover Japanese Banana Rice Pudding?
Very easily! Transfer any leftovers to an airtight container and store them in the refrigerator for up to 3 days. This way, you can enjoy your creamy dessert later without any hassle! Just remember to reheat gently or enjoy it chilled for a refreshing treat.
Can I freeze the Japanese Banana Rice Pudding?
Yes, indeed! To freeze your pudding, portion it into airtight, freezer-safe containers. It will stay fresh for up to 2 months. When you’re ready to enjoy, simply transfer it to the fridge to thaw overnight, then gently reheat on the stove, adding a splash of coconut milk for that creamy consistency.
What if my pudding is too thick after chilling?
No worries! If you find your pudding has thickened too much in the fridge, just stir in a little coconut milk while warming it on low heat until it reaches your desired consistency. This will help restore its rich, velvety texture without losing flavor.
Is there a way to adjust the sweetness in the pudding?
Definitely! Start by adding sugar gradually, tasting as you go. This way, you can find the perfect balance between the natural sweetness of the ripe bananas and your preferred level of sweetness. Remember, it’s all about letting those beautiful banana flavors shine through!
Are there any dietary considerations with this recipe?
Yes! This Japanese Banana Rice Pudding is naturally vegan and dairy-free, making it suitable for many dietary preferences. However, if you have nut allergies, be cautious with any toppings or variations, such as almond extract or nut garnishes, which should be omitted or swapped for alternatives. Enjoy guilt-free!
Creamy Japanese Banana Rice Pudding for a Cozy Dessert Treat
Ingredients
Equipment
Method
- Rinse the short-grain rice under cold running water until the water runs clear and drain well.
- In a medium saucepan, combine the rinsed rice with coconut milk and bring to a gentle boil.
- Reduce heat to low and let it simmer for 15-20 minutes until the rice is tender and absorbed most of the milk.
- Fold in the sliced bananas and sugar, stirring gently to combine. Cook on low for an additional 5 minutes.
- If desired, add vanilla extract and cinnamon, and allow to simmer for a couple more minutes before serving.
- Serve warm or allow to cool to room temperature before refrigerating.
Leave a Reply