
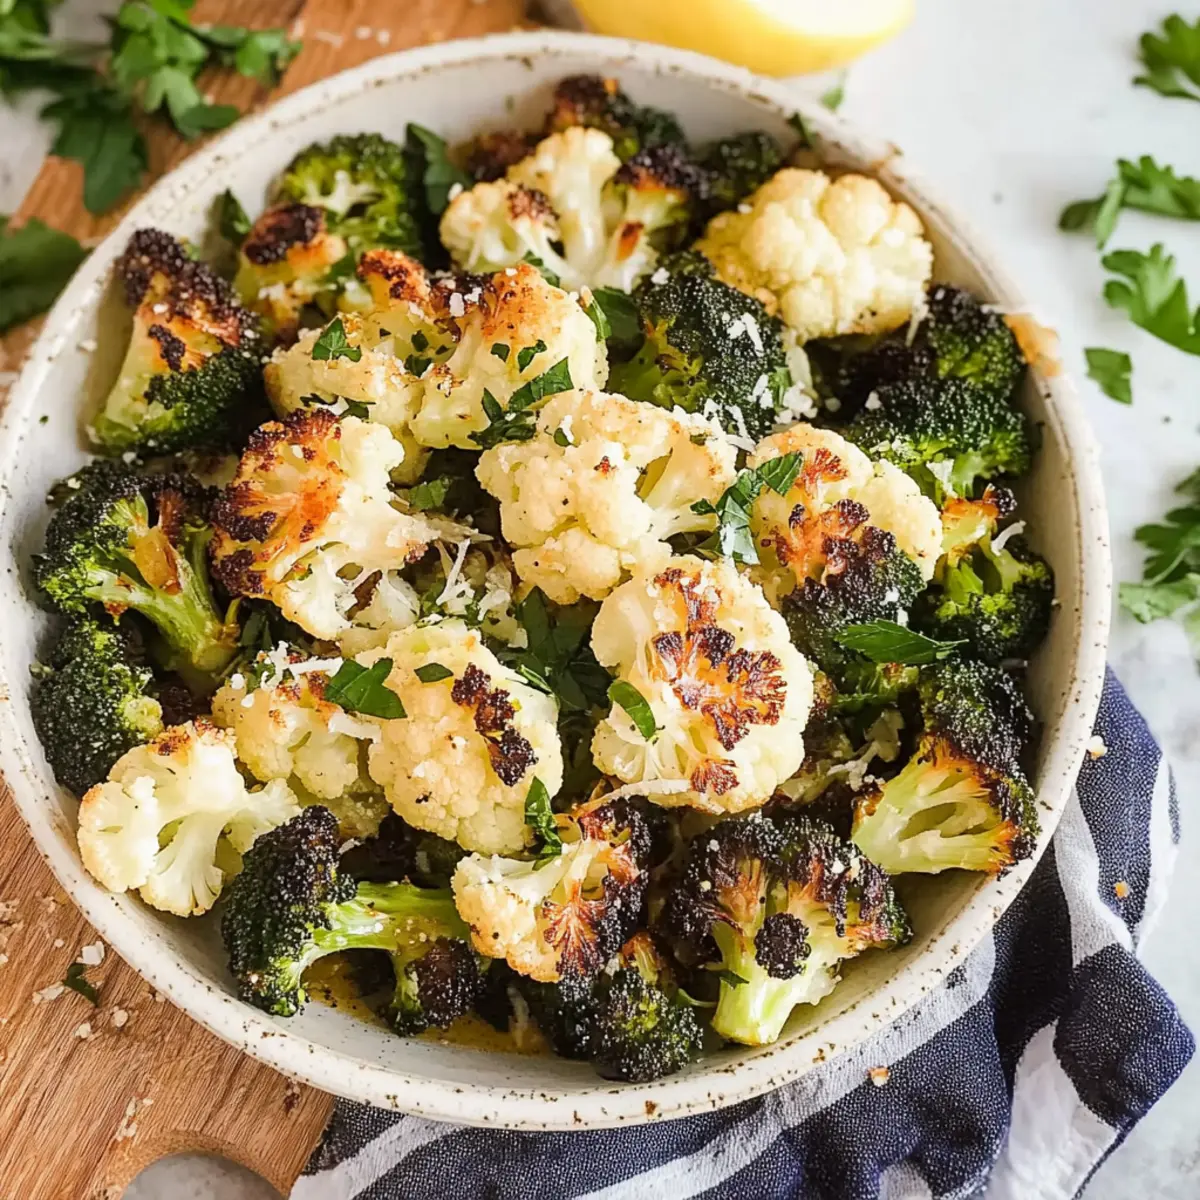
As I tossed the fresh florets into the bowl, a wave of anticipation washed over me—this simple oven-roasted broccoli and cauliflower recipe is about to elevate my dinner game effortlessly. Seasoned with garlic, Parmesan, and a medley of herbs, this dish not only boasts a quick prep time but also emerges as an eye-catching side that’s sure to impress at holiday gatherings. Imagine the tender yet crispy exterior, each bite bursting with savory goodness! Whether it’s Thanksgiving or a cozy weeknight dinner, this Roasted Broccoli and Cauliflower shines as a versatile, gluten-free, and vegetarian option that everyone will love. Curious to discover how to turn your veggies into a sensational delight? Let’s dive into this delightful recipe together!
Why Is This Roasted Broccoli and Cauliflower Special?
Simplicity at Its Best: With just a few ingredients and minimal prep, this recipe brings fresh veggies to life without fuss.
Elevated Flavor: The garlic and Parmesan create a delightful crunch, turning simple vegetables into a savory treat that pairs beautifully with any main dish.
Versatile Dish: Perfect for festive occasions like Thanksgiving or Christmas, yet simple enough for a weeknight dinner—this dish fits every occasion seamlessly.
Nutrient-rich Option: Packed with vitamins and fiber, you can enjoy this dish guilt-free as it makes for a healthy side that everyone can love. For more veggie inspiration, check out my delicious Korean Baked Cauliflower for a different twist!
Time-Saving Side: Whip it up in under 30 minutes, making it a go-to choice when you need a quick, crowd-pleasing dish.
Roasted Broccoli and Cauliflower Ingredients
For the Vegetables
• Fresh Cauliflower Florets – Provides structure and a mild flavor; can substitute with frozen cauliflower without thawing.
• Fresh Broccoli Florets – Adds vibrant color and texture; frozen broccoli can work if fresh isn’t available.
For the Seasoning
• Olive Oil – Used for roasting to enhance flavor and help the vegetables brown; avocado oil is a great alternative.
• Garlic Cloves (minced) – Infuses the dish with aromatic flavor; garlic powder can be a quick substitute if fresh isn’t handy.
• Grated Parmesan Cheese – Adds a savory, salty depth; try nutritional yeast for a dairy-free option.
• Italian Herb Seasoning – Enhances overall flavors beautifully; a mix of dried herbs like oregano and thyme can be used in its place.
• Salt – Elevates all flavors; adjust according to your dietary needs.
• Pepper – Adds a gentle spice; can be omitted for a milder dish.
This Roasted Broccoli and Cauliflower dish is ready to shine on your table!
Step‑by‑Step Instructions for Oven-Roasted Broccoli and Cauliflower with Garlic and Parmesan
Step 1: Preheat the Oven
Begin by preheating your oven to 400°F (200°C). This temperature is crucial for achieving that perfect tenderness and golden-brown color on your Roasted Broccoli and Cauliflower. While the oven heats, gather your ingredients and equipment, including a mixing bowl and a parchment-lined baking sheet to prepare for the next steps.
Step 2: Prepare the Vegetables
In a large mixing bowl, toss together the fresh cauliflower and broccoli florets with olive oil, minced garlic, grated Parmesan, Italian herb seasoning, salt, and pepper. Ensure each piece is evenly coated with these delicious ingredients for maximum flavor. This step not only enhances the taste but also sets the stage for a beautifully roasted dish.
Step 3: Arrange on Baking Sheet
Once the vegetables are well-coated, spread them out in a single layer on the prepared parchment-lined baking sheet. Make sure the florets have enough space between them to allow for even roasting. This separation will help achieve that delightful crispy exterior on your Roasted Broccoli and Cauliflower, ensuring they roast perfectly.
Step 4: Roast the Vegetables
Place the baking sheet in the preheated oven and roast for about 20 minutes. Halfway through cooking, give the vegetables a gentle toss to promote even browning. You’ll know they’re ready when you see a lovely golden-brown hue and the broccoli and cauliflower are tender but still slightly crisp.
Step 5: Serve and Enjoy
Once roasted to perfection, remove the baking sheet from the oven. Serve the delicious Oven-Roasted Broccoli and Cauliflower warm as an eye-catching side dish that shines on any holiday table or casual dinner. Relish the savory flavors that come from the garlic and parmesan, making every bite a delightful experience!
How to Store and Freeze Roasted Broccoli and Cauliflower
Fridge: Store leftover roasted broccoli and cauliflower in an airtight container for up to 3-4 days. Reheating can be done in the oven or microwave to keep them tender.
Freezer: For longer storage, freeze the roasted veggies in a single layer on a baking sheet before transferring them to a freezer-safe bag. They’ll last up to 3 months.
Reheating: When ready to enjoy, reheat frozen roasted broccoli and cauliflower in the oven at 350°F (175°C) for about 15-20 minutes or until heated through.
Wrap: If you are storing for multiple days, wrap with plastic wrap before placing in the container to help prevent moisture loss and maintain flavors.
Roasted Broccoli and Cauliflower Variations
Feel free to tailor this roasted broccoli and cauliflower recipe to suit your taste buds with some delightful twists!
-
Colorful Veggie Medley: Mix in sliced carrots or bell peppers for a vibrant array of colors and flavors. Adding these bright veggies not only looks beautiful but also enhances the nutritious profile of your dish.
-
Citrus Zing: Squeeze fresh lemon juice over the roasted vegetables right before serving for a refreshing burst of flavor. This simple addition can elevate the dish, brightening up the natural earthiness of the vegetables.
-
Cheesy Goodness: Swap the Parmesan for crumbled feta or shredded mozzarella to create a different flavor profile. Each cheese brings its unique personality, making this dish a tasty adventure!
-
Spicy Kick: Add a sprinkle of red pepper flakes or cayenne pepper for a delightful heat that complements the savory notes beautifully. The contrast of spice against the roasted sweetness is a match made in heaven!
-
Herb Infusion: Experiment with fresh herbs like rosemary or thyme instead of Italian seasoning. This can give your roasted veggies a fresh, garden-like flavor that brightens every bite.
-
Nutty Finish: Top with toasted pine nuts or slivered almonds after roasting for crunch and an extra layer of flavor. The nuttiness pairs wonderfully with the tender vegetables, making it an exciting texture element!
-
Soy Sauce Twist: Drizzle a little low-sodium soy sauce or tamari before roasting for an umami boost. It adds depth to the flavor, creating a lovely savory profile that’s irresistible.
-
Balsamic Glaze: For a sweet-and-sour element, drizzle a balsamic reduction over the vegetables before serving. This adds complexity and a touch of sweetness that balances the savory notes beautifully.
And if you’re on the hunt for more delicious veggie ideas, check out these delightful dishes like Korean Baked Cauliflower or experience the flavors in my Chinese Beef Broccoli recipe!
Expert Tips for Roasted Broccoli and Cauliflower
- Prep Ahead: Prepare the veggies a night before by tossing them in olive oil and seasonings, keeping them in the fridge overnight for easy roasting.
- Frozen Easy: If using frozen broccoli and cauliflower, there’s no need to thaw! Just add a few extra minutes to the cooking time for perfect results.
- Even Cooking: For a uniform roast, arrange the florets in a single layer on the baking sheet, allowing space between them for the best crispy texture.
- Flavor Variations: Experiment with different cheese options like feta or mozzarella to add a unique twist to your roasted broccoli and cauliflower.
- Serving Perfection: For the most vibrant flavor and texture, serve immediately after roasting—these veggies shine best when enjoyed fresh!
Make Ahead Options
These Oven-Roasted Broccoli and Cauliflower are perfect for busy weeknights or festive meal prep! You can prep the vegetables by tossing the fresh cauliflower and broccoli florets with olive oil, garlic, and seasonings up to 24 hours in advance. Simply store the coated veggies in an airtight container in the refrigerator to maintain their freshness. On the day you plan to serve, spread them on a prepared baking sheet and roast as directed, adding an extra minute or two if they’re chilled. This way, you save valuable time while ensuring your roasted vegetables are just as delicious—with all the ease of meal prep!
What to Serve with Oven-Roasted Broccoli and Cauliflower
Get ready to elevate your meal experience with delightful sides and accents that perfectly complement this colorful, savory dish.
- Creamy Mashed Potatoes: The rich, buttery texture creates a comforting contrast to the tender, crispy vegetables.
- Grilled Chicken Breast: Juicy and seasoned chicken adds protein while balancing the vibrant flavors of the roasted veggies.
- Quinoa Salad: A light, refreshing salad with herbs and lemon provides a healthy contrast to the earthy vegetables.
- Herbed Rice Pilaf: Fluffy rice infused with herbs brings a subtle taste that enhances the overall meal harmony.
- Warm Dinner Rolls: Soft, buttery rolls are perfect for mopping up any flavors leftover on your plate, inviting companionship to this delicious dish.
- Crisp Garden Salad: A fresh garden salad with a zesty vinaigrette adds crunch and lightness that complements the heartiness of the roasted mix.
- Apple Pie: A slice of warm apple pie with a scoop of vanilla ice cream offers a delightful sweet finish after savoring the savory dish.
Oven-Roasted Broccoli and Cauliflower Recipe FAQs
How do I choose the best broccoli and cauliflower for roasting?
Absolutely! When selecting fresh broccoli and cauliflower, look for tightly packed florets that are vibrant in color. Avoid any with dark spots or wilting leaves, as these can indicate age. If you’re opting for frozen, pick brands that use good-quality, fresh vegetables without any added sauces.
How should I store leftover roasted broccoli and cauliflower?
To maintain freshness, store the leftover roasted broccoli and cauliflower in an airtight container in the refrigerator for up to 3-4 days. If you find the flavors fading, a light drizzle of olive oil or a sprinkle of salt can revive them before reheating.
Can I freeze roasted broccoli and cauliflower for later use?
Very! To freeze roasted vegetables, allow them to cool completely. Spread them in a single layer on a baking sheet and freeze for about 1 to 2 hours until they’re frozen solid. Then, transfer them to a freezer-safe bag and they can be stored for up to 3 months. Just remember to label the bag with the date!
What should I do if my roasted broccoli and cauliflower didn’t turn out crispy?
No worries! If they’re undercooked, simply toss the vegetables back in the oven for an additional 5-10 minutes until they reach that desired crispiness. Make sure they’re spread out on the baking sheet to allow for proper air circulation. If they’re soggy, it might help to roast them at a higher temperature next time or reduce the oil slightly.
Is this roasted broccoli and cauliflower recipe safe for those with dietary restrictions?
Absolutely! This dish is naturally gluten-free and vegetarian, making it suitable for a variety of dietary needs. For those with dairy allergies, you can easily swap out the Parmesan with nutritional yeast or leave it out altogether. Always check for potential allergens based on the ingredients used, especially in seasonings.
Irresistibly Delicious Roasted Broccoli and Cauliflower Recipe
Ingredients
Equipment
Method
- Preheat your oven to 400°F (200°C). Gather your ingredients and equipment, including a mixing bowl and a parchment-lined baking sheet.
- In a large mixing bowl, toss together the fresh cauliflower and broccoli florets with olive oil, minced garlic, grated Parmesan, Italian herb seasoning, salt, and pepper.
- Spread the vegetables out in a single layer on the prepared baking sheet.
- Place the baking sheet in the preheated oven and roast for about 20 minutes, giving a gentle toss halfway through.
- Remove the baking sheet from the oven and serve warm.
Leave a Reply