
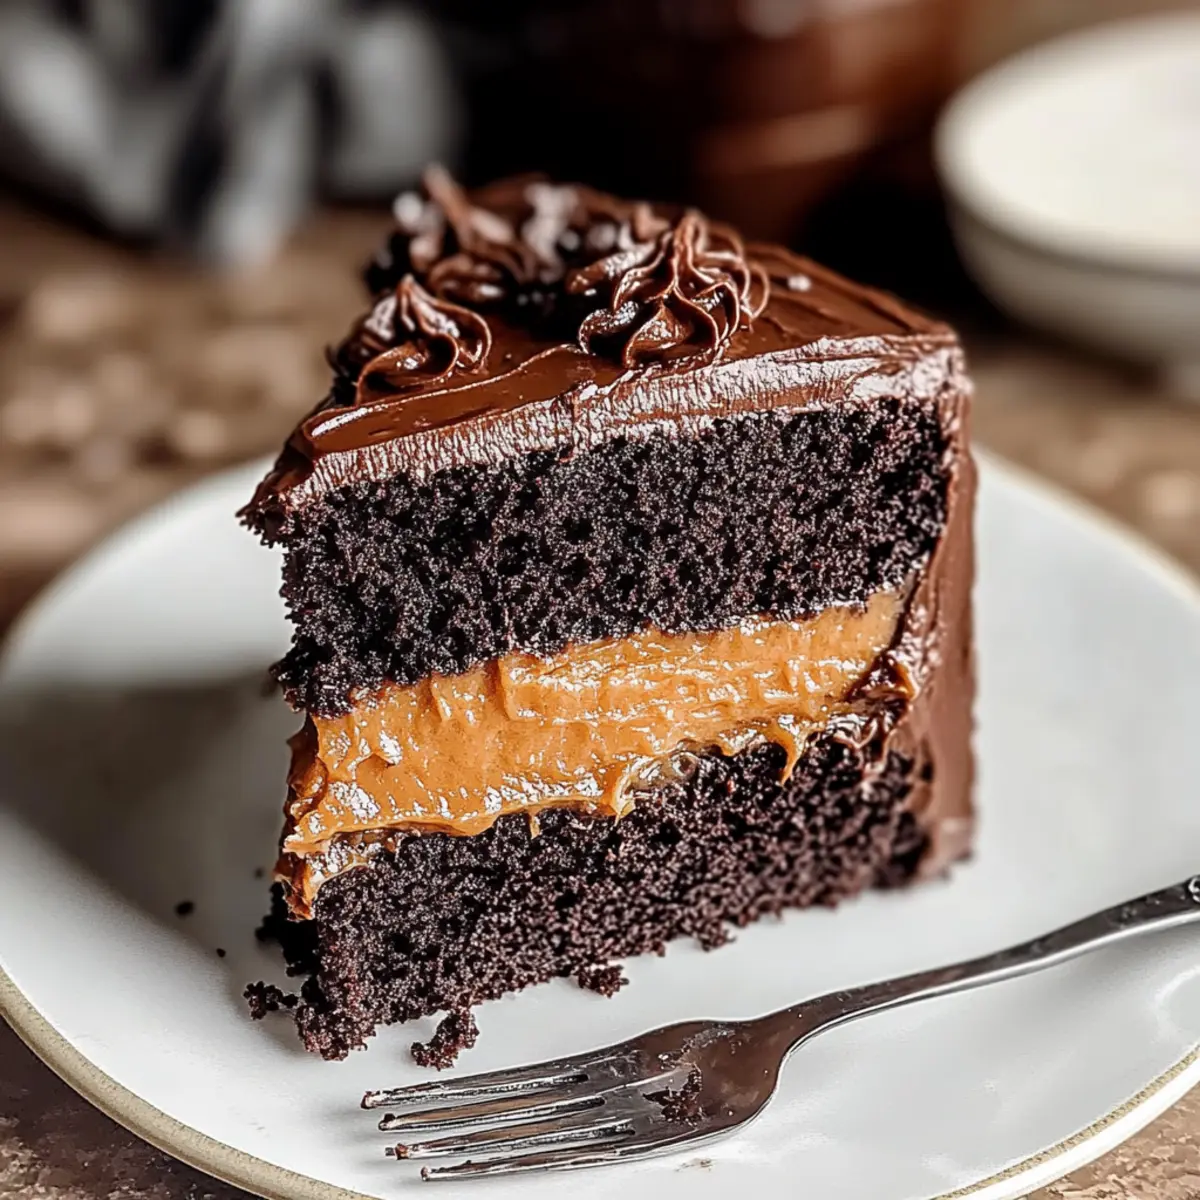
As I whisked together the rich cocoa and creamy buttermilk, an aroma filled my kitchen that instantly transported me to a cozy bakery in Buenos Aires. The Chocolate Dulce de Leche Cake is not just a dessert; it’s an experience that marries deep chocolate flavor with the velvety sweetness of caramel. What I love most about this cake is its straightforward preparation—perfect for a last-minute surprise or a celebratory occasion—and its luxurious texture that feels like a slice of heaven with every bite. It’s a crowd-pleaser that turns any routine afternoon into a delightful celebration. Curious about how to create this indulgent masterpiece at home? Let’s dive into the recipe!
Why is Chocolate Dulce de Leche Cake a Must-Try?
Decadence Awaits: This cake is a showstopper, delivering a rich chocolate flavor complemented by a smooth dulce de leche filling that will have everyone coming back for seconds.
Gourmet Made Easy: With simple ingredients and straightforward steps, you can create a dessert that rivals any high-end bakery treat right in your kitchen.
Versatile and Fun: Customize it by adding your favorite nuts or toppings, making each creation uniquely yours. Why not pair it with a scoop of vanilla ice cream or fresh berries for an extra layer of indulgence?
Crowd-Pleasing Charm: Whether it’s a birthday, celebration, or a casual dessert, this cake guarantees smiles and satisfied taste buds at any gathering. Dive into this delightful experience, and don’t miss out on exploring other indulgent recipes like Chocolate Peanut Butter or the velvety Velvet Gothic Cake!
Chocolate Dulce de Leche Cake Ingredients
For the Cake
- All-Purpose Flour – Structure your cake perfectly; substitute with gluten-free flour for a gluten-free delight.
- Granulated Sugar – Adds sweetness; can be reduced for a less sweet treat.
- Cocoa Powder – For a deep chocolate flavor; Dutch-processed cocoa works wonders for richness.
- Baking Soda – This leavening agent ensures a nice rise; always check for freshness.
- Baking Powder – An additional leavening option; omit if using self-rising flour.
- Salt – Enhances all the flavors; sea salt adds a delightful texture.
- Vegetable Oil – Brings moisture and richness; melted butter is a delicious substitute.
- Buttermilk – Tenderizes the cake wonderfully; use milk plus vinegar if you need a quick alternative.
- Hot Water – Activates cocoa powder for intense chocolate; always use boiling water for best results.
- Eggs – Binds everything together; flax eggs can replace them for a vegan version.
- Vanilla Extract – Adds warm flavor; choose pure vanilla extract for an aromatic boost.
For the Ganache
- Unsalted Butter – Provides a creamy texture for your ganache; salted butter can be used for a different taste.
- Dark Brown Sugar – Gives the ganache depth and moisture; light brown sugar works too if that’s what you have on hand.
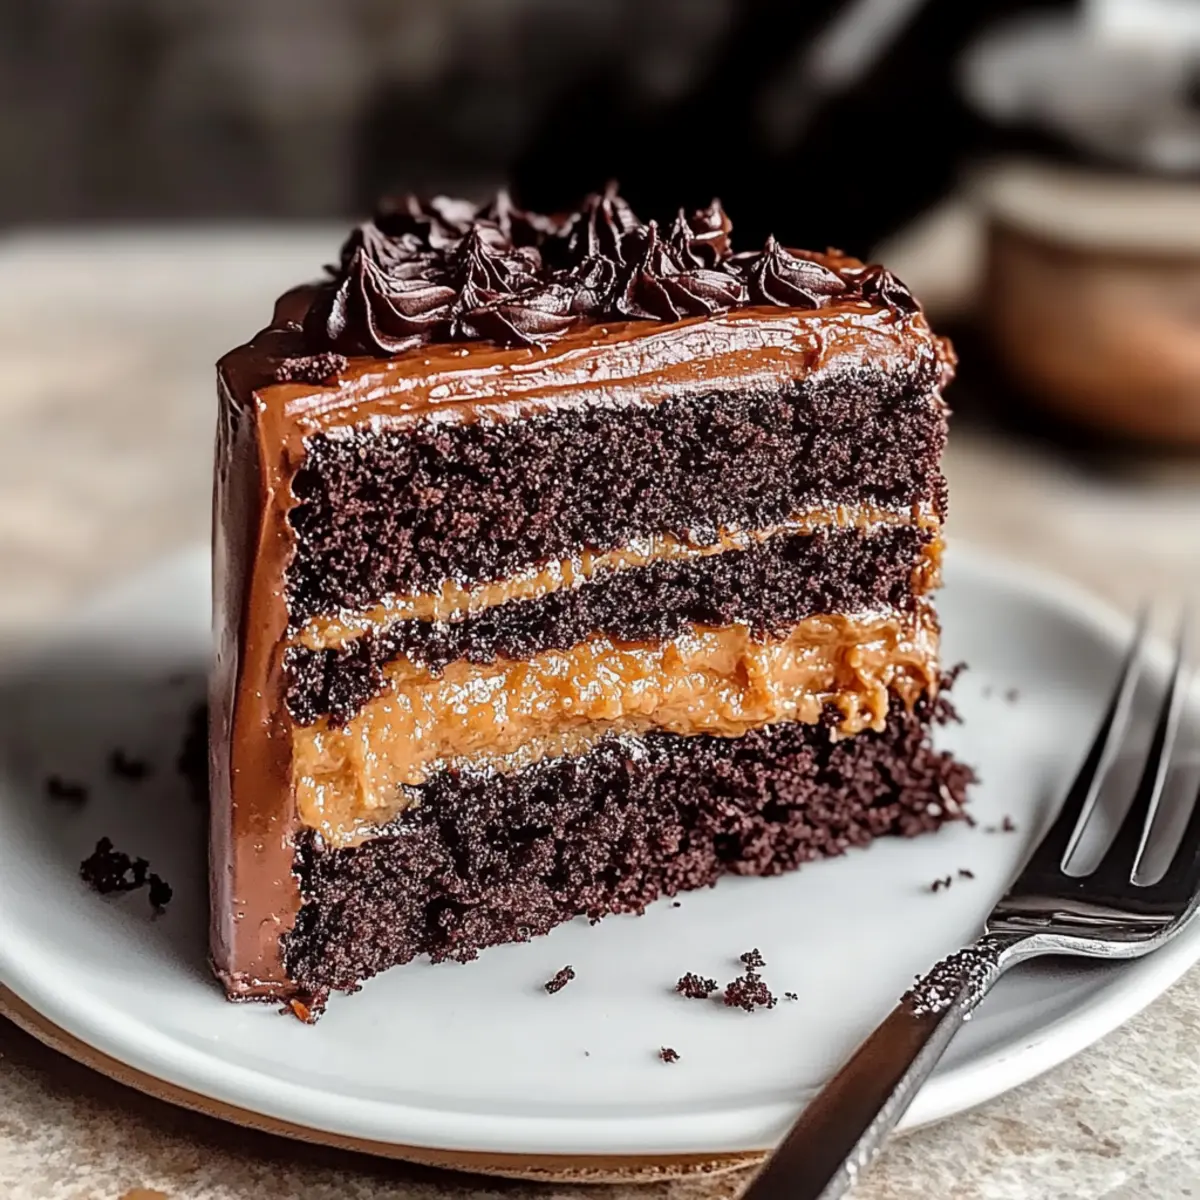
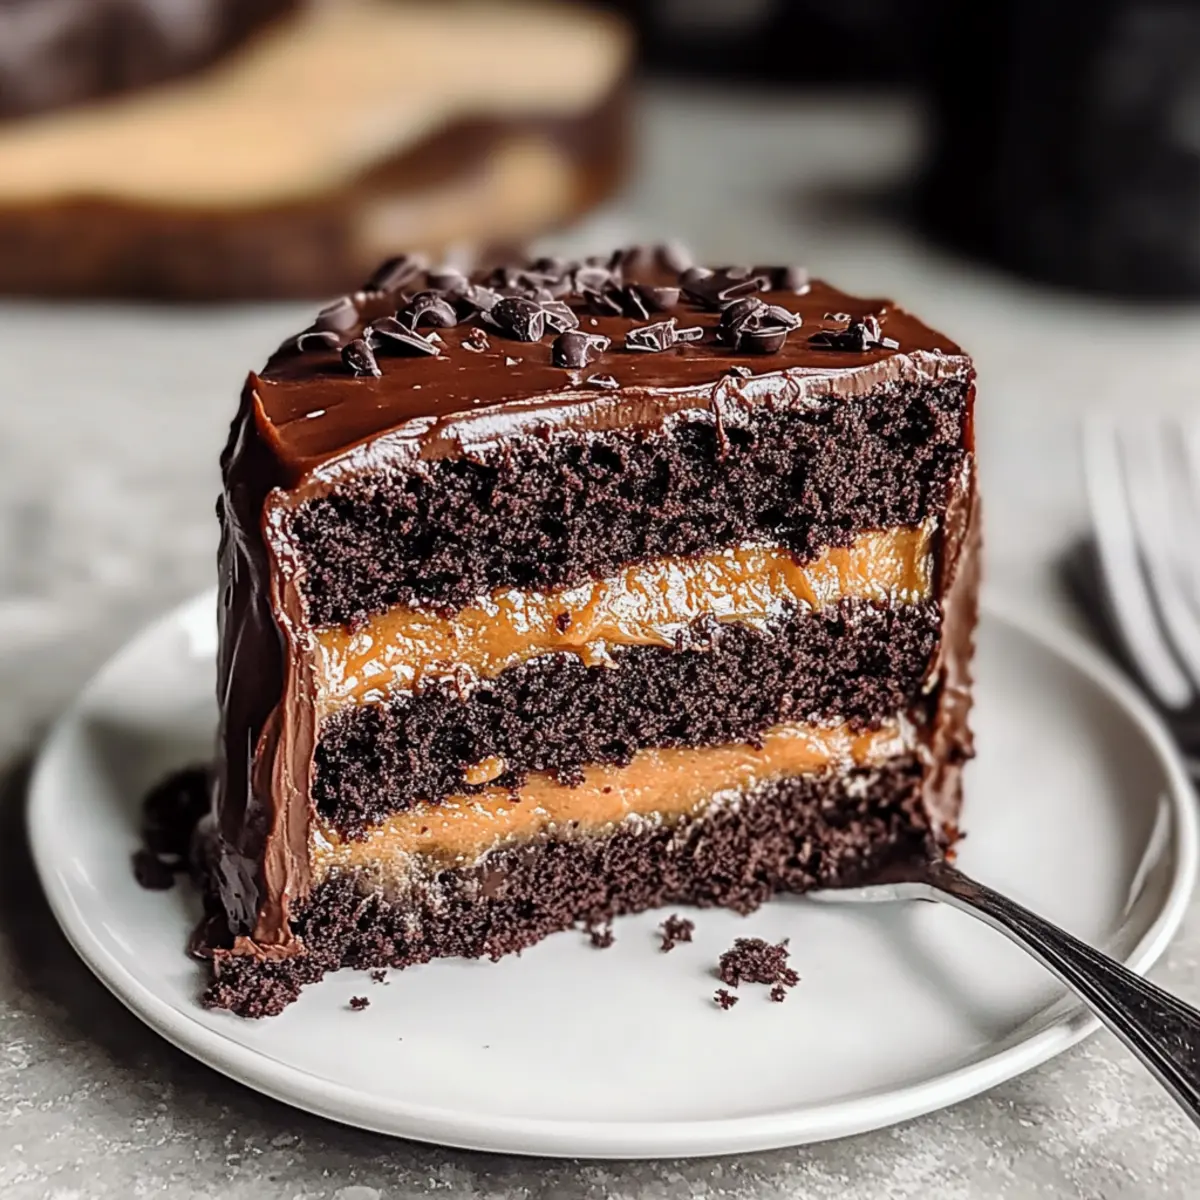
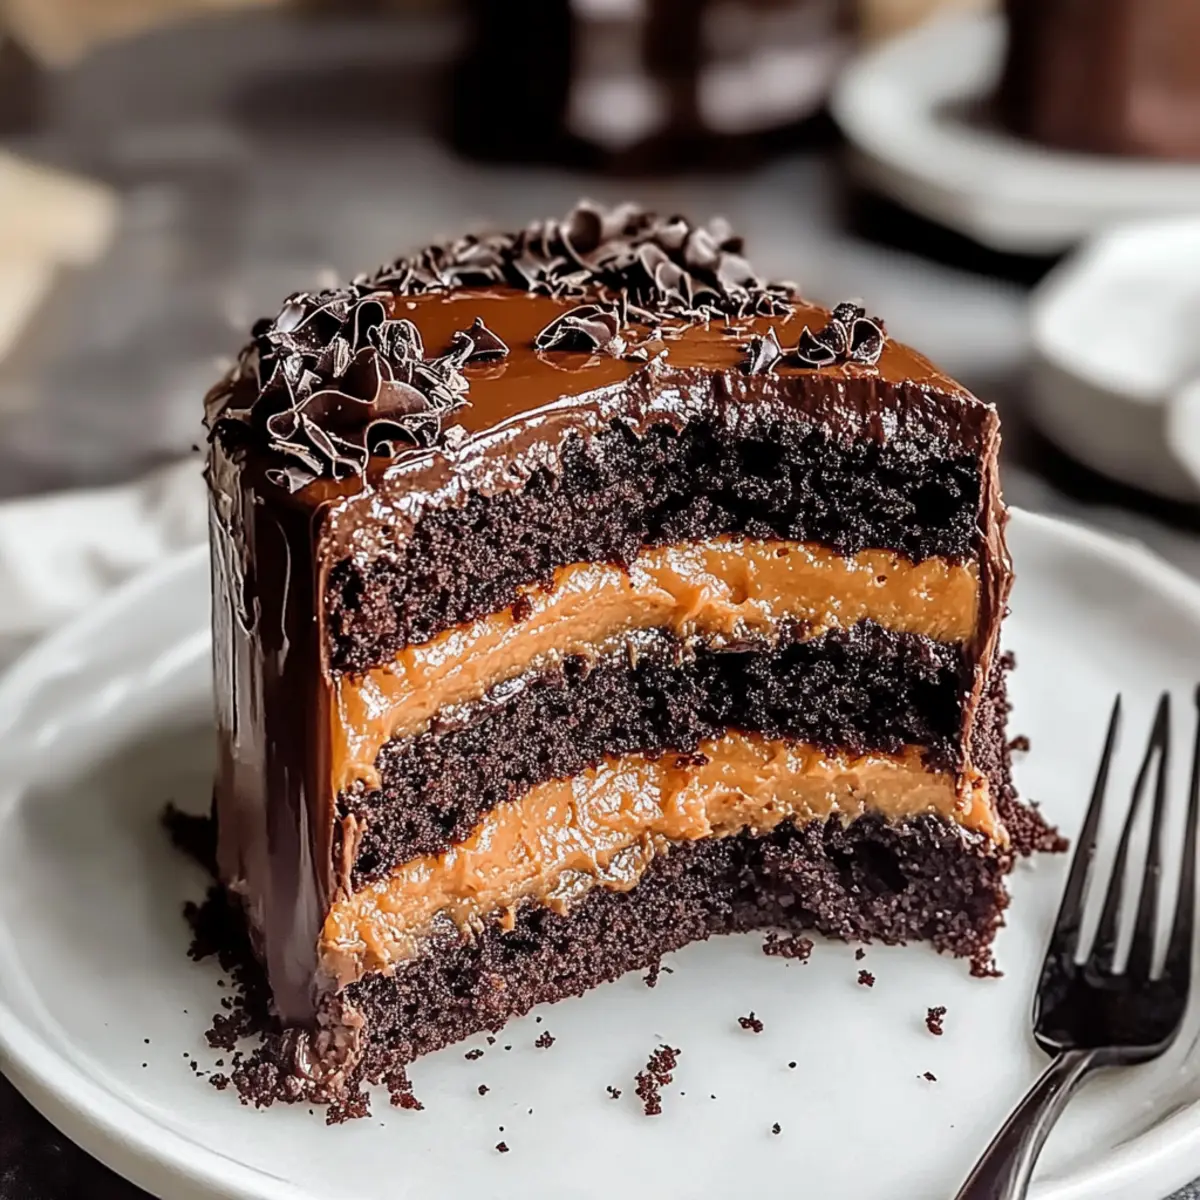
- Dulce de Leche – The delicious filling; feel free to use homemade or store-bought for convenience.
- Heavy Cream – Creates a rich ganache; milk is an option, but the texture won’t be as luxurious.
Get ready to impress everyone with your homemade Chocolate Dulce de Leche Cake!
Step‑by‑Step Instructions for Chocolate Dulce de Leche Cake
Step 1: Preheat and Prepare
Preheat your oven to 350°F (175°C) and prepare two 9-inch round cake pans by greasing them generously with butter or non-stick spray. This ensures that your decadent Chocolate Dulce de Leche Cake will come out beautifully without sticking. For extra safety, you can line the bottoms of the pans with parchment paper, which will help in easy removal later.
Step 2: Combine Dry Ingredients
In a large mixing bowl, sift and whisk together 2 cups of all-purpose flour, 2 cups of granulated sugar, ¾ cup of cocoa powder, 1 ½ teaspoons of baking soda, 1 ½ teaspoons of baking powder, and 1 teaspoon of salt. When well-combined, the flour mixture should have an even color and texture. This step is essential for creating a uniform base for your cake.
Step 3: Mix Wet Ingredients
In a separate bowl, whisk together 1 cup of vegetable oil, 1 cup of buttermilk, 1 cup of hot water, 2 large eggs, and 2 teaspoons of vanilla extract until smooth and well-blended. The hot water helps to activate the cocoa powder, ensuring that your cake has a rich and deep chocolate flavor. The mixture should be glossy and completely combined before the next step.
Step 4: Combine Mixtures
Gradually pour the wet ingredients into the bowl of dry ingredients, mixing on low speed using a hand mixer. As the ingredients begin to combine, increase to medium speed and mix for about 2 minutes until the batter is smooth and well incorporated. The consistency should be thick and slightly pourable, which is perfect for our Chocolate Dulce de Leche Cake.
Step 5: Bake the Cake
Divide the batter evenly between the prepared cake pans. Smooth the tops with a spatula for even baking. Place the pans in the preheated oven and bake for 35 minutes or until a toothpick inserted in the center comes out clean. You’ll know they’re done when the tops spring back lightly when touched, and the edges pull away from the sides of the pans.
Step 6: Cool the Cakes
Once baked, remove the cakes from the oven and allow them to cool in the pans for about 10 minutes. After this, carefully transfer them to a wire rack to cool completely. It’s essential to let the layers cool completely before frosting to avoid melting the ganache later on.
Step 7: Make the Filling
While the cakes are cooling, prepare the filling by creaming together ½ cup of unsalted butter and 1 cup of dark brown sugar until light and fluffy. Gradually add 1 cup of dulce de leche and mix until smooth and creamy. This decadent filling will enhance the rich flavors of the Chocolate Dulce de Leche Cake beautifully.
Step 8: Prepare the Ganache
For the luscious ganache, heat 1 cup of heavy cream in a saucepan until it just begins to simmer. Pour the hot cream over 8 ounces of chopped dark chocolate in a bowl. Allow it to sit for a minute, then stir until the mixture is smooth and glossy. This velvety ganache will create a stunning finish for the cake.
Step 9: Assemble the Cake
To assemble, place one layer of the cooled cake on a serving plate. Spread an even layer of dulce de leche filling on top, then gently place the second cake layer on top. Pour the warm ganache over the entire cake, allowing it to drip down the sides for a beautiful, indulgent presentation. Your Chocolate Dulce de Leche Cake is now ready to impress!
What to Serve with Chocolate Dulce de Leche Cake
There’s nothing quite like enhancing your dessert experience with delightful pairings that bring out the best flavors of this rich cake.
-
Vanilla Ice Cream: The creamy sweetness of vanilla ice cream perfectly complements the rich chocolate and dulce de leche, offering a cool contrast.
-
Fresh Berries: The tartness of raspberries or strawberries balances the cake’s sweetness, adding a refreshing touch and beautiful color to your plate.
-
Espresso: A strong shot of espresso cuts through the cake’s richness, enhancing the chocolate flavors and providing a cozy coffee break.
-
Whipped Cream: Light and airy whipped cream adds a luxurious texture, creating a delightful contrast to the dense cake layers.
-
Chocolate Ganache Drizzle: For the ultimate indulgence, drizzle extra ganache over each slice; this enhances the chocolate experience and adds visual appeal.
-
Hazelnut Praline: Crunchy hazelnut praline sprinkled on top offers a delightful textural contrast and a nutty flavor that pairs beautifully with caramel.
Feel free to mix and match these pairings to craft a dessert experience that feels truly special!
Make Ahead Options
These Chocolate Dulce de Leche Cakes are perfect for meal prep enthusiasts! You can bake the cake layers up to 2 days in advance. Simply let them cool completely, then wrap tightly in plastic wrap and refrigerate to keep them moist. The dulce de leche filling can also be prepared up to 3 days ahead; store it in an airtight container in the fridge. When you’re ready to serve, just assemble the cake by placing one layer on a plate, spreading the chilled filling on top, and then adding the second layer. Pour the ganache over just before serving to ensure it remains glossy and decadent, guaranteeing that every slice of your Chocolate Dulce de Leche Cake is just as delicious as when it was freshly made!
Chocolate Dulce de Leche Cake Variations
Feel free to get creative with your cake and enhance the flavors or textures that excite your palate!
-
Nuts Galore: Add a sprinkle of chopped walnuts or pecans between layers for a delightful crunch. The nutty flavor offers a fantastic contrast to the sweetness of the dulce de leche.
-
Flavored Extracts: Boost flavor with almond or coffee extracts to make it uniquely yours. A hint of coffee can deepen the chocolate experience, making each bite more intriguing.
-
Fruit Toppings: Fresh berries or sliced bananas add a refreshing touch to each slice. These bright flavors balance the rich chocolate and caramel beautifully, creating a dessert that’s both indulgent and light.
-
Frosting Twist: Swap ganache for a simple whipped cream frosting for a lighter finish. The airy texture complements the cake’s density without overpowering its deliciousness.
-
Spicy Chocolate: For a bit of heat, add a dash of cayenne or chili powder to the batter. The unexpected warmth adds depth to the chocolate, igniting the senses in a whole new way.
-
Vegan Version: Replace eggs with flax eggs and use coconut cream for ganache to keep it entirely plant-based. You won’t lose the lush texture, and everyone can enjoy a slice!
-
Cookie Crust: Add a simple crust by crushing up chocolate cookies and combining with butter, pressing it into the bottom of your cake pan. This adds an unexpected crunch and chocolatey depth to the experience!
-
Alternative Sweeteners: Use honey or maple syrup in place of granulated sugar for a natural sweetness. Just be aware that it may change the cake’s texture slightly, but the flavor will be delightful!
With these variations, you’ll never tire of your Chocolate Dulce de Leche Cake adventure. Looking for more tempting options? Dive into the world of other decadent desserts like Chocolate Poke Cake or heavenly French Butter Cake.
Storage Tips for Chocolate Dulce de Leche Cake
Fridge: Store leftovers in an airtight container in the refrigerator for up to 5 days to maintain freshness and flavor.
Freezer: Wrap individual slices tightly in plastic wrap, then foil, and freeze for up to 3 months. This way, you can enjoy a slice of your Chocolate Dulce de Leche Cake whenever the craving strikes!
Thawing: To thaw, simply place the wrapped slice in the refrigerator overnight or let it sit at room temperature for about 1-2 hours.
Reheating: If you prefer your cake slightly warm, reheat in the microwave for about 10-15 seconds. Enjoy that gooey filling and rich ganache!
Expert Tips for Chocolate Dulce de Leche Cake
- Room Temperature Ingredients: Always use ingredients at room temperature for better mixing and a lighter cake texture. This applies especially to eggs and buttermilk.
- Cooling Cakes: Let the cake layers cool completely before frosting. This prevents the ganache from melting and losing its glorious finish.
- Careful Mixing: Avoid over-mixing the batter. Mixing just until combined keeps your Chocolate Dulce de Leche Cake light and moist.
- Check Your Leavening: Ensure your baking soda and baking powder are fresh for a good rise. Old leavening agents can lead to dense cake layers.
- Customizations: Feel free to add flavors or toppings like nuts or fruit; just keep in mind that they can alter the balance of the cake’s texture and flavor slightly.
Chocolate Dulce de Leche Cake Recipe FAQs
What type of cocoa powder is best for this cake?
To achieve the richest chocolate flavor, I recommend using Dutch-processed cocoa powder. It not only deepens the chocolate notes but also interacts beautifully with the baking soda. If you only have natural cocoa powder on hand, that will work, too, although the flavor profile will be slightly different.
How should I store my leftover Chocolate Dulce de Leche Cake?
Absolutely! Store any leftovers in an airtight container in the refrigerator for up to 5 days to keep it fresh. If you’re planning to enjoy it later, you can also freeze individual slices. Wrap each slice tightly in plastic wrap, then foil, and freeze for up to 3 months.
Can I freeze the Chocolate Dulce de Leche Cake? If yes, how?
Yes, you can freeze the cake! Here’s how: Once fully cooled, wrap the entire cake tightly in plastic wrap followed by aluminum foil to prevent freezer burn. For best results, freeze it in an airtight container. When you’re ready to enjoy, let it thaw overnight in the refrigerator or on the counter for about 2 hours.
What should I do if my cake is too dry?
The key to a moist Chocolate Dulce de Leche Cake is careful measurement and baking time. If your cake turns out dry, it may have been overbaked or the oven temperature was too high. Ensure you’re using an oven thermometer for accuracy, and always check for doneness a few minutes early. To rescue a dry cake, you can brush it with simple syrup (equal parts water and sugar, heated until dissolved) to add moisture back into the layers.
Are there any dietary considerations for this cake?
If you’re serving this cake to guests with dietary restrictions, there are several options to customize the recipe. For a gluten-free version, substitute the all-purpose flour with a gluten-free blend. If you’re looking for a vegan option, replace the eggs with flax eggs (1 tablespoon flaxseed meal mixed with 2.5 tablespoons water per egg) and use plant-based milk with vinegar in place of buttermilk. Swap the butter in the ganache with a dairy-free alternative, and you’re all set!
How do I know when the cake is done baking?
The best way to check if your cake is done baking is by performing the toothpick test! Insert a toothpick into the center of the cake; it should come out clean or with just a few moist crumbs. If it comes out with wet batter on it, give the cake a few more minutes in the oven and check again. I usually start checking around the 30-minute mark for good measure!
Irresistible Chocolate Dulce de Leche Cake for Every Celebration
Ingredients
Equipment
Method
- Preheat your oven to 350°F (175°C) and prepare two 9-inch round cake pans by greasing them generously.
- In a large mixing bowl, sift and whisk together flour, sugar, cocoa powder, baking soda, baking powder, and salt.
- In a separate bowl, whisk together the oil, buttermilk, hot water, eggs, and vanilla extract until smooth.
- Gradually pour the wet ingredients into the bowl of dry ingredients, mixing on low speed until combined.
- Divide the batter evenly between the prepared cake pans and smooth the tops.
- Bake for 35 minutes or until a toothpick inserted in the center comes out clean.
- Once baked, allow the cakes to cool in the pans for about 10 minutes before transferring to a wire rack.
- Prepare the filling by creaming together butter and brown sugar until light and fluffy, then add dulce de leche.
- Heat cream in a saucepan until it begins to simmer, then pour over chopped dark chocolate and stir until smooth.
- To assemble, place one cake layer on a serving plate, spread filling on top, and place the second layer on top, pouring ganache over the cake.
Leave a Reply