
As I stood in my kitchen, the vibrant scent of spring filled the air, sparking memories of sunlit gatherings and laughter. That’s when I decided to whip up my favorite Pea Bruschetta, a fresh and easy appetizer that never fails to impress. This delightful dish combines the sweetness of peas with the savory goodness of parmesan, all layered on top of crispy ciabatta toast. Not only is it incredibly quick to prepare, but it’s also a dish that pleases a crowd, making it perfect for a light lunch or as an elegant starter at your next gathering. Whether you’re aiming to impress guests or simply treat yourself, this Pea Bruschetta is sure to hit the spot. Curious about how to create this refreshing treat? Let’s dive into the details!
Why is Pea Bruschetta a Must-Try?
Freshness at Its Finest: The vibrant flavors of sweet peas create a refreshing topping that’s perfect for any occasion.
Quick Prep: Ready in minutes, this recipe is ideal for busy days or last-minute gatherings.
Crowd-Pleasing Appeal: Its colorful presentation and delicious taste make it a hit at parties, complementing any menu.
Versatile Serving Options: Enjoy it as a stunning appetizer, or pair it with a salad for a light lunch. For variations, try incorporating ingredients like Chickpea Feta Avocado for added flavor and nutrition.
Pea Bruschetta Ingredients
• Dive into the fresh flavors of Pea Bruschetta with this vibrant ingredient list!
For the Pea Topping
- Frozen Peas – Your main flavor component; using fresh peas enhances the taste and texture when blanched.
- Pea Shoots – Optional for garnish; they add a lovely touch of freshness and texture.
- Grated Parmesan Cheese – Provides umami richness; swap with pecorino for a sharper flavor profile.
- Olive Oil – Essential for richness; go for extra virgin to elevate the taste even further.
- Lemon Juice – Brightens the pesto; there’s no substitute, but vinegar can be a milder alternative.
- Garlic – Infuses flavor into the topping and toast; fresh garlic is best for a bold taste.
For the Bread
- Ciabatta – The perfect base; feel free to use any rustic bread you enjoy.
- Black Pepper – Enhances the overall flavor; freshly cracked is ideal for the best taste.
- Lemon Zest – An optional but delightful garnish that brings an extra citrusy freshness.
Step‑by‑Step Instructions for Pea Bruschetta
Step 1: Make the Pea Topping
Begin by grabbing your food processor. Add frozen peas, optional pea shoots, grated parmesan, olive oil, lemon juice, half a garlic clove, salt, and pepper. Pulse until the mixture reaches a rough paste, about 30 seconds, scraping down the sides as needed. The vibrant green color should be visible, and the aroma will be inviting.
Step 2: Prepare the Bruschetta
Preheat your broiler or grill to medium-high, ensuring it’s hot for even toasting. Cut ciabatta into 0.5-inch thick slices and arrange them on a baking sheet. Drizzle each side with olive oil. Toast the bread for 2-3 minutes on each side until golden brown and crispy, keeping a watchful eye to prevent burning.
Step 3: Flavor the Toast
Once your ciabatta slices are toasted to perfection, remove them from the oven. Take the remaining half of the garlic clove and rub it on each warm slice. This step adds a lovely garlicky aroma and flavor to the crunchy base of your Pea Bruschetta, enhancing the overall enjoyment with every bite.
Step 4: Assemble Bruschetta
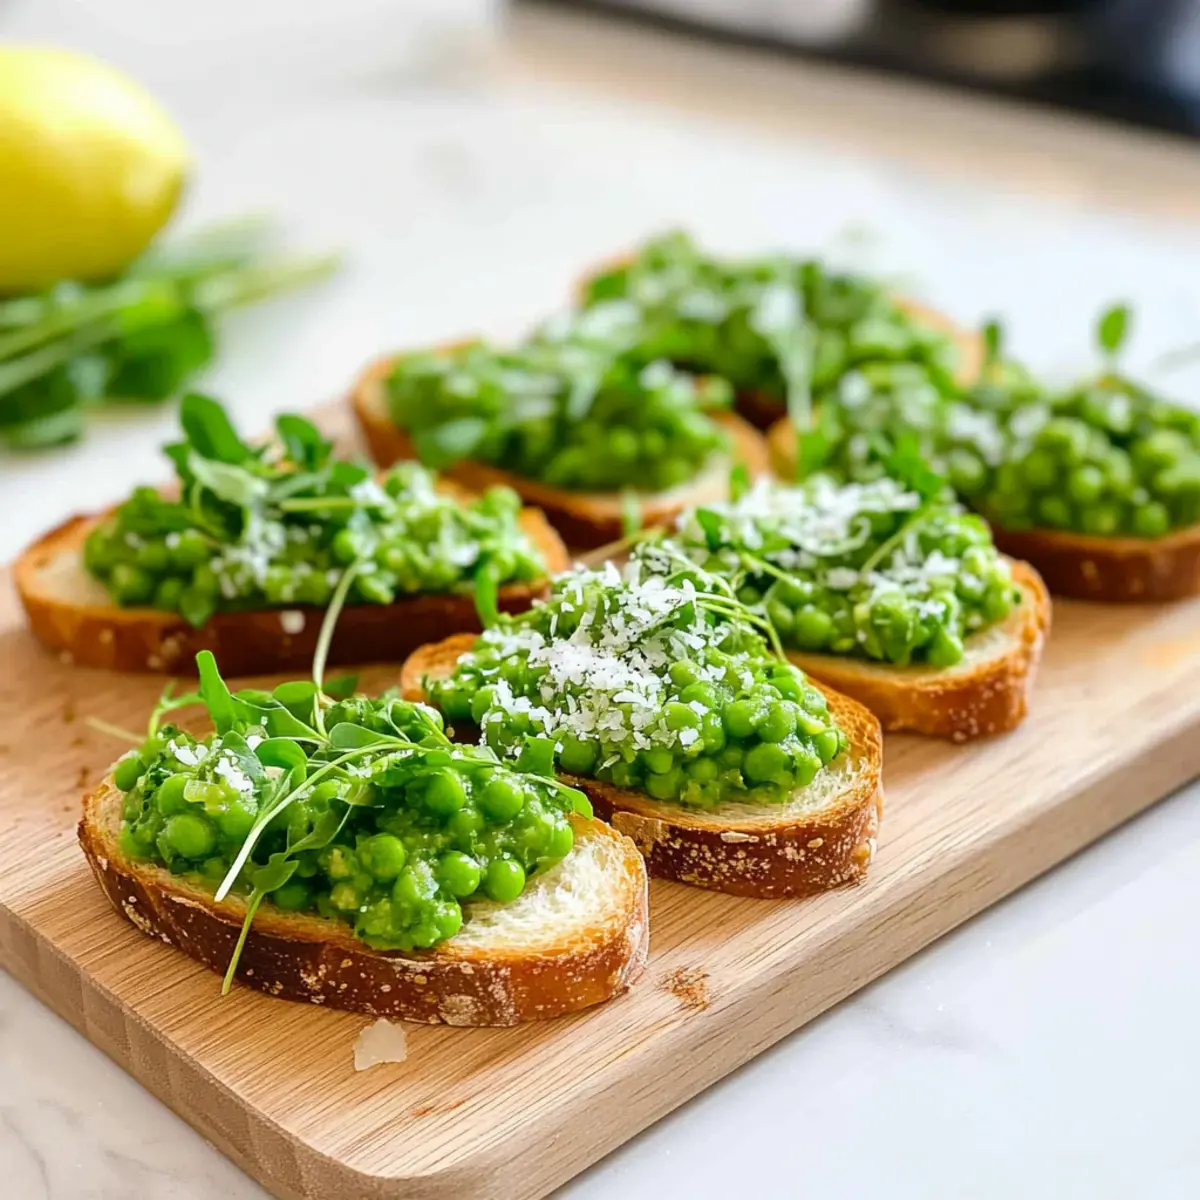
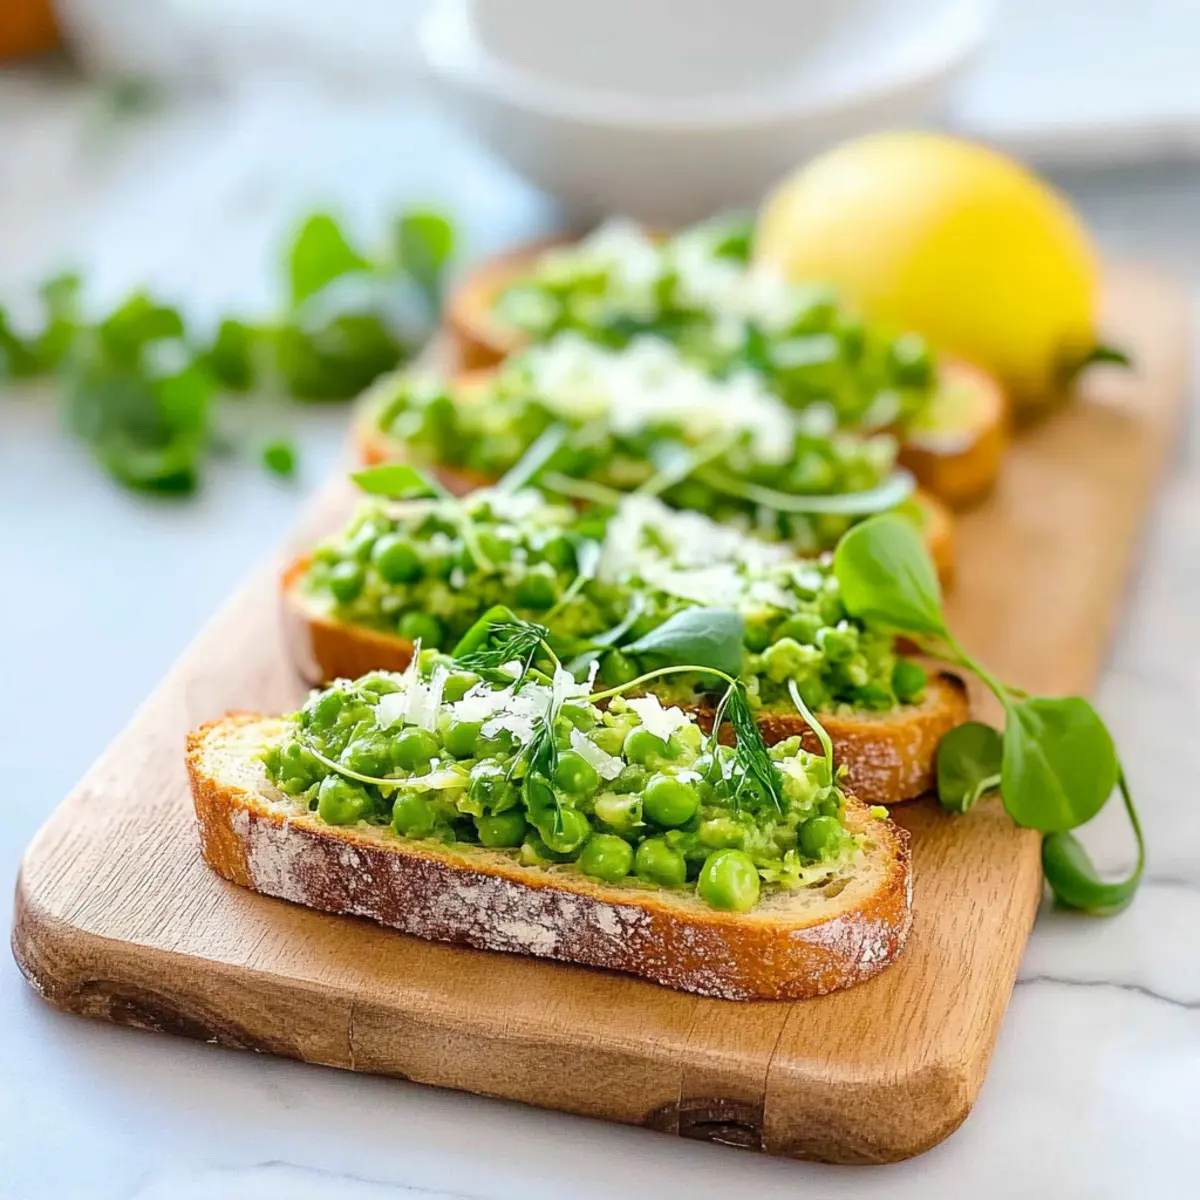
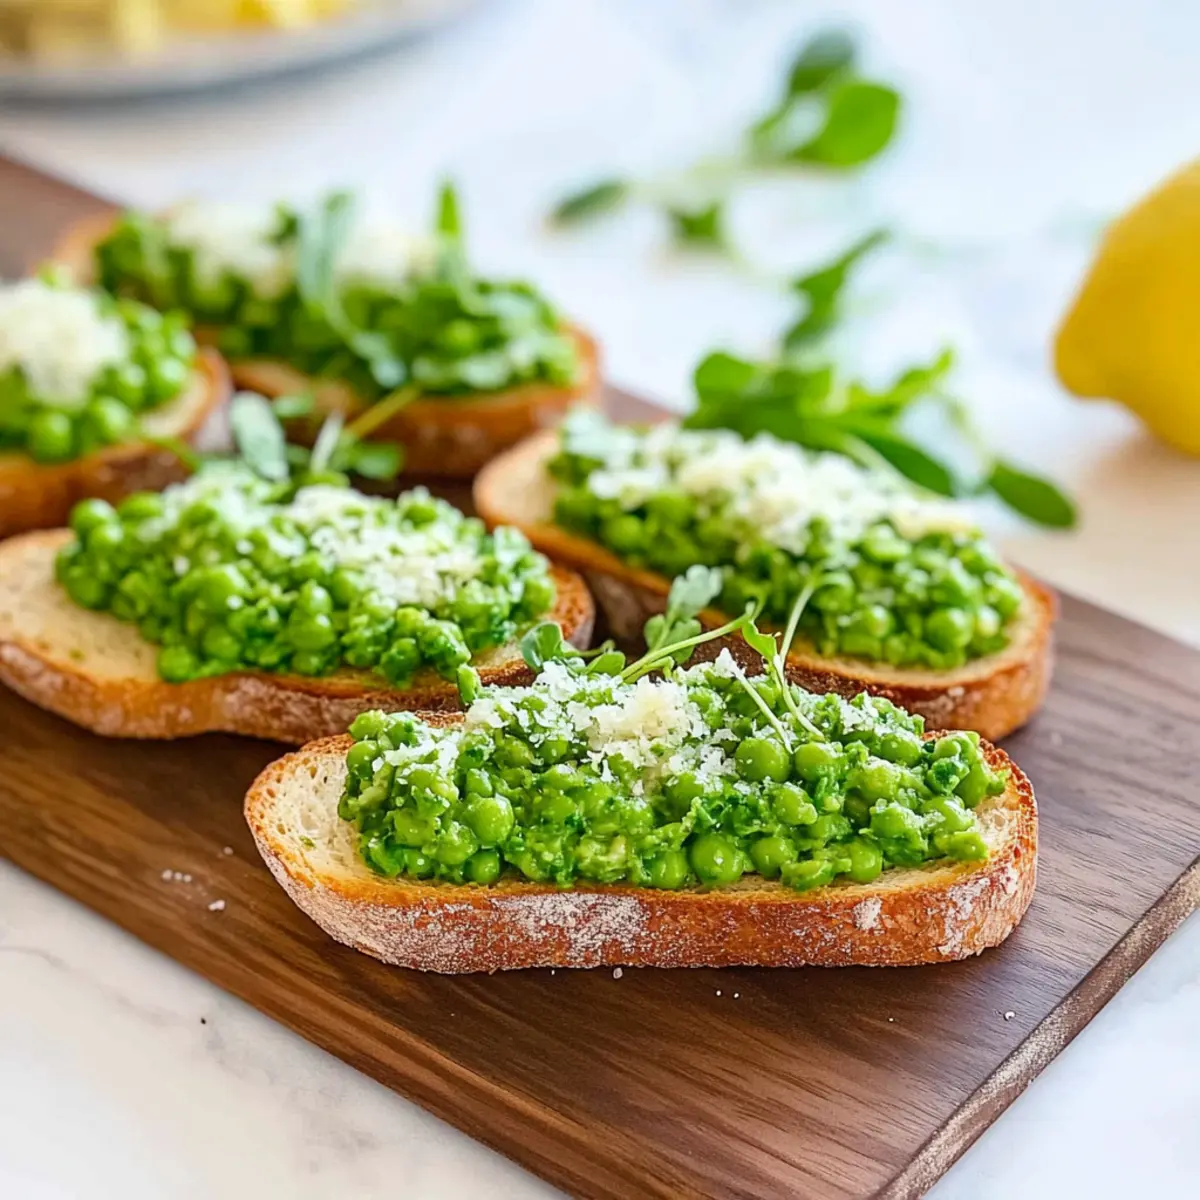
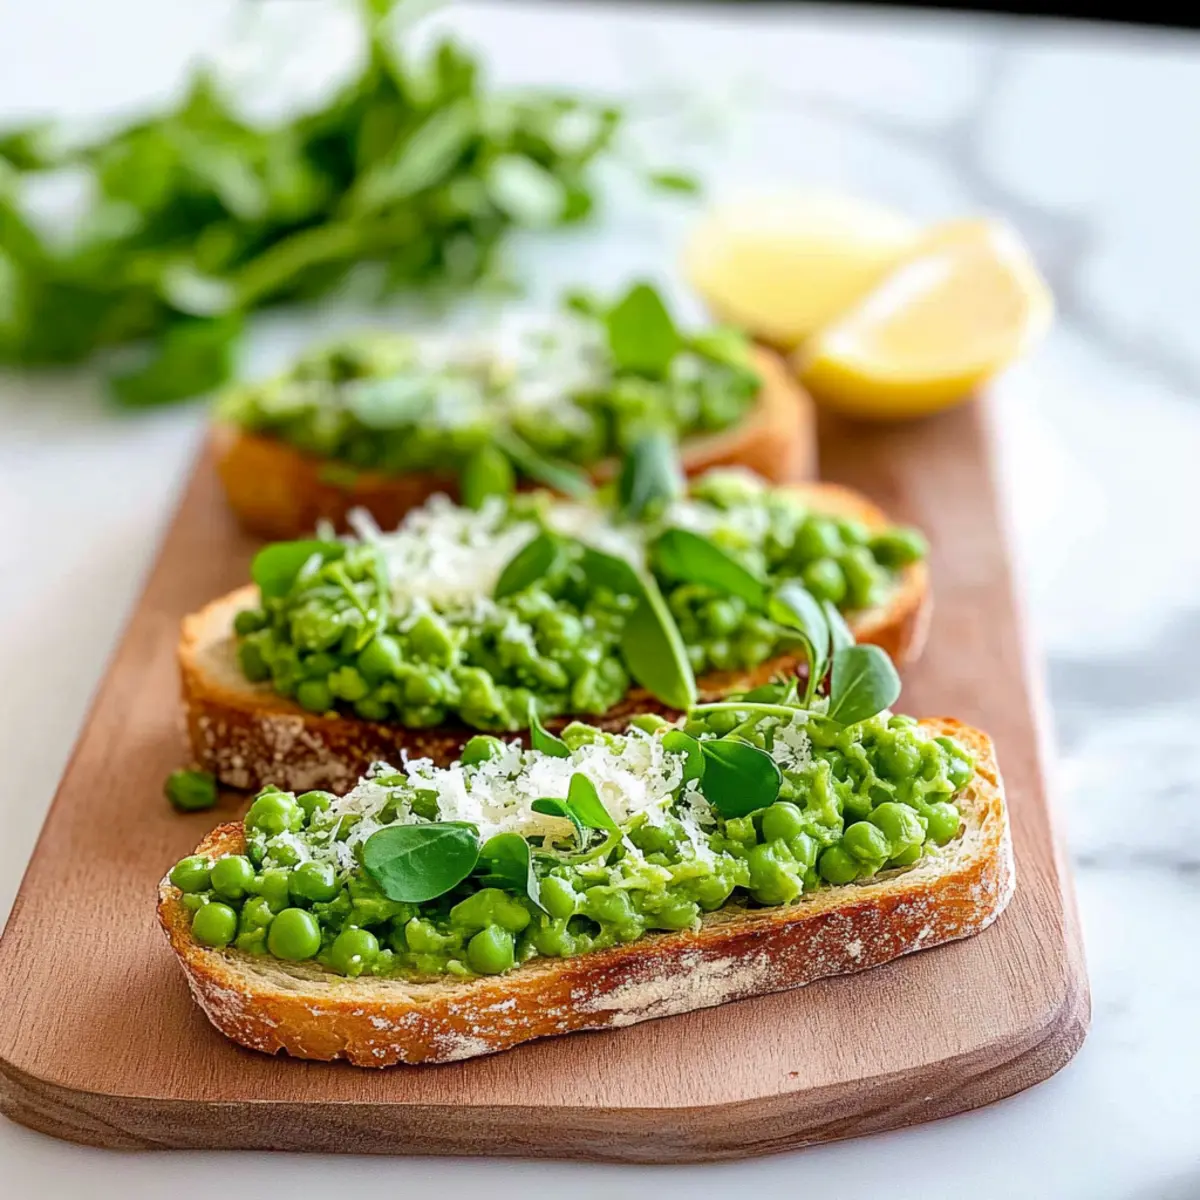
Spread a hearty layer of your pea topping on each toasted ciabatta slice, ensuring an even coating. For a beautiful presentation, garnish with extra parmesan, a sprinkle of lemon zest, and fresh pea shoots if using. Finish by drizzling a touch of extra virgin olive oil on top and sprinkling with freshly cracked black pepper, inviting all that flavor together.
Make Ahead Options
Preparing Pea Bruschetta ahead of time is a fantastic way to save precious minutes on busy days! You can make the pea topping up to 3 days in advance—simply store it in an airtight container in the refrigerator to maintain its vibrant flavor and texture. If you choose to toast the ciabatta ahead of time, keep the slices in a cool, dry place for about 24-48 hours; just re-toast them briefly before serving to restore their delightful crispness. When it’s time to enjoy your appetizer, spread the chilled pea topping on the toasted bread, garnish with lemon zest and extra parmesan, and drizzle with olive oil. Serving this Pea Bruschetta will feel effortless and still just as delicious!
How to Store and Freeze Pea Bruschetta
Fridge: Store any leftover pea topping in an airtight container for up to 3 days. This keeps the flavors fresh, but for best texture, wait to assemble until serving.
Freezer: If you want to make a larger batch, freeze the pea topping in an airtight container for up to 3 months. Thaw in the refrigerator overnight before use and stir well.
Toasted Bread: Keep toasted ciabatta in a cool, dry place for 24-48 hours. If they soften, re-toast briefly in the oven to restore crispness before serving with your delicious Pea Bruschetta.
Reheating: To refresh the topping after refrigerating, simply give it a quick stir. If it seems dry, add a splash of olive oil to regain creaminess.
What to Serve with Pea Bruschetta?
Transform your Pea Bruschetta into a complete, satisfying meal with these delightful pairings that complement its fresh flavors.
- Mixed Greens Salad: A light, peppery salad with arugula or spinach adds a crisp contrast that balances the creamy topping.
- Tomato Gazpacho: This chilled soup brightens up your plate with its vibrant flavors, providing a refreshing contrast to the bruschetta.
- Roasted Asparagus: Tender stalks coated in olive oil bring a savory punch, and their earthy taste harmonizes beautifully with the sweetness of peas.
- Chilled White Wine: A glass of chilled Sauvignon Blanc enhances the dish’s freshness while contrasting the creamy texture for a delightful sip.
- Grilled Lemon Chicken: Juicy chicken infused with zesty lemon elevates your meal, balancing the lightness of the bruschetta with hearty satisfaction.
- Herb-Infused Quinoa: This fluffy side brings a nutty flavor and a chewy texture, making it a wholesome companion to the creamy crostini.
- Lemon Sorbet: End on a sweet note with a light and refreshing sorbet that mirrors the dish’s bright flavors, cleansing your palate beautifully.
- Fresh Fruit Platter: Seasonal fruits offer a juicy, sweet contrast that complements the savory notes of the bruschetta, perfect for a light dessert.
Expert Tips for Pea Bruschetta
- Perfect Bread Thickness: Ensure your ciabatta slices are roughly 0.5 inches thick to maintain a good balance between the crunchy toast and the creamy pea topping.
- Keep a Close Eye: When toasting, watch the bread closely; broiler settings can vary and toast quickly, avoiding any burnt pieces.
- Fresh Ingredients Matter: Use fresh peas when available for an even richer flavor; if using frozen, consider blanching them beforehand for the best results.
- Garnish with Intention: Lemon zest and pea shoots elevate the presentation and flavor; don’t skip these touches for your Pea Bruschetta!
- Store Smart: Store leftover pea topping in an airtight container in the fridge for up to three days but assemble just before serving to keep the bread crisp.
Pea Bruschetta Variations & Substitutions
Feel free to play around with this Pea Bruschetta recipe to create a version that suits your taste buds!
- Whole Grain Bread: Substitute ciabatta with whole-grain bread for a heartier, nutritious option. It adds a delightful chewiness to each bite.
- Feta Cheese: Swap out the parmesan for tangy feta or creamy goat cheese. Each cheese brings its unique flavor profile and pairs beautifully with the peas.
- Herb-Infused Pesto: Add fresh mint or basil to the pea topping for a bright, herbaceous twist. These herbs elevate the dish with an aromatic freshness.
- Spicy Kick: Include a pinch of red pepper flakes or diced jalapeños in the pea mixture for added heat. This little kick can transform your appetizer into a showstopper.
- Nutty Crunch: Toss in toasted pine nuts or walnuts for an unexpected crunchy texture that complements the creamy peas nicely. It creates a fun contrast in every bite.
- Lemon Zest Boost: For a zippier flavor, mix more lemon zest into the pea topping. It’s a simple way to uplift the freshness, reminiscent of sun-kissed spring days.
- Roasted Garlic: Instead of raw garlic, try using roasted garlic for a sweeter, richer flavor in your topping. It brings depth and richness that’s truly addictive.
For more refreshing flavors, consider pairing your Pea Bruschetta with a vibrant Chickpea Feta Avocado salad for a delightful meal or snack!
Pea Bruschetta Recipe FAQs
What type of peas should I use for this recipe?
Absolutely! Frozen peas work wonderfully, but if you can get your hands on fresh peas, they will elevate the dish with an even richer flavor. For fresh peas, just remember to blanch them briefly to enhance their sweetness and vibrant color.
How should I store leftover pea topping?
If you have any leftover pea topping (which is often the case with this appetizing dish!), store it in an airtight container in the refrigerator for up to 3 days. To maintain the best texture and flavor, avoid assembling the bruschetta until you’re ready to serve.
Can I freeze the pea topping for later use?
Yes, you can definitely freeze the pea topping! Place it in an airtight container and it will keep in the freezer for up to 3 months. When you’re ready to use it, simply thaw it in the refrigerator overnight, then give it a good stir before serving. If it needs a little moisture, add a splash of olive oil to revive its creamy texture.
What should I do if my toast burns while broiling?
Very! It’s easy for bread to burn while broiling, as broiler settings can vary quite a bit. To avoid this, keep a close eye on the bread during the toasting process. If you find that it’s browning too quickly, simply lower the oven rack to reduce the heat exposure, or toast it for a shorter amount of time, checking frequently.
Is this recipe suitable for those with nut allergies?
Yes, this Pea Bruschetta is nut-free, making it a great option for those with nut allergies. Always be sure to double-check the labels of any pre-packaged ingredients, like parmesan cheese, to ensure they are also free from nuts and manufactured in a nut-safe environment.
What are some variations I can try with this recipe?
I often love getting creative with my Pea Bruschetta! You can swap ciabatta for a whole-grain bread for a healthier twist or try out different cheeses like feta or goat cheese for a new flavor profile. Adding fresh herbs like mint or basil to the pea topping also offers a delightful herbaceous note that brightens the dish even further.
Fresh Pea Bruschetta: An Easy Springtime Delight
Ingredients
Equipment
Method
- In a food processor, combine frozen peas, optional pea shoots, grated parmesan, olive oil, lemon juice, half a garlic clove, salt, and black pepper. Pulse until a rough paste forms, about 30 seconds.
- Preheat broiler or grill to medium-high. Cut ciabatta into 0.5-inch thick slices and arrange on a baking sheet. Drizzle with olive oil and toast for 2-3 minutes on each side until golden brown.
- Rub the toasted ciabatta slices with the remaining half of the garlic clove for flavor.
- Spread the pea topping over the toasted slices, garnish with extra parmesan, lemon zest, and pea shoots if using, then drizzle a little olive oil and sprinkle with black pepper.
Leave a Reply